Ork Aircraft Traktor

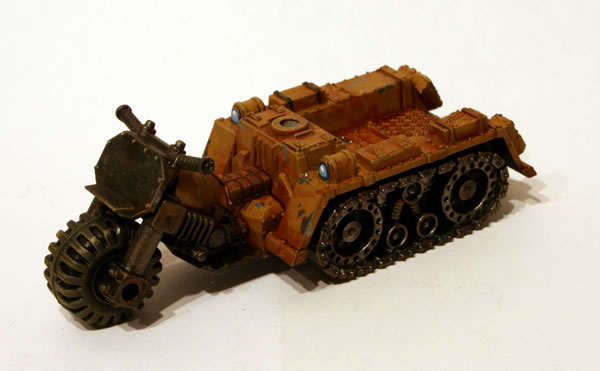
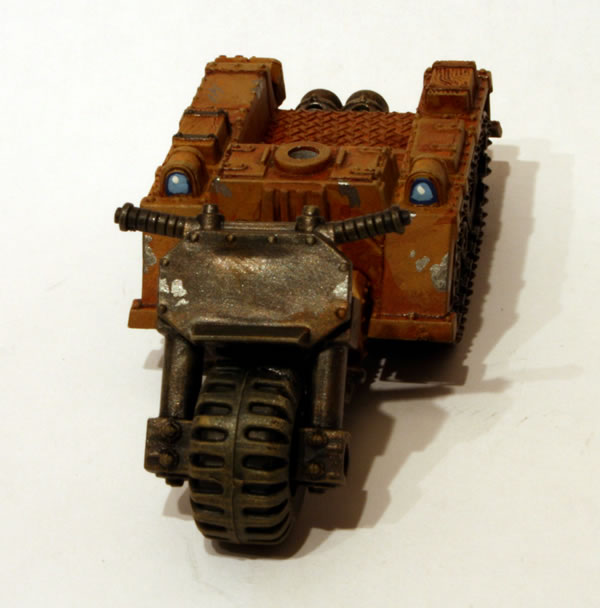
One of the Forgeworld models I have always liked is the Ork Aircraft Traktor and Launch Trolley. Ideal to go with my Ork Bommer.

Sadly this is now no longer available, so when stocks were running low (back in 2006) I bought one.

The model consists of the plastic Wartrakk and some resin pieces.

Having put the model together I initially gave it a white undercoat. Having re-looked at the model I decided that I wanted the dirty rusty metal look I had given some of my other Ork vehicles, so I gave the model a black undercoat. This was then initially given a drybrush of Tin Bitz.

I then gave it a drybrush of Boltgun Metal.

I also used some Blazing Orange to add rusty streaks.
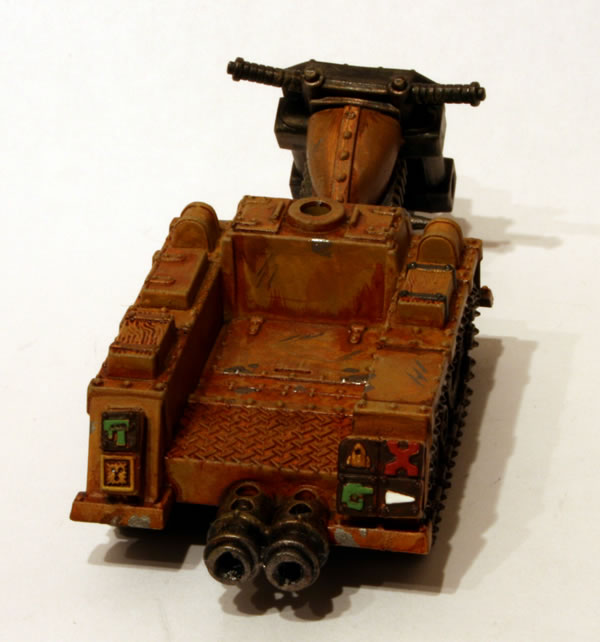
The other side.

You can see the full workbench feature on the Traktor.

Detailing the Wartrakk

Having done the main basecoat, wash and drybrush on my Ork Wartrakk, the next stage was to weather and detail the model.

I then started the weathering and detailing process on the Wartrakk. This included scratch marks, rust, flaking paint. It also included painting in the straps and the headlights.

Looking at this under the harsh glare of the digital camera, some of it looks like it might need a little more work, it never surprises me how forgiving the eye is, compared to the camera.

The rear view, note the use of Forge World Ork glyphs (which are way too thick).

Basically apart from the main weapon and the driver, I think this is now finished.

See the full workbench feature on the Wartrakk.

Ork Kommandos

I have added materials from the urban basing kit to my Ork Kommandos.

I didn’t use any of the resin pieces, but used the large and small slate. I think I will add some barbed wire as well.

I initially decided to paint their backpacks separately, so thought of how I would need to mount them. After much thought (and a fair bit of procrastination) I decided against that idea and stuck the backpacks on.

The Kommandos come with two different backpacks, I’ve thought with the Stikkbombz and Tankbombz that these models would make good Tankbustaz.

Here are the Kommandos.

Here is the Kommandos Mob complete with Big Shoota and Burna.

Next stage will be the undercoat.

Ork Kommando Warboss

I have added materials from the urban basing kit to my Ork Kommandos.
I didn’t use any of the resin pieces, but used the large and small slate. I think I will add some barbed wire as well.

I initially decided to paint their backpacks separately, so thought of how I would need to mount them. After much thought (and a fair bit of procrastination) I decided against that idea and stuck the backpacks on.

Here is the Kommando Nob (Boss)’s backpack complete with Grot

I have based my other Ork bosses on 40mm bases, so I might at some point rebase him, but for the moment he can stay on his smaller base (well he is an infiltrator).

Next stage will be the undercoat.

Black Templar Cenobyte with Relic

I have always liked this model, but wasn’t sure a) where it came from, b) what it was called, so I could never find it in the stores or on the online store.

It was only recently when reading through an old White Dwarf that I saw it was part of the Black Templars Chaplain Grimaldus and Retinue Boxed Set.

So now I knew which boxed set it came from, I could work out what it was called and find it in the online store. It is available either as part of a boxed set or individually. As I wasn’t too bothered about the other miniatures in the boxed set I purchased it individually through Mail Order.

I will be using it as part of my Inquisitorial retinue.

Having cleaned the model I based it with GW modelling sand.

See the full workbench feature on the Black Templar Cenobyte with Relic.

Ork Kommando with Burna

At GamesDay 2006 I purchased a box of Ork Kommandos. I recently got the Kommando with a Burna to add to the force.

Having put the model together, I added some slate and modelling sand to the base.

Ork Kommando with Burna

After much thought I decided I would stick the fuel tank on the back of the Ork as painting it separately seemed a lot of extra effort.

Ork Kommando with Burna

The next stage was to give the model a black undercoat.

See the full workbench feature on the Ork Kommando with a Burna.

Detailing the Stormtroopers

One part of any model which takes it from a painted model to a gaming masterpiece is the details.

Having taken my Inquisitorial Stormtroopers through the wash and then a drybrush, the next stage was the details. For example painting the muzzle of the hellguns in black. I painted the helmet visors in light blue and highlighted in white.

Details on this model includes the head of the sergeant (he’s the only model not wearing a helmet).

Detailing the Stormtroopers

Then there are the Heavy Weapon troopers.

Lots of nice detail on the rear of these models. I used Bleached Bone for the eagle symbols.

Overall making the unit looking better and better.

Another view.

See the full workbench feature on my website.