The original Snotling Pump Wagon released back in the day is probably my favourite Citadel model of all time. What I liked about it most was the humour behind the model, you got the idea that the designer was down the pub when the idea came up.
I did originally consider the new model a “monstrosity” but when making a recent order, I added one to my basket.

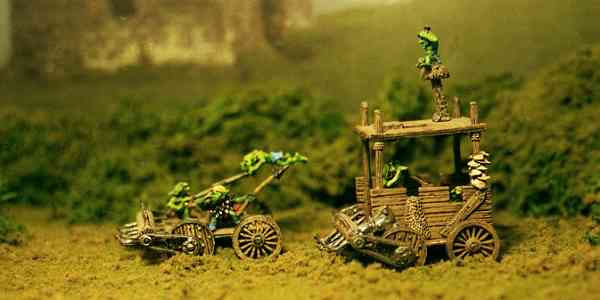
The Snotling Pump Wagon is a terrifyingly erratic contraption, consisting of little more than a ramshackle wooden hut precariously balanced on crude wheels. This rickety war engine is propelled forward solely by the frantic, sweat-drenched pumping of dozens of hyperactive Snotlings hidden within its frame. Careening wildly across the battlefield with zero steering and infinite momentum, it acts as a crude rolling fortress, crushing, flattening, and piercing any unfortunate foes who fail to scramble out of the way of its spiked rollers and wooden chassis.
This is a metal model and in the box are numerous metal parts, a base, and instructions.

The first stage will be to clean the metal castings. I am going to fully construct the pump wagon, but the crew will be painted separately before adding them to the wagon.