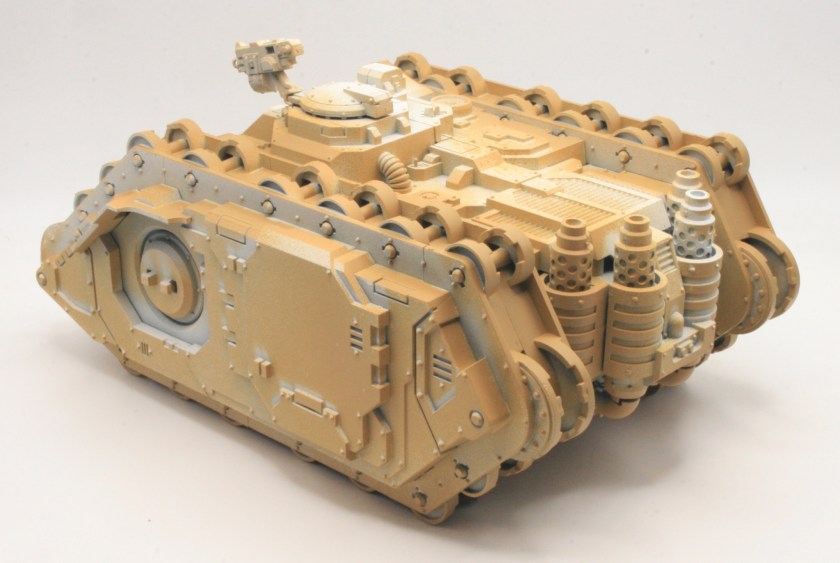
My latest model for my Imperial Fists Horus Heresy force is the Typhon Heavy Siege Tank.
Here is the virtually finished model in the desert.
Of course it all started off with the box of the kit.
Named for the ‘Great Beast’ of Ancient Terran myth, the immense Typhon Heavy Siege Tank was developed by the Mechanicum alongside the Spartan, with which it shares a basic chassis design. The Typhon’s primary armament is the massive Dreadhammer cannon, and was created in response to a request from the Primarch Peturabo, master of the Iron Warriors. He demanded a Legiones Astartes war engine that could rival the great batteries of the Imperial Crusade Army in firepower, but manoeuvre and deploy at the speed of a Space Marine force.
I’ve always liked the Forge World model and I took a photograph of this Imperial Fists painted model at Warhammer World on a visit a few years ago.

There are some great Horus Heresy models available and I am pleased to add this one to my collection.
I will be painting them the same way I painted my other Horus Hersey models.
The Typhon is an extended Land Raider, and as the model kit uses the core parts from the Proteus Land Raider, there are components within the kit which extends the sides, adds an extra wheel and track parts. There are also additional parts to widen the hull, as the Typhon is wider than the Proteus.
I can see why they did this, but it does make the construction of the kit more complicated then I think it needs to be. I think it would have been better to create completely new sprues with the bigger parts needed, rather than additional parts to widen the existing sprues. I think it potentially makes it a weaker model as a result.
I remember when we first saw the Spartan (and the Typhon is basically a Spartan with a big gun) and I said when they announced the plastic Spartan.
With the announcement of the plastic Spartan Land Raider Assault Tank it got me thinking, will we also a plastic Land Raider Proteus? It wouldn’t be too much of a step to have a plastic kit of this Land Raider? Essentially the Spartan is a stretched Land Raider.
What I didn’t realise (as I didn’t buy the Spartan at the time) was that literally what Games Workshop had done was create a kit which was a stretched extension kit for a kit they hadn’t released yet.
The Proteus Land Raider is the core of both the Spartan, the Typhon and (obviously) the Proteus. The Typhon comes with some additional sprues, which provides new side parts and the big gun.
This was not quite the simple construction kit that it could have been.
The first stage is to construct the track units, which have a fair few parts to them.
I did have one problem in that the polystyrene cement I was using wasn’t very effective. It was a replacement for a nearly empty bottle of my usual Humbrol polystyrene cement. I had constructed the track units, and then they fell apart on me. So I then re-glued the units with the Humbrol polystyrene cement which did work.
The internal hull components went together well, but I did think that they were difficult to stick (and keep) together.
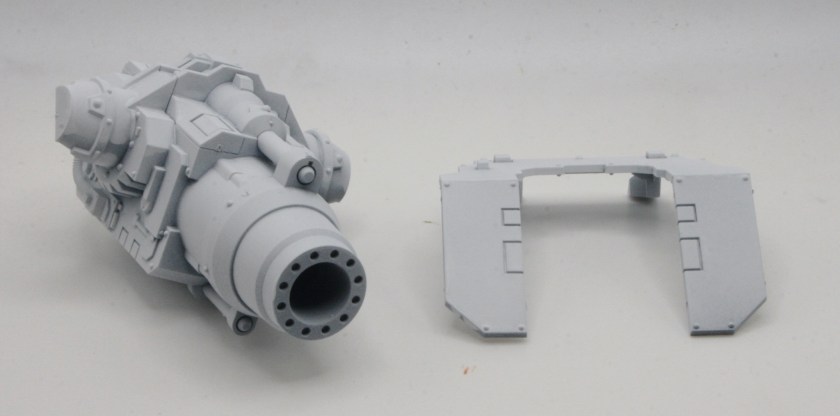
The main weaponry, the dreadhammer siege cannon went together really easily.
Attaching the tracks to the hull was a lot easier than I thought it would be.
I have kept the tracks off, despite the instructions indicating they should be stuck on. These will be painted separately.
I still have to construct the sponson weapons, and I am still deciding which ones to attach to this beast.
The Typhon has four exhausts compared to the two on the Proteus Land Raider.
I decided to use the hull plates instead of the hull doors on the model.
I kept the dreadhammer siege cannon separate, and its accompanying armour shield. The instructions indicated that the weapon mounts should be stuck on once the weapon is in place. I decided that I would cheat slightly and affix the weapon mounts to the weapon.
These would then be painted Leadbelcher like the cannon.
This is how it is looking, a dry fit with the dreadhammer siege cannon in place.
I realised I had forgotten to construct the sponson weapons, so I quickly put them together. There is quite a choice, I decided I would go with the lascannons.
The next stage was a white undercoat.
The main weapon was kept separate. So the hull actually is in this stage. It has a big hole in it.
The main dreadhammer siege cannon was kept separated as was the weapon armour shield, both were also undercoated.
The tracks I kept on the sprue for painting.
I had planned to base coat the underneath of the model with with Citadel Zandri Dust in preparation for painting the the whole model yellow. However when visiting my FLGS, they had sold out of Zandri Dust spray. So I bought some Army Painter Desert Yellow Spray, along with can of Army Painter Daemonic Yellow.
I sprayed the model first with the Desert Yellow spray.
This is designed to add shadow.
As well as the underneath of the model, I also sprayed the wheels and suspension.
I base coated the dreadnought siege weapon with Citadel Leadbelcher.
For the tracks, still on the sprue, I gave them a spray of Citadel Mechanicus Standard Grey.
I then gave the model a base coat of Army Painter Daemonic Yellow.
I also gave the main weapon shield the same basecoat of Army Painter Daemonic Yellow.
This is the Typhon with the dreadnought siege weapon.
The next step was to paint the bolter and the exhausts.
The next step will be shading the model.
Unlike some of my other models there is no iconography on the Typhon, so this stage was quicker than some of my Grey Knights models.
Having constructed the sponson weapons I gave them an undercoat of white spray paint.
I was intending to give the sponson weapons a base coat of Citadel Leadbelcher but my spray had run out when I had base coated the main weapon.
However I did give the shields of the weapons a spray of Army Painter Daemonic Yellow.
I will then use a pot of Citadel Leadbelcher to paint the weapons.
It was then onto shading the model. I used some Citadel Reikland Fleshshade Shade, aiming to achieve the same result I got with my first Deimos Pattern Rhino.
This time though, compared to some of my other models I went with an initial lighter shade, with the intention to add more later.
I gave the main weapon a wash of Agrax Earthshade Shade.
I also shaded the gun shield with Citadel Reikland Fleshshade Shade.
The next step will be some more shading.
I did some more shading using Citadel Reikland Fleshshade Shade and Citadel Seraphim Sepia Shade and Citadel Nuln Oil Shade on the exhausts.
I used Citadel Seraphim Sepia Shade on the main weapon.
Once that shade was dry, I used Citadel Nuln Oil Shade on the engine vents and the exhausts.
I then used Citadel Nuln Oil Shade on the wheels as well.
I had used Citadel Agrax Earthshade Shade on the tracks, forgetting that I should have done a heavy drybrush of Gorthor Brown first.
So I did the heavy drybrush of Gorthor Brown .
I then washed the tracks (again) with Citadel Agrax Earthshade Shade.
I nearly forgot to paint the extra track pieces that come with the Typhon kit (as it is longer than the standard Land Raider). Once I remembered I did them the same way as the rest of the tracks.
After painting and shading them, I drybrushed them lightly, first with Leadbelcher. I then did a very light drybrush with Terminatus Stone.
For the next stage I used some Citadel Layer Yriel Yellow. I took a large brush and gave the model, what I would call, a heavy drybrush. I put paint on the brush, and then used some kitchen towel to remove most of the paint, and then using a stippling process added paint to the model. I then used the same process with Citadel Layer Flash Gitz Yellow.
I then gave the model a light drybrush of Citadel Layer Dorn Yellow.
I glued in the Dreadhammer Siege Cannon and then added the frontal armour.
I painted the lascannons with Citadel Leadbelcher. The sensor covering was then painted with Citadel Layer Flash Gitz Yellow.
These were then attached to the Typhon.
It was then onto shading the sponsons. I used some Citadel Reikland Fleshshade Shade on them.
The next stage was to add the tracks to the Typhon. I had painted the tracks on the sprue. These were removed from the sprue and using superglue I attached the tracks to the Typhon.
Unlike the Rhino tracks, the tracks for the left and right hand sides are identical. As the Typhon is longer than the Proteus Land Raider, there are four extra track sections that need to be added.
There were a couple of places where I found it challenging to affix them.
I am not too happy with the engine area, so might look at that part of the model again.
Here is the virtually finished model in the desert.
I still need to add some transfers, and then I will do some further weathering.
I plan to use some weathering powders I got from Forge World many years ago.
More soon…


