Reflecting once more on the MkIIb Land Raider

The Land Raider is an Imperial main battle tank and troop transport which serves as the “armoured fist of the Space Marines.” It is one of the most resilient and iconic armoured vehicles in the galaxy. The Land Raider’s heritage predates even the founding of the Imperium of Man, yet it remains the single most destructive weapon in the Adeptus Astartes’ arsenal.

The Mark IIb Land Raider Phobos is one of the earliest marks of the standard pattern of Land Raider, and it still bears similarities to both the Land Raider Proteus and the Spartan Assault Tank that served as the models for the design.

The Mark IIb Land Raider Phobos is the only pattern of the standard Land Raider Phobos that uses the older armoured sponsons, as they do not allow the weapons they hold to fully rotate. This pattern of Land Raider is mostly extinct within Space Marine Armouries, having been replaced with newer marks and patterns of the standard Land Raider Phobos. However, some Chapters may still possess one or two as treasured relics of their ancient past.

When I got a Forge World MkIIB Land Raider and was originally painting it up, the plan was to this as a Grey Knights Land Raider in desert camouflage.

The planned painting process I was using, eventually it would have turned out and looked like the Inquisitorial Stormtroopers Repressor Transport.

Though I am pleased with my Repressor, and it works with the painted Inquisitorial Stormtroopers I painted a few years back.

I wasn’t sure if this was the best way forward for the Mark IIb Land Raider. I wrote up some reflections recently on my MkIIB Land Raider, on the current state of the painting and what I needed to do next.

However having liked the paint scheme I was using on my Deimos-pattern Rhino, I decided that I would find the model and paint this Land Raider in the same scheme.

However I first decided that I would try out the paint scheme on my other Land Raider first before doing anything drastic. With that Land Raider I followed the process I had used on the Rhino with a yellow spray various shades, dry brushing and detailing.

I was really pleased with the progress on that Land Raider so as it neared completion, I decided I would use a similar process on the Mark IIb Land Raider with one minor change. Whereas with the other Land Raider I left the base coat Tausept Ochre before applying the yellow. This time I sprayed the Mark IIb Land Raider with a spray of White Scar paint.

I left the underside Zandri Dust to add some shadow to the future yellow basecoat.

The next step will be a spray of yellow paint. Games Workshop don’t do a yellow spray and I don’t have an airbrush. I did use a paint comparison site to find a close alternative to Yriel Yellow. The Daemonic Yellow spray from Army Painter seemed like a good choice, and I had one which I bought for the Deimos-pattern Rhino.

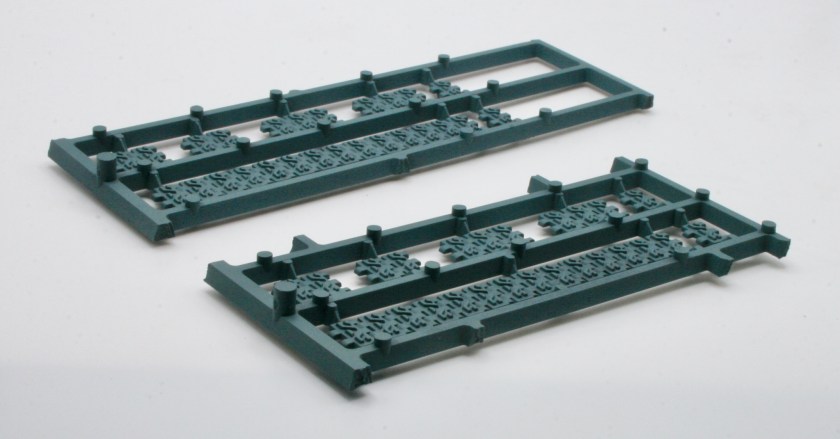
I also started on the tracks for the Land Raider, which were given a spray of Mechanicus Standard Grey.

I then did a heavy drybrush of Gorthor Brown. The tracks, once dry, I then gave them a wash of Agrax Earthshade Shade. After painting and shading them, I drybrushed them lightly, first with Leadbelcher. I then did a very light drybrush with Terminatus Stone.

See the full Mark IIb Land Raider workbench.

Land Raider Doors Stone Iconography

Grey Knights can use Land Raiders, when I first started putting this force together I knew that if I was going to get a Land Raider it would have to be the Forge World MkIIB Land Raider.

However I was also lucky enough to receive a second Land Raider as a present. It was the Terminus model, I decided though to build it as a standard Land Raider. Having made the hull I kept the weapons as separate assemblies, I would also be adding the tracks later too.

Now I made a mistake when I ordered my Mark IIb Land Raider, you get a set of doors and I (foolishly) asked them to replace the supplied eagle doors with Grey Knights Land Raider doors.

Now what I didn’t realise was that the side doors on the sponson are not the same size as the Land Raider doors, but are in fact the same size as Rhino side doors. So the Grey Knight doors are too big! However this meant I could use them on this new Land Raider.

The Land Raider has been through a journey of black undercoat, Tausept Ochre, some airbrushing and eventually a final coat of Daemonic Yellow spray from Army Painter.

When I was originally looking at the iconography on the doors of my Land Raider I did think about how I should paint it.

Initially I did consider painting it up with the colours of red, gold, black and white skulls. However when I looked at examples online they looked very busy. One thing I always liked about the Terminators from Space Hulk and at Warhammer World were the stone icons on their shoulder pads, like these Dark Angles Death Wing Terminators from Warhammer World.

Dark Angels Death Wing

So in the end I decided that I would paint the icongraphy on the doors as stone. I painted the door iconography with Mechanicus Standard Grey. I however did paint the skulls with Ushabti Bone.

Then I washed the model with various Citadel Shades. I also did some dry brushing with various shades of yellow.

Once the model was shaded I then painted the doors with Stormvermin Fur. This was followed by a drybrush of Dawnstone Layer and then a lighter dry brush of Administratum Grey. The Dry paint grey was too dark, so I did a final really light dry brush of Terminatus Stone Dry paint.

I was really quite pleased with the effect that I got in the end.

See the full workbench feature on this Land Raider.

Drybrushing the Inquisitorial Stormtroopers Repressor Transport

The Repressor tank is often used by Sisters of Battle as transport, and by the Adeptus Arbites in an anti insurgency role. I said  in a blog post back in 2004.

“I do like this model and I am intending to get one to use with my Daemonhunters army as a transport for the Storm Troopers”. 

I did get one and started building and painting this model back in 2007, I recently retrieved it from storage and decided that I would try and finish painting it. I realised I had made quite significant progress and it wouldn’t take too long to finish it off.

Having sprayed the model with Citadel Zandri Dust. I started the detailing, using Leadbelcher on the weapons and the exhausts. The next step was painting the iconography and purity seals. I then gave the model a wash using Citadel shades. I then did some additional shading using different shades.

The next stage was some drybrushing, for this I used Citadel Zandri Dust.

The aim here was to add edge highlights to the Repressor. I wanted to achieve a slight dusty effect as well.

After the drybrushing I will then detail the iconography, the weapons, and the exhausts on the model.

I tried a new technique that I picked up from my FLGS. It was to use a metallic gold Sharpie pen on the front iconography. It was easy to apply and I quite liked the end result. You have to be careful to be accurate, as unlike acrylic paint, which you can remove quite easily if you make a mistake. This is a permanent marker and won’t budge!

The tracks for the Repressor were given a spray of Mechanicus Standard Grey.

I then did a heavy drybrush of Gorthor Brown. The tracks, once dry, I then gave them a wash of Agrax Earthshade Shade. I then did a heavy drybrush of Gorthor Brown. The tracks, once dry, I then gave them a wash of Agrax Earthshade Shade. After painting and shading them, I drybrushed them lightly, first with Leadbelcher. I then did a very light drybrush with Terminatus Stone.

The next step was to paint and highlight the iconography.

This is to brighten up the purity seals and other iconography after it was dulled down by the shades and washes.

See the workbench feature on the Inquisitorial Stormtroopers Repressor Transport.

Drybrushing the Land Raider

I have on my workbench a standard Land Raider.

The standard Land Raider, also known as the Land Raider Phobos, is an Imperial main battle tank and troop transport which serves as the “armoured fist of the Space Marines.” It is one of the most resilient and iconic armoured vehicles in the galaxy. The Land Raider’s heritage predates even the founding of the Imperium of Man, yet it remains the single most destructive weapon in the Adeptus Astartes’ arsenal. Protected by bonded Ceramite and Adamantium armour, the Land Raider is nearly impervious to all save the most destructive weaponry.

For the basecoat I used Tausept Ochre. I lost interest in the model, so, it got put into storage. However having liked the paint scheme I was using on my Deimos-pattern Rhino, I decided that I would find the model and paint this Land Raider in the same scheme. The first thing I did was spray the underneath of the model with Citadel Zandri Dust. I gave the model a couple of light sprays of Army Painter Daemonic Yellow. I painted the weapon sub-assemblies. added detailing and painted the iconography. Then using various Citadel shades I washed and shaded the model.

For the next stage I used some Citadel Layer Yriel Yellow. I took a large brush and gave the model, what I would call, a heavy drybrush. I put paint on the brush, and then used some kitchen towel to remove most of the paint, and then using a stippling process added paint to the model.

This was done all across the model and then repeated. I wanted to remove some of the shine from the shade as well.

I then gave the model a light drybrush of Citadel Layer Dorn Yellow. The aim here was to add edge highlights to the Land Raider.

I wanted to achieve a slight dusty effect as well.

After the drybrushing I will then detail the iconography, the weapons, and the engines on the model.

The tracks for the Land Raider were given a spray of Mechanicus Standard Grey.

I then did a heavy drybrush of Gorthor Brown. The tracks, once dry, I then gave them a wash of Agrax Earthshade Shade. After painting and shading them, I drybrushed them lightly, first with Leadbelcher. I then did a very light drybrush with Terminatus Stone.

The next step was to paint and highlight the iconography.

This is to brighten up the purity seals and other iconography after it was dulled down by the shades and washes.

I am really pleased with how this Land Raider has turned out, so much so I have decided that I will paint my Mark IIb Land Raider using the same process and techniques. However I might give the model a white spray first before doing the yellow.

See the workbench feature on the Land Raider.

Drybrushing the Razorback

One model I got many years ago, well in 2006, was a Forgeworld Razorback the one with the much bigger turret, which I much prefer over the plastic kit version that you could get in the shops back then. I recently retrieved it from storage and decided that I would try and finish painting it. I was using Tausept Ochre as the base coat, however having liked the paint scheme I was using on my Deimos-pattern Rhino, I decided that I would paint the Razorback in the same scheme.

Having sprayed the underneath of the model with Citadel Zandri Dust. I gave the model a basecoat of Army Painter Daemonic Yellow. This was followed with Leadbelcher for painting the exhausts and weaponry. The next step was painting the iconography and purity seals. I then slightly messed up the shading on the model, but think I managed to get the effect I was looking for.

For the next stage I used some Citadel Layer Yriel Yellow. I took a large brush and gave the model, what I would call, a heavy drybrush. I put paint on the brush, and then used some kitchen towel to remove most of the paint, and then using a stippling process added paint to the model.

The plan was that this would take the flat surfaces of the model back to the base colour.

I then gave the model a light drybrush of Citadel Layer Dorn Yellow.

The tracks for the Razorback were given a spray of Mechanicus Standard Grey.

I then did a heavy drybrush of Gorthor Brown. The tracks, once dry, I then gave them a wash of Agrax Earthshade Shade. I then did a heavy drybrush of Gorthor Brown. The tracks, once dry, I then gave them a wash of Agrax Earthshade Shade. After painting and shading them, I drybrushed them lightly, first with Leadbelcher. I then did a very light drybrush with Terminatus Stone.

The next step was to paint and highlight the iconography.

This is to brighten up the purity seals and other iconography after it was dulled down by the shades and washes.

See the workbench feature on the Razorback.

Shading the Land Raider

I have on my workbench a standard Land Raider. For the basecoat I used Tausept Ochre. I lost interest in the model, so, it got put into storage. However having liked the paint scheme I was using on my Deimos-pattern Rhino, I decided that I would find the model and paint this Land Raider in the same scheme. The first thing I did was spray the underneath of the model with Citadel Zandri Dust. I gave the model a couple of light sprays of Army Painter Daemonic Yellow. I painted the weapon sub-assemblies. added detailing and painted the iconography.

I attached the lascannons to the Land Raider and then started to shade the model. The side sponsons I did glue in. The frontal lascannons I left unstuck as I wanted to ensure I could get behind them.

I shaded the model with Reikland Fleshshade Shade. This was the process I used on the Deimos-pattern Rhino.

It didn’t cover as well as I would have liked, so I will be going over the model again.

I will do some further shading with Seraphim Sepia Shade and Agrax Earthshade Shade, especially over the rear engine area.

See the workbench feature on the Land Raider.

Shading the Grey Knights Dreadnought

I have had a Mark IV Forge World Grey Knights Dreadnought on my workbench for a while. After getting some weapon arms for the model. I gave the main model a black undercoat and started base coating with a metallic paint. The weapons I had given a white undercoat. Getting it out from storage, I decided to almost start again and gave the model a base spray of Leadbelcher. 

What I wanted to do was to give the model some shadow. I gave the model a wash of Nuln Oil Shade.

Next step will be some highlighting.

See the full workbench feature on my Grey Knights Dreadnought.

Shading the Inquisitorial Stormtroopers Repressor Transport

The Repressor tank is often used by Sisters of Battle as transport, and by the Adeptus Arbites in an anti insurgency role. I said  in a blog post back in 2004.

“I do like this model and I am intending to get one to use with my Daemonhunters army as a transport for the Storm Troopers”. 

I did get one and started building and painting this model back in 2007, I recently retrieved it from storage and decided that I would try and finish painting it. I realised I had made quite significant progress and it wouldn’t take too long to finish it off.

Having sprayed the model with Citadel Zandri Dust. I started the detailing, using Leadbelcher on the weapons and the exhausts. The next step was painting the iconography and purity seals.

I wanted to give the model a wash to add shadow, so shaded the model using Seraphim Sepia Shade.

Repressor

The rear view.

Repressor

This is the Repressor with the front turret and dozer blade. I am liking how this now looks. I did notice that there was some iconography on the front track guard which I had missed.

The next step will be more shading of the model.

See the workbench feature on the Inquisitorial Stormtroopers Repressor Transport.

Shading the Razorback

One model I got many years ago, well in 2006, was a Forgeworld Razorback the one with the much bigger turret, which I much prefer over the plastic kit version that you could get in the shops back then. I recently retrieved it from storage and decided that I would try and finish painting it. I was using Tausept Ochre as the base coat, however having liked the paint scheme I was using on my Deimos-pattern Rhino, I decided that I would paint the Razorback in the same scheme.

Having sprayed the underneath of the model with Citadel Zandri Dust. I gave the model a basecoat of Army Painter Daemonic Yellow. This was followed with Leadbelcher for painting the exhausts and weaponry. The next step was painting the iconography and purity seals.

So, there I was ready to shade my Razorback in the same way as my Deimos-pattern Rhino. I did bring up my painting guide on the website. Even so I completely misread what I had done! Instead of using Citadel Reikland Fleshshade Shade I used Seraphim Sepia Shade.

Thought I had used Seraphim Sepia Shade on the Rhino, the primary and first shade was in fact Reikland Fleshshade.

It seemed to be okay.

However it wasn’t quite the same look as the Rhino. So I got out the Reikland Fleshshade.

This again wasn’t quite right, so I did some more shading.

I think the next stages of drybrushing will help soften the effect of the shading.

See the workbench feature on the Razorback.

Iconography on the Land Raider

I have on my workbench a standard Land Raider. For the basecoat I used Tausept Ochre. I lost interest in the model, so, it got put into storage. However having liked the paint scheme I was using on my Deimos-pattern Rhino, I decided that I would find the model and paint this Land Raider in the same scheme. The first thing I did was spray the underneath of the model with Citadel Zandri Dust. I gave the model a couple of light sprays of Army Painter Daemonic Yellow. I also painted the weapon sub-assemblies.

I started detailing and painting the iconography. Purity seals were Ushabti Bone for the paper and Mephiston Red for the red wax.

I painted the door iconography with Mechanicus Standard Grey aiming for a stone effect.

See the workbench feature on the Land Raider.