There is still some work to do with this model, but I am pleased I have made progress and nearly finished it.

This is the story (or is the saga) of how it got painted…
In a blog post I showed a picture of a Sisters of Battle Repressor from the Forgeworld Displays at GamesDay.

The Repressor tank is often used by Sisters of Battle as transport, and by the Adeptus Arbites in an anti insurgency role.
The Repressor is an Imperial armoured personnel carrier (APC) based on the standard Rhino chassis. The Repressor is used by both the Adeptus Arbites as a riot control and crowd suppression vehicle, and by the Adepta Sororitas as an infantry transport during intense urban battles. The Repressor uses an extensively converted Rhino chassis; the transport compartment has been greatly expanded upon, a raised roof featuring firing slits for the passenger’s weapons has been added, a large dozer blade used to plow through debris and rioting mobs is attached to the front of the vehicle, and the vehicle possesses a small forward cupola-mounted turret.
I said “I do like this model and I am intending to get one to use with my Daemonhunters army as a transport for the Storm Troopers”.
Well Santa must have been listening as I got one for Christmas. I am well pleased.
It is a very nice model and you get the following bits of resin. A new hull top, a dozer blade and extra weapons.
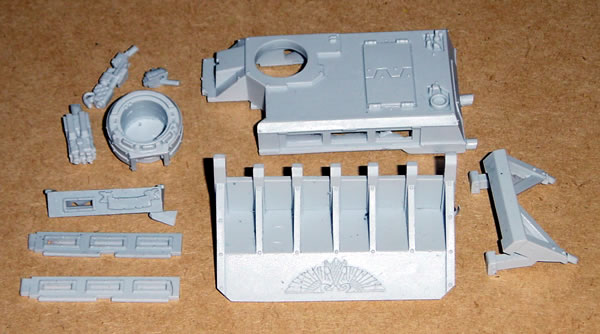
The Forgeworld model above includes Sisters of Battle doors, but as I am going to make this a Inquisitorial Storm Trooper transport I may use some Inquisition doors or leave them as they are. I might leave them as they are, as I am thinking about adding some extra armour to the model, akin to the spaced armour, but made from mesh, a kind of anti-tank mesh that you see on armoured vehicles today or on German tanks during World War Two.
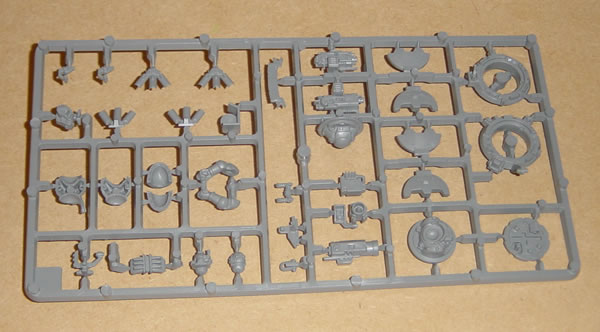
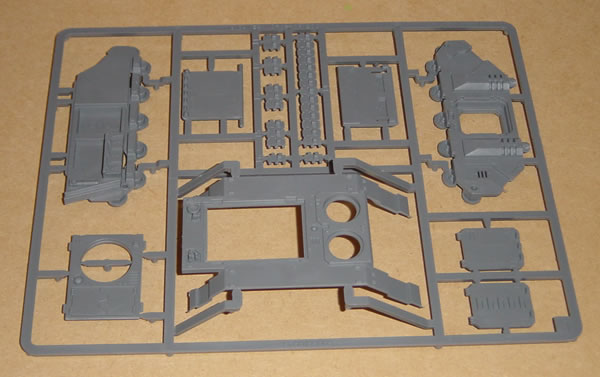
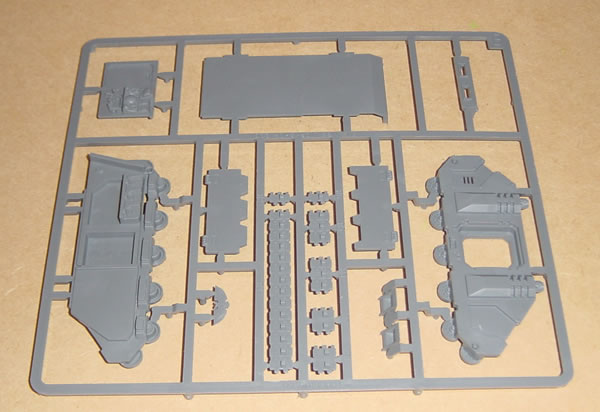
As well as the resin pieces you also get a complete Rhino kit (though the Repressor is also available as a conversion kit, though the conversion kits to me never seem such value for money).
The standard Rhino kit includes three sprues.
After much procrastinating and leaving it, the other day I started and made significant progress on my Sisters of Battle Repressor which I am going to use as a Storm Troopers Transport.
The Repressor uses the Rhino as the basis for the model and there are various resin parts.
After thinking about it for a while I decided that I would not detail, model or paint the interior of the model. In the main as the resin parts did not allow easy access (viewing) to the internals and therefore would be (in my view) a lot of work and effort and nobody would see it.
The first stage was to put the core Rhino structure together. I avoided the mistake I made with my Ork Looted Rhino and assembled it according to the “instructions”.
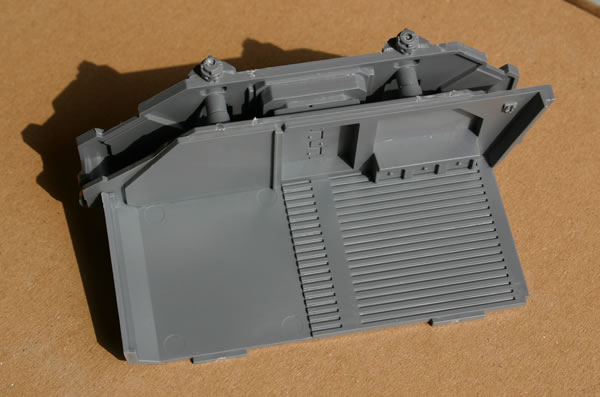
After one side I glued the other track assembly together. Luckily there are not lots of wheels like most scale model kits you get these days.
Then the two sub-assemblies were glued together. At this point don’t forget to add the back door!

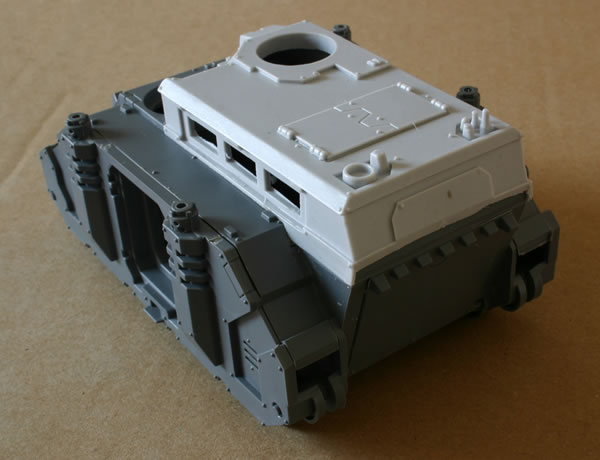
I stuck on the top of the Rhino which is the base for my Sisters of Battle Repressor – Storm Troopers Transport.
I also added the front armour panel as well.
I won’t be detailing the inside as already mentioned, but I am intending to add extra details such as purity seals etc…
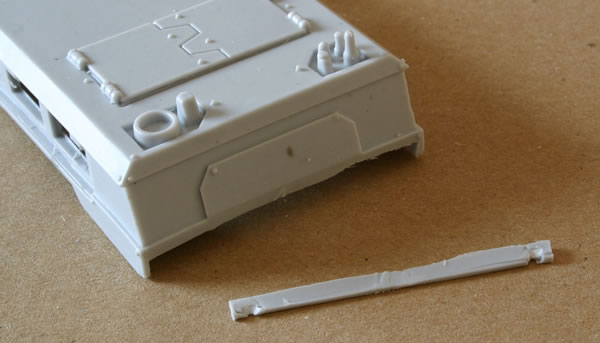
One of the resin parts that comes with the Repressor kit is the visor for the driver. Basically it is the same as the plastic part, but with a banner attached.
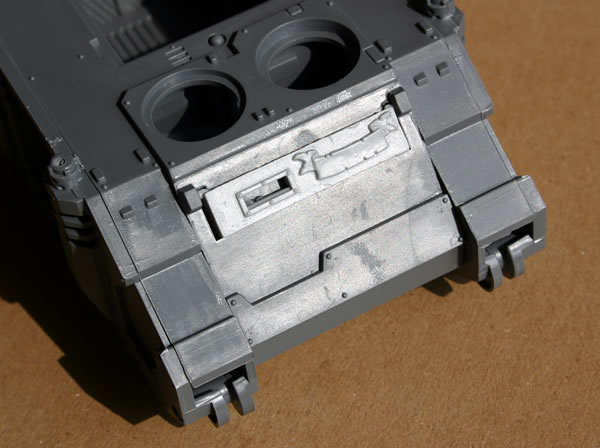
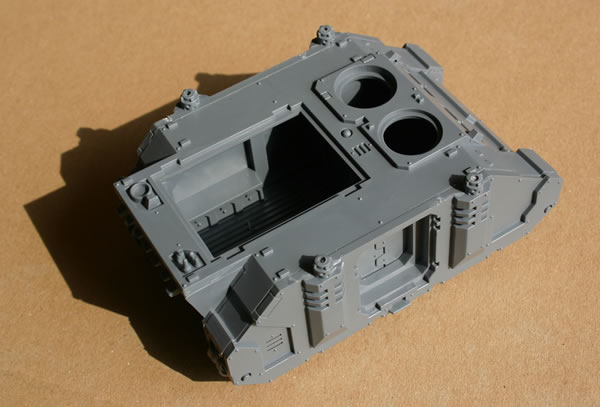
As I was building the Repressor I noticed that I had a problem. The new roof did not fit as expected, it was as though it had shrunk.
The arrow points to the parts not fitting together as they should.
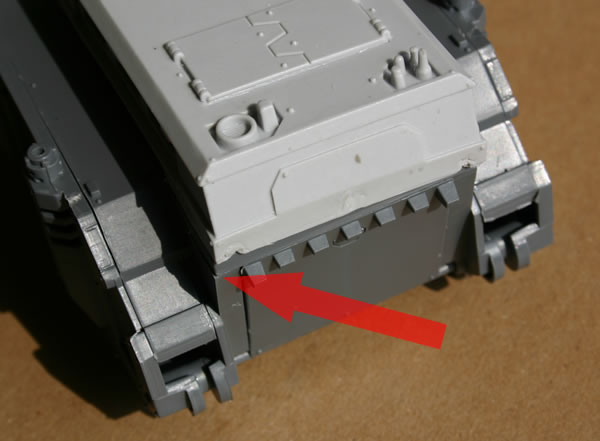
This is of course always a concern with resin parts and to be honest I almost expect it with Forgeworld models, these are resin kits which require skill not mass produced plastic kits which any old fool can put together!
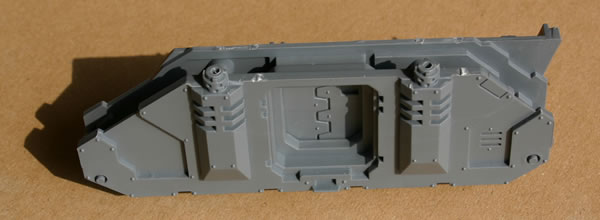
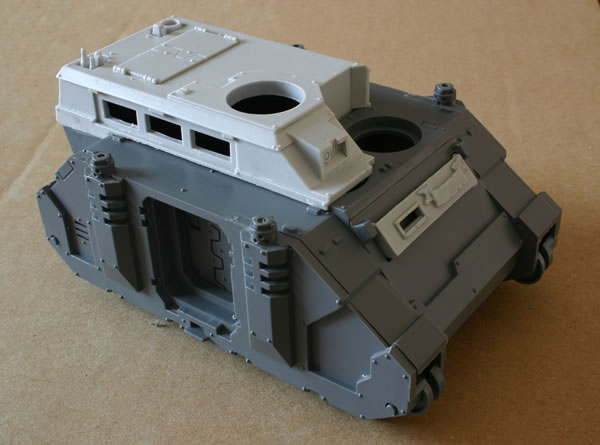
This shot shows the front.

Now the issue was how was I going to rectify this?

As I thought about it, I decided to make up the frontal storm bolter turret. These are the resin and plastic components.
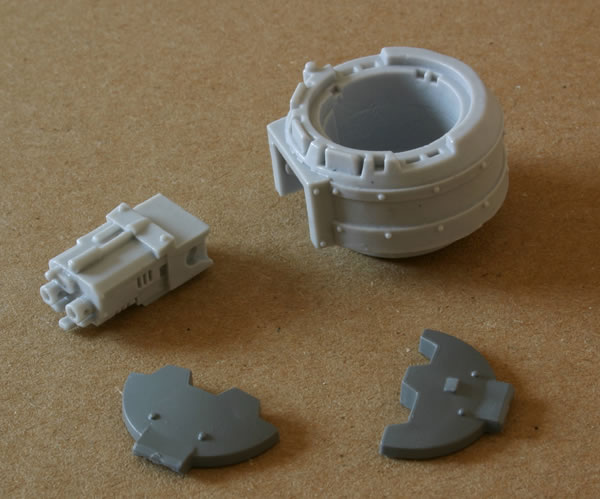
Here is the completed turret.
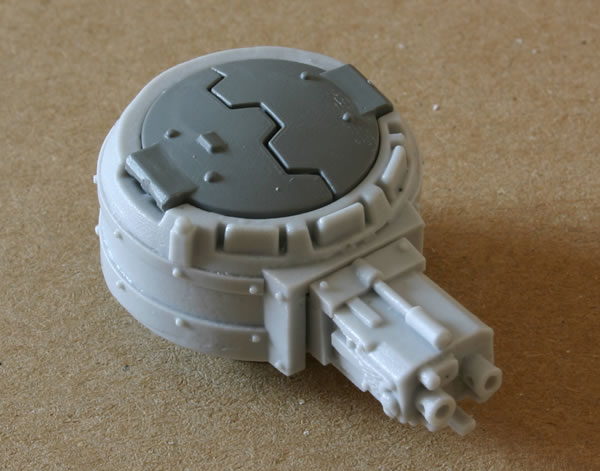
It fits nicely into the turret ring.
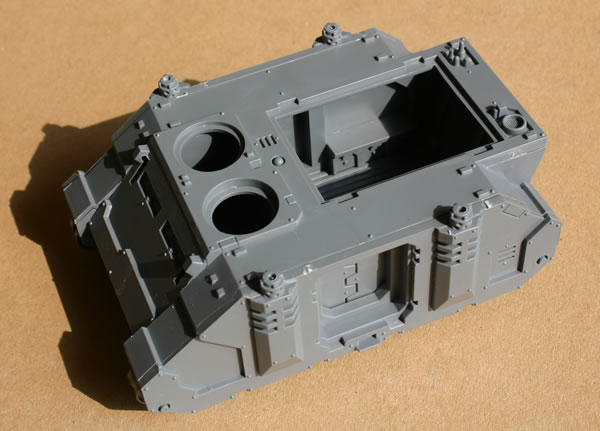
Back to the ill-fitting top superstructure. I decided initially to try and file down the Rhino body to allow the resin superstructure fit. This wasn’t really working, so I decided to trim the back of the superstructure.
This allowed the superstructure to fit.
But it wasn’t a perfect fit.
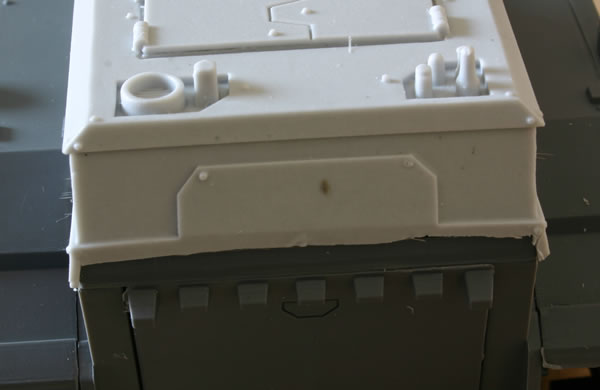
This was more apparent on the front.
Where there was quite a large gap.

Time to get out the green stuff (putty).


The Repressor kit comes with a resin flamer for a hatch ring.

Combined with the plastic hatch ring from the extras sprue, it will go on the top of the Repressor structure.

It went together very easily.

I decided to make the hatch closed, if this was a Sisters of Battle Repressor or a Adeptus Arbites Repressor then I may have added a gunner, as this will be used for different units I decided to make it closed.
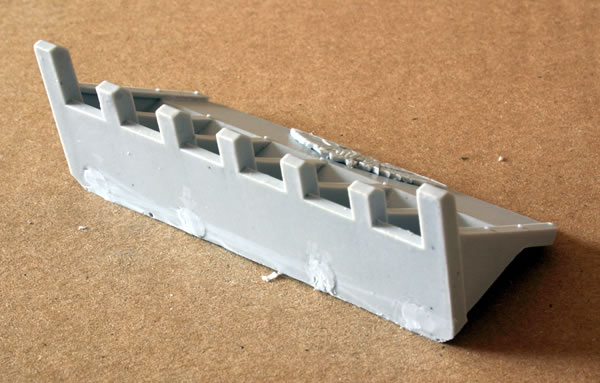
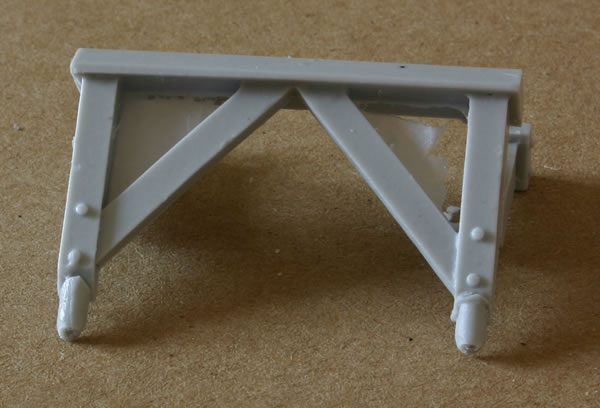
One of the nice extra parts for the Sisters of Battle Repressor is the large dozer blade. It consists of two parts; the blade and the attachment for attaching the blade to the hull.
The blade has some quite large sprue attachments which need to be removed with care.

If you don’t it can result in damage to the resin blade, luckily this is at the bottom of the blade.
The attachment had a fair bit of flash attached which needed to be cleaned.
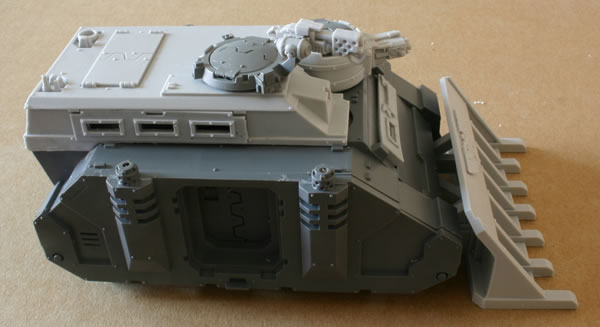
I am going to paint this part separately, but to give you an idea on how the final Repressor will look here is as though the dozer blade was attached.
The next stage is doors, for which I have purchased some Rhino Inquisition doors from Forgeworld.

Another thing I bought was the Inquisitor and Grey Knights brass etched sheet also from Forgeworld. I am going to use components from this to enhance the model.

I also have some purity seals hanging about, which I also intend to use.

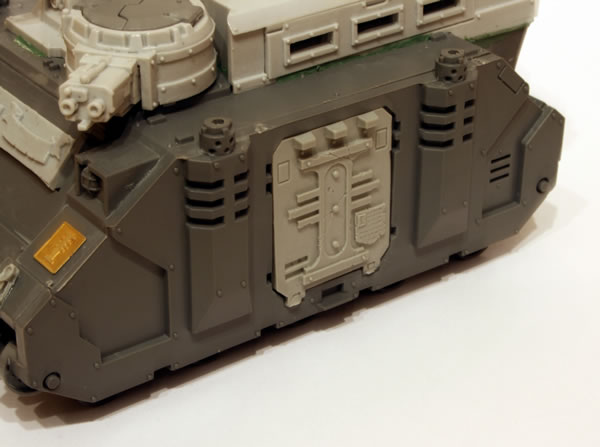
I glued the resin Inquisition doors into the door slots on the main body.

These doors are really nice and add a lot of character to the model. I wish I had used the front plate instead of the suppplied plastic one, but it would be of little use, as the front plate is hidden by the huge dozer blade.

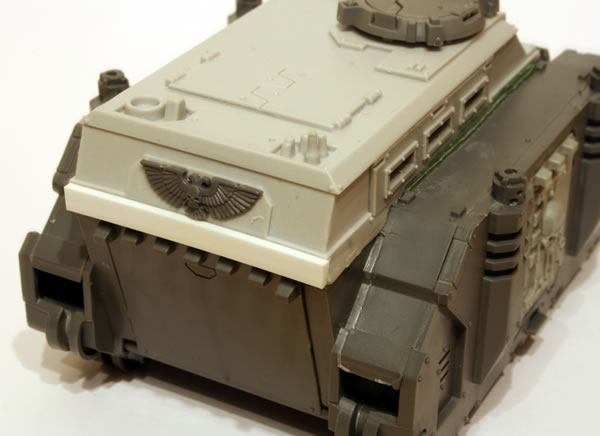
I added a purity seal and a brass Inquisitor symbol to the front. I also glued on the headlights as well.

To the back I added the plastic eagle which comes with the Rhino kit. I also added a strip of plasticard to hide the ill-fitting back part of the superstructure (see before).

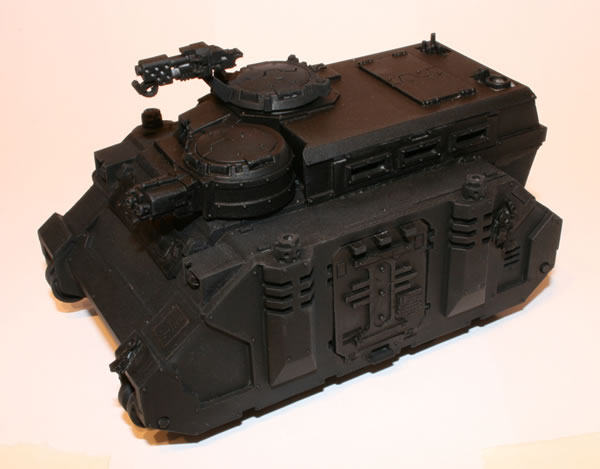
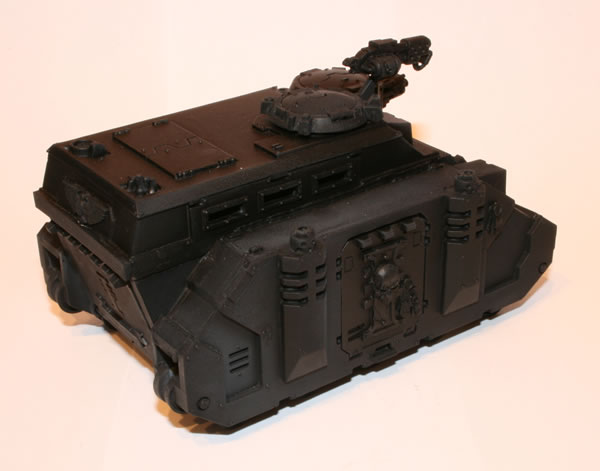
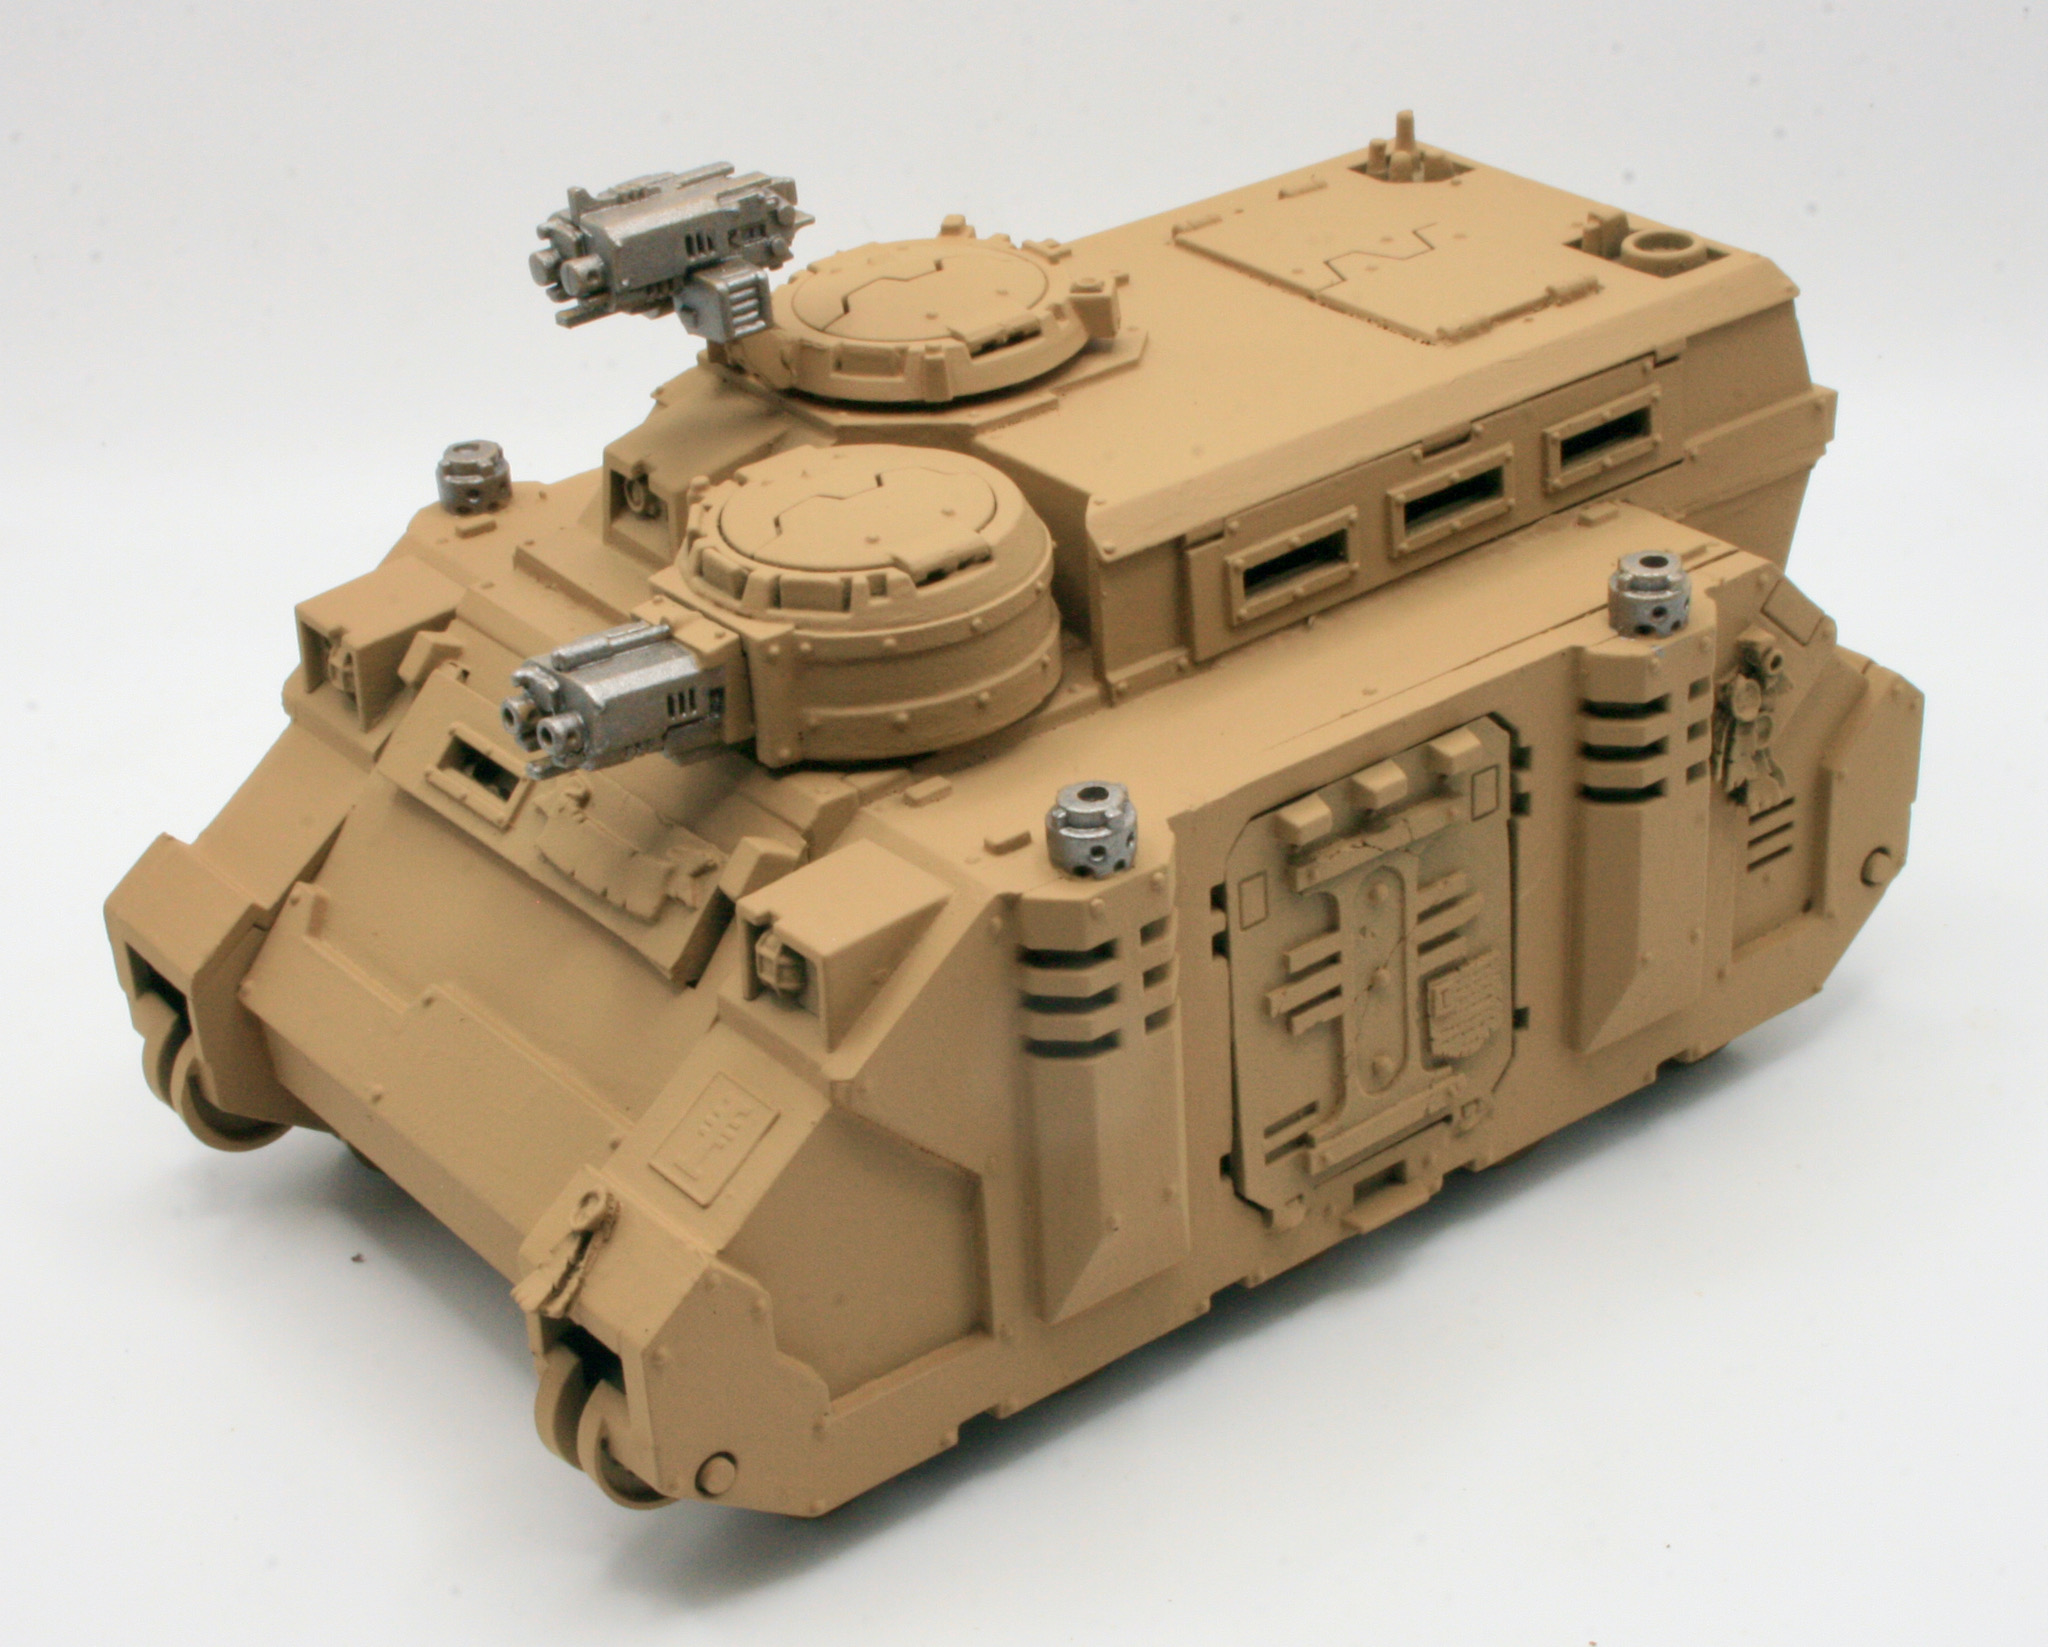
This is pretty much done now, time for an undercoat.

I will be using a black undercoat, notice how I have left the track units off, these will be painted separately.

Some more shots of this stage of the model.
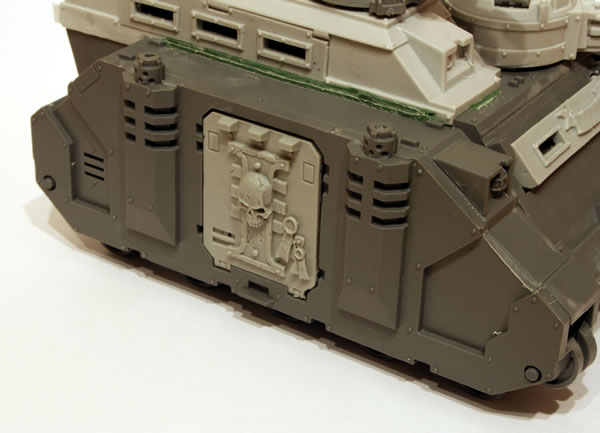
Having had time for reflection, I decided I wanted to add some more Inquisition symbols, so I added more icons and purity seals to the back door.

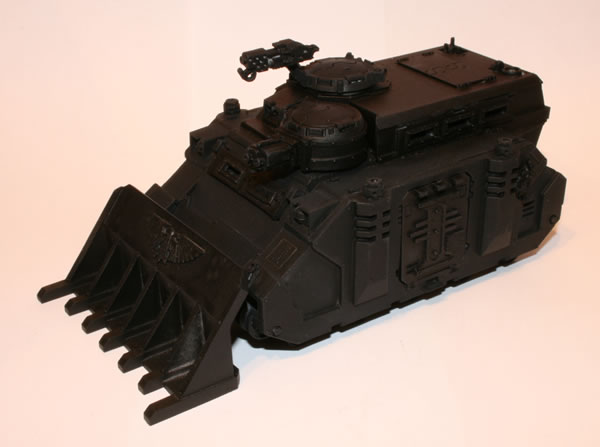
I then gave the model a black undercoat using Citadel Chaos Black paint spray.
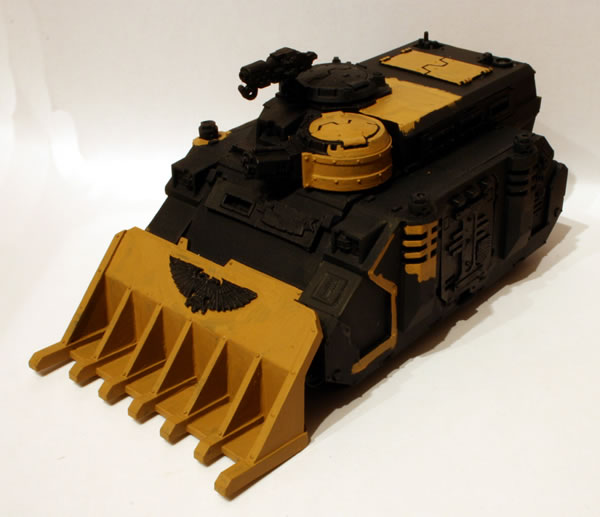
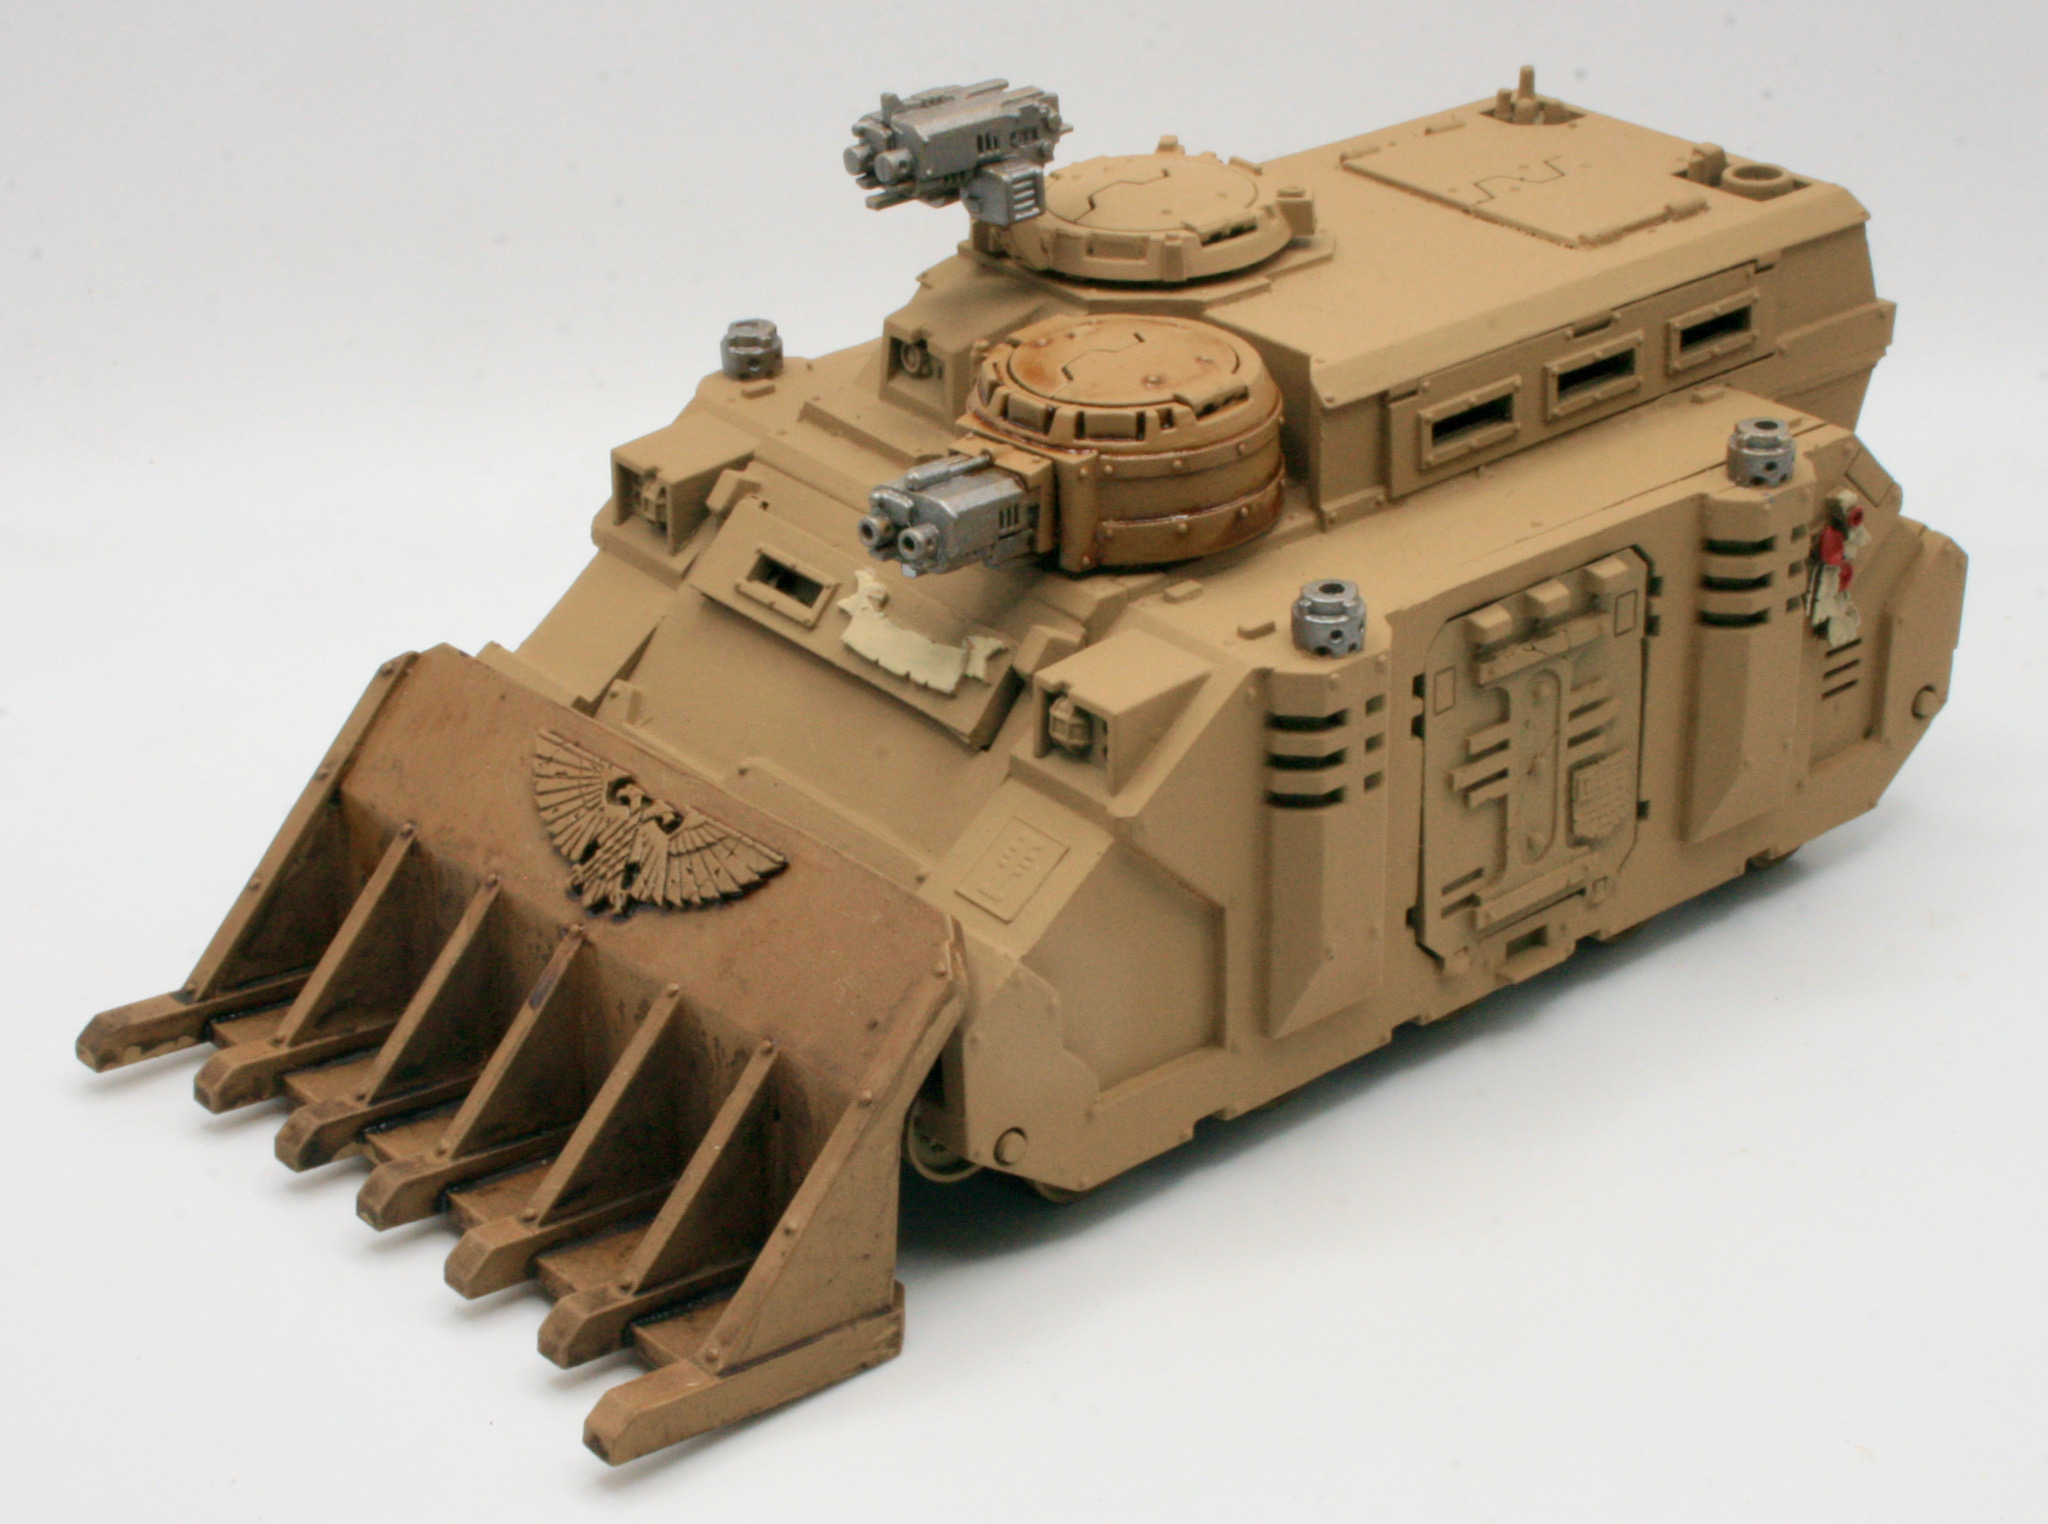
Here is the Repressor with the dozer blade.
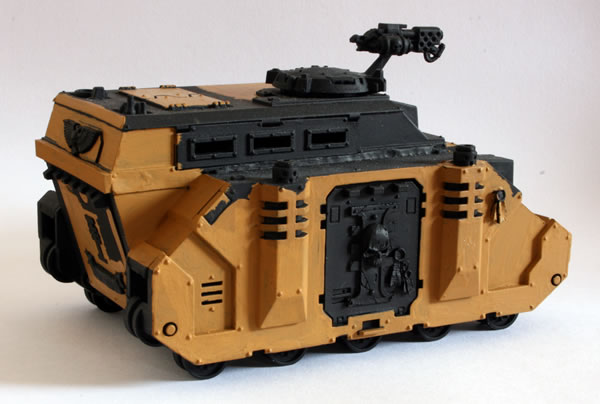
Next stage is a basecoat of Tausept Ochre (a Games Workshop Foundation paint).
Adding more of the basecoat of Tausept Ochre (a foundation paint). The right side and rear have had a lot of work done to them…
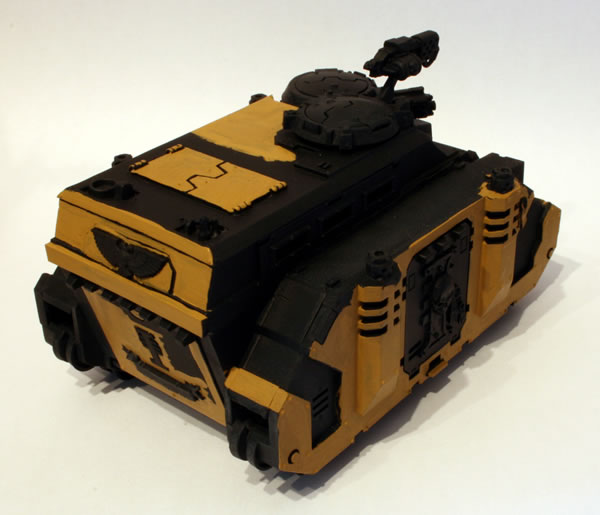

Painting more of the basecoat.
Painting more of the basecoat.

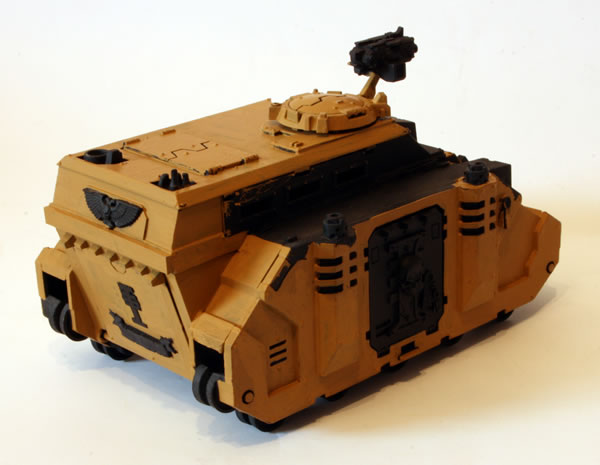
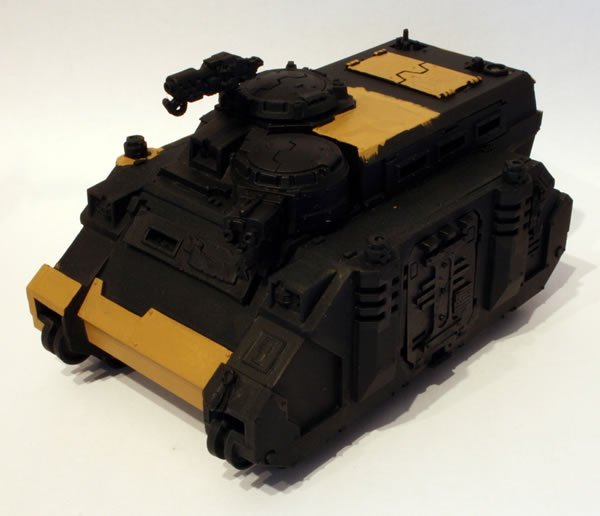
I decided that I would try using Citadel’s spray gun to base coat the rest of the Repressor. However due to thinning the paint too much I didn’t get the result I hoped for.

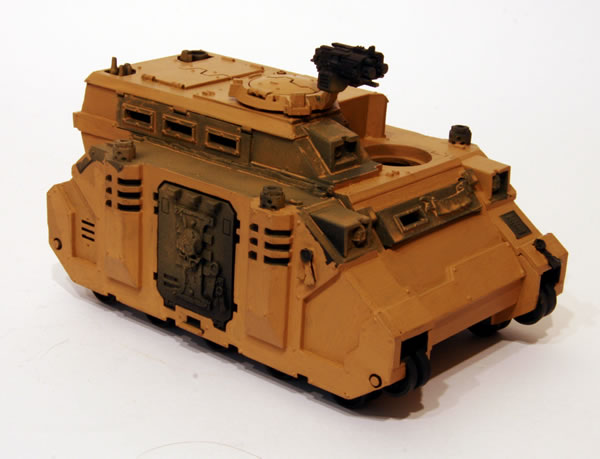
Though I actually started building and painting this model back in 2007, I recently retrieved it from storage and decided that I would try and finish painting it. I realised I had made quite significant progress.
I was using Tausept Ochre as the base coat, though as you can see the basecoat wasn’t covering the black undercoat very well.
At one point I decided that I would try using Citadel’s spray gun to base coat the rest of the Repressor. However due to thinning the paint too much I didn’t get the result I hoped for. It was really at this point it got put away.
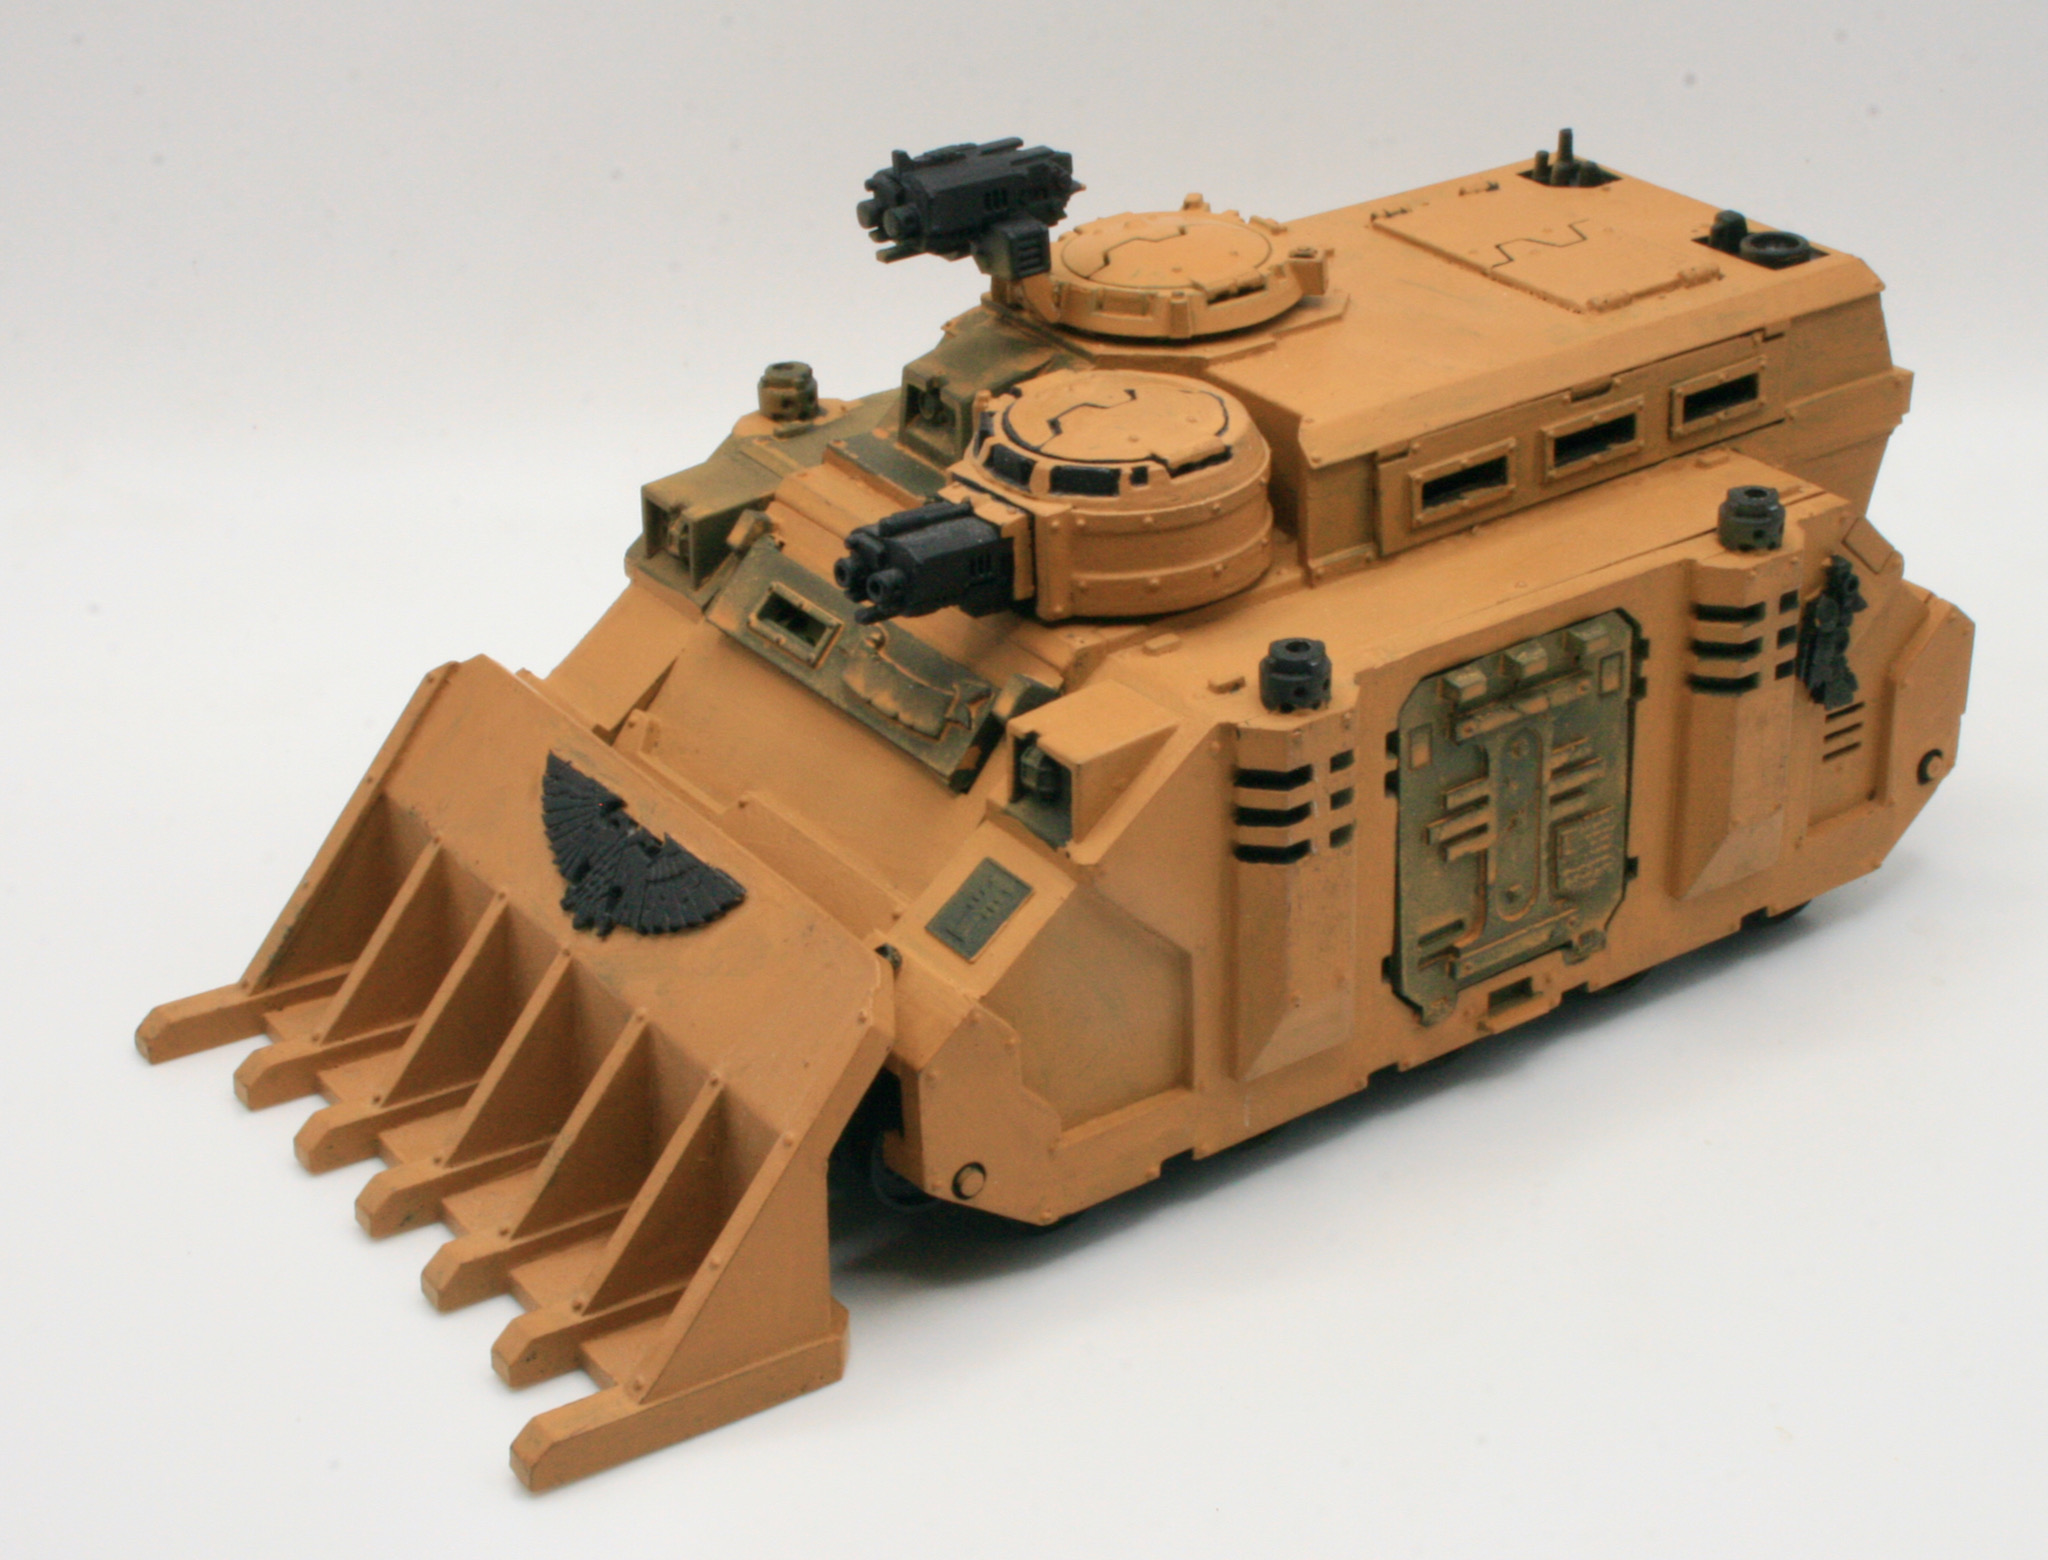
However having liked the paint scheme I was using on my Deimos-pattern Rhino, I decided that I would paint the Repressor using the same method, but not necessarily the bright yellow of the Rhino.
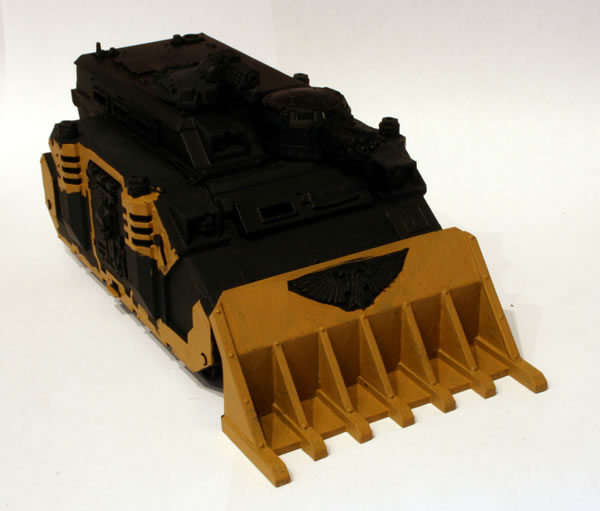
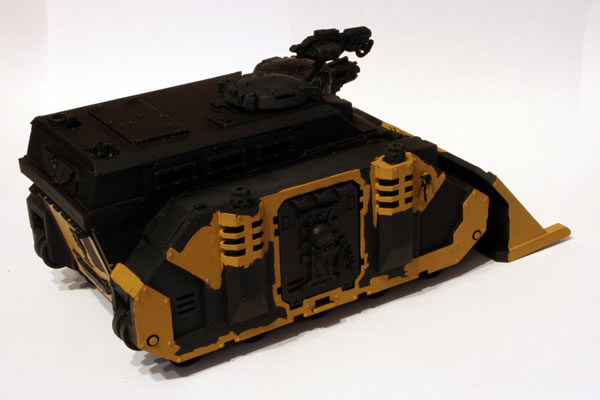
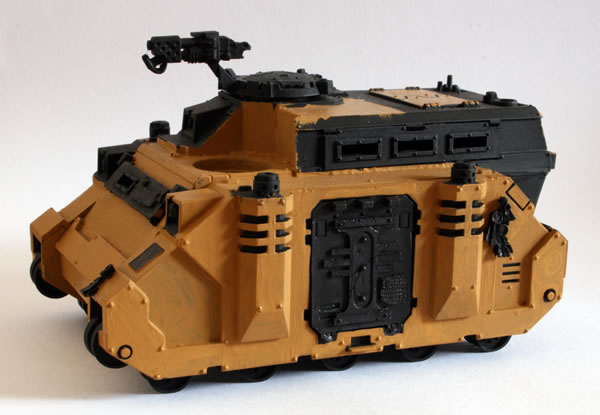
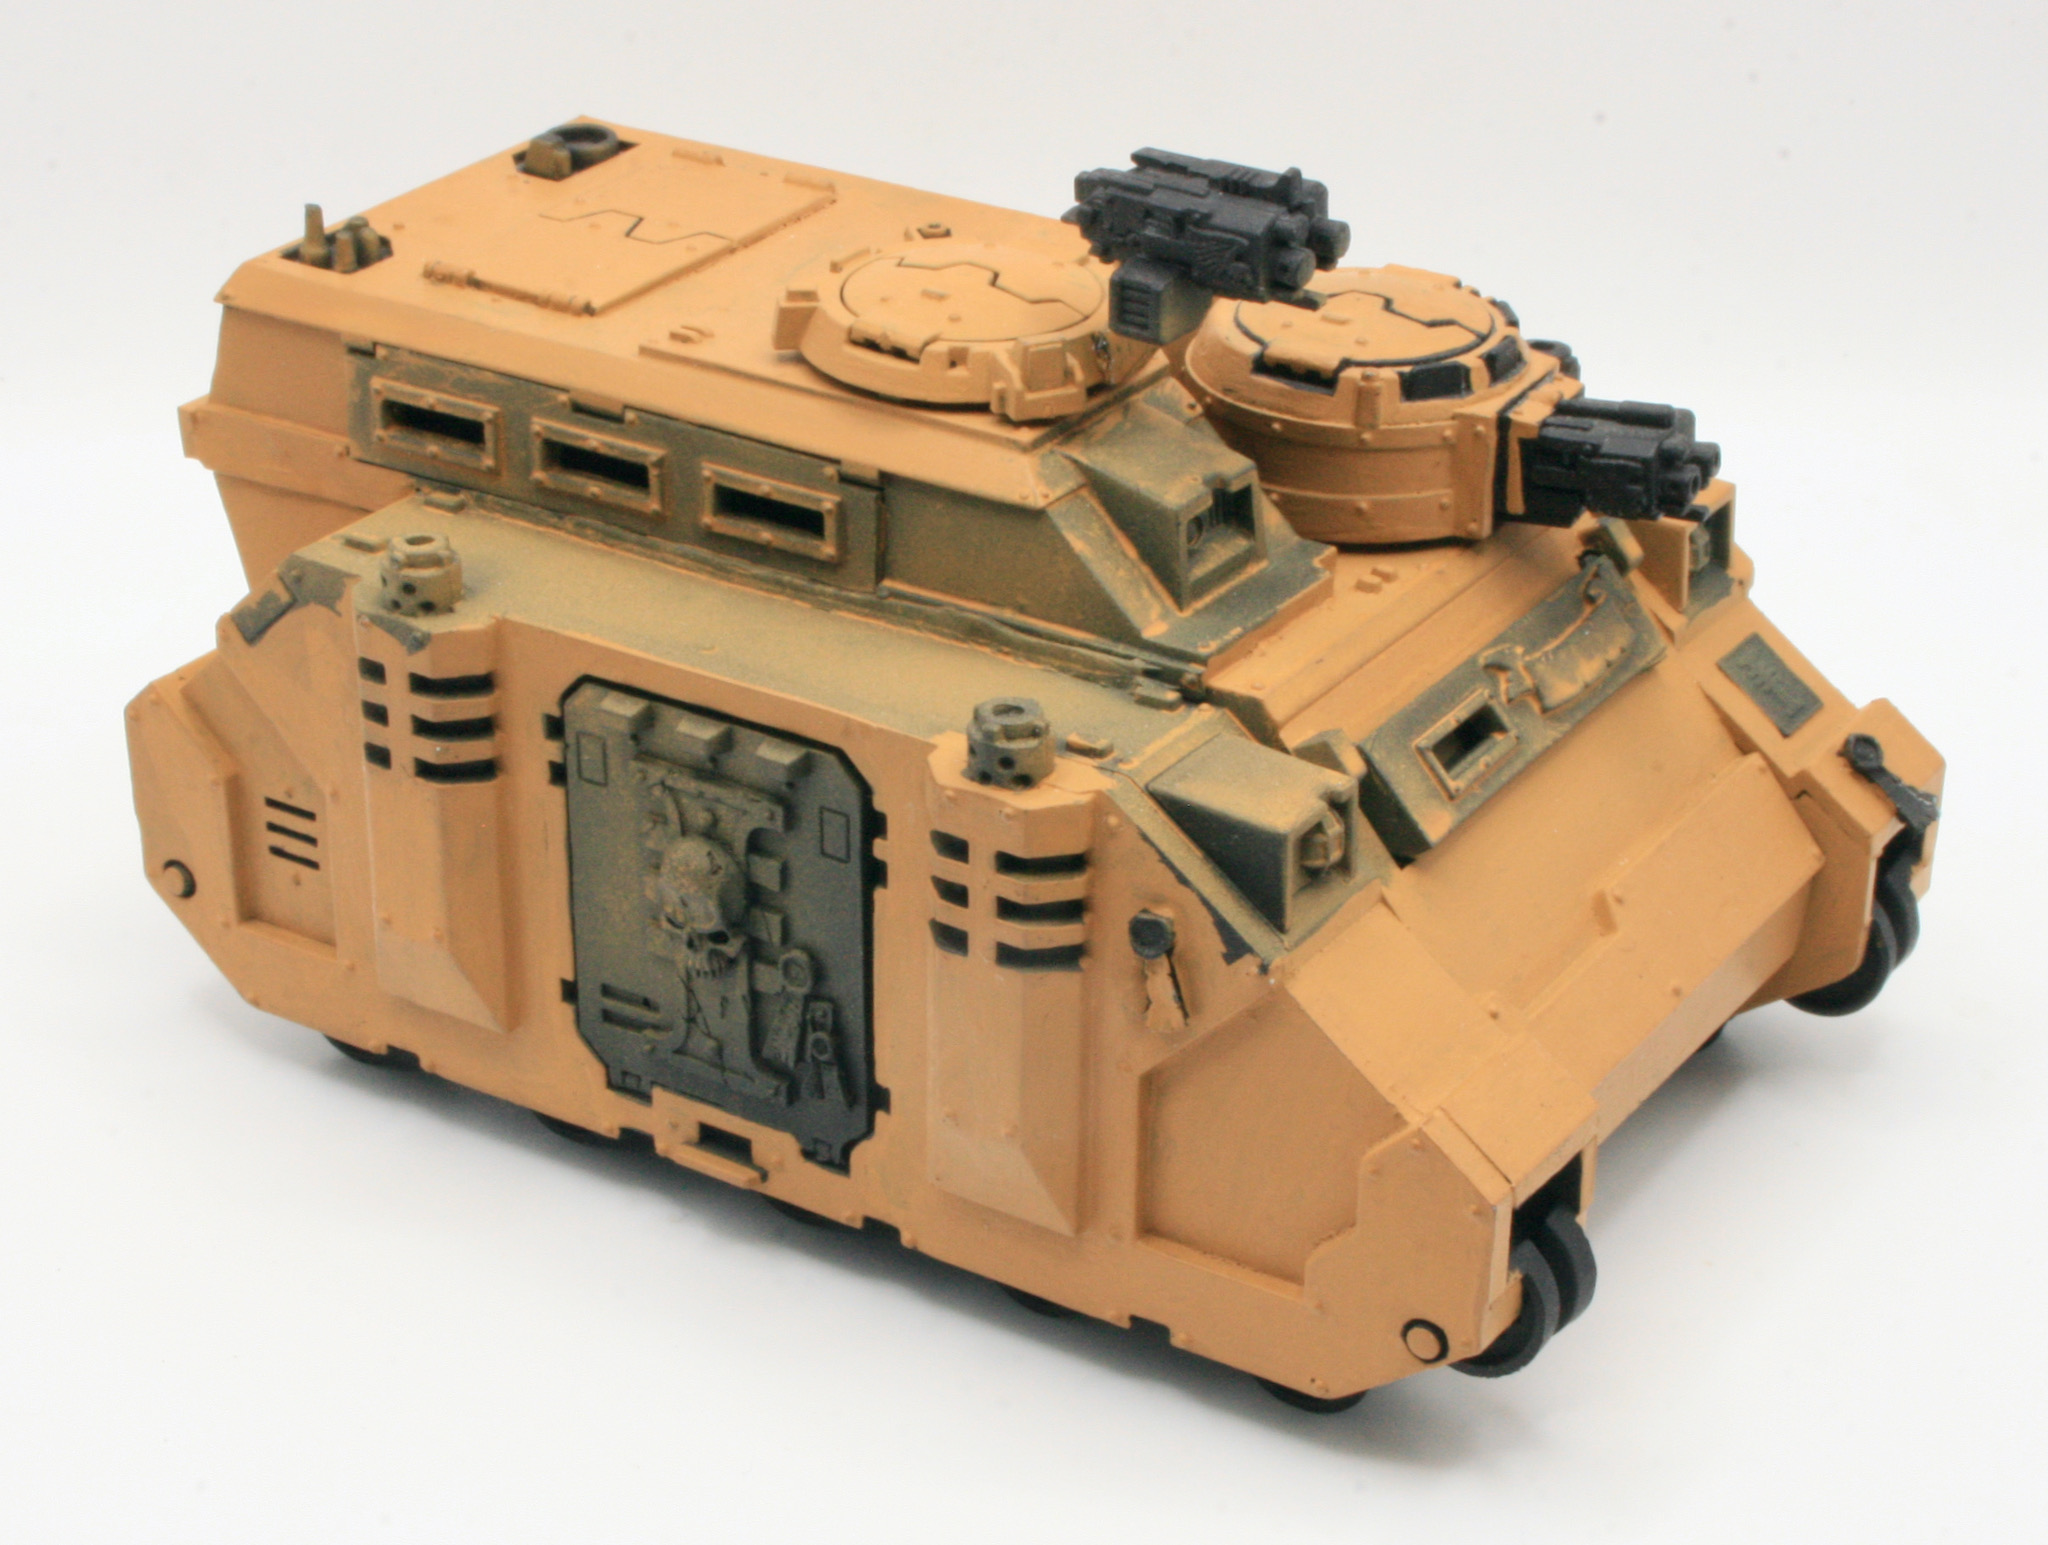
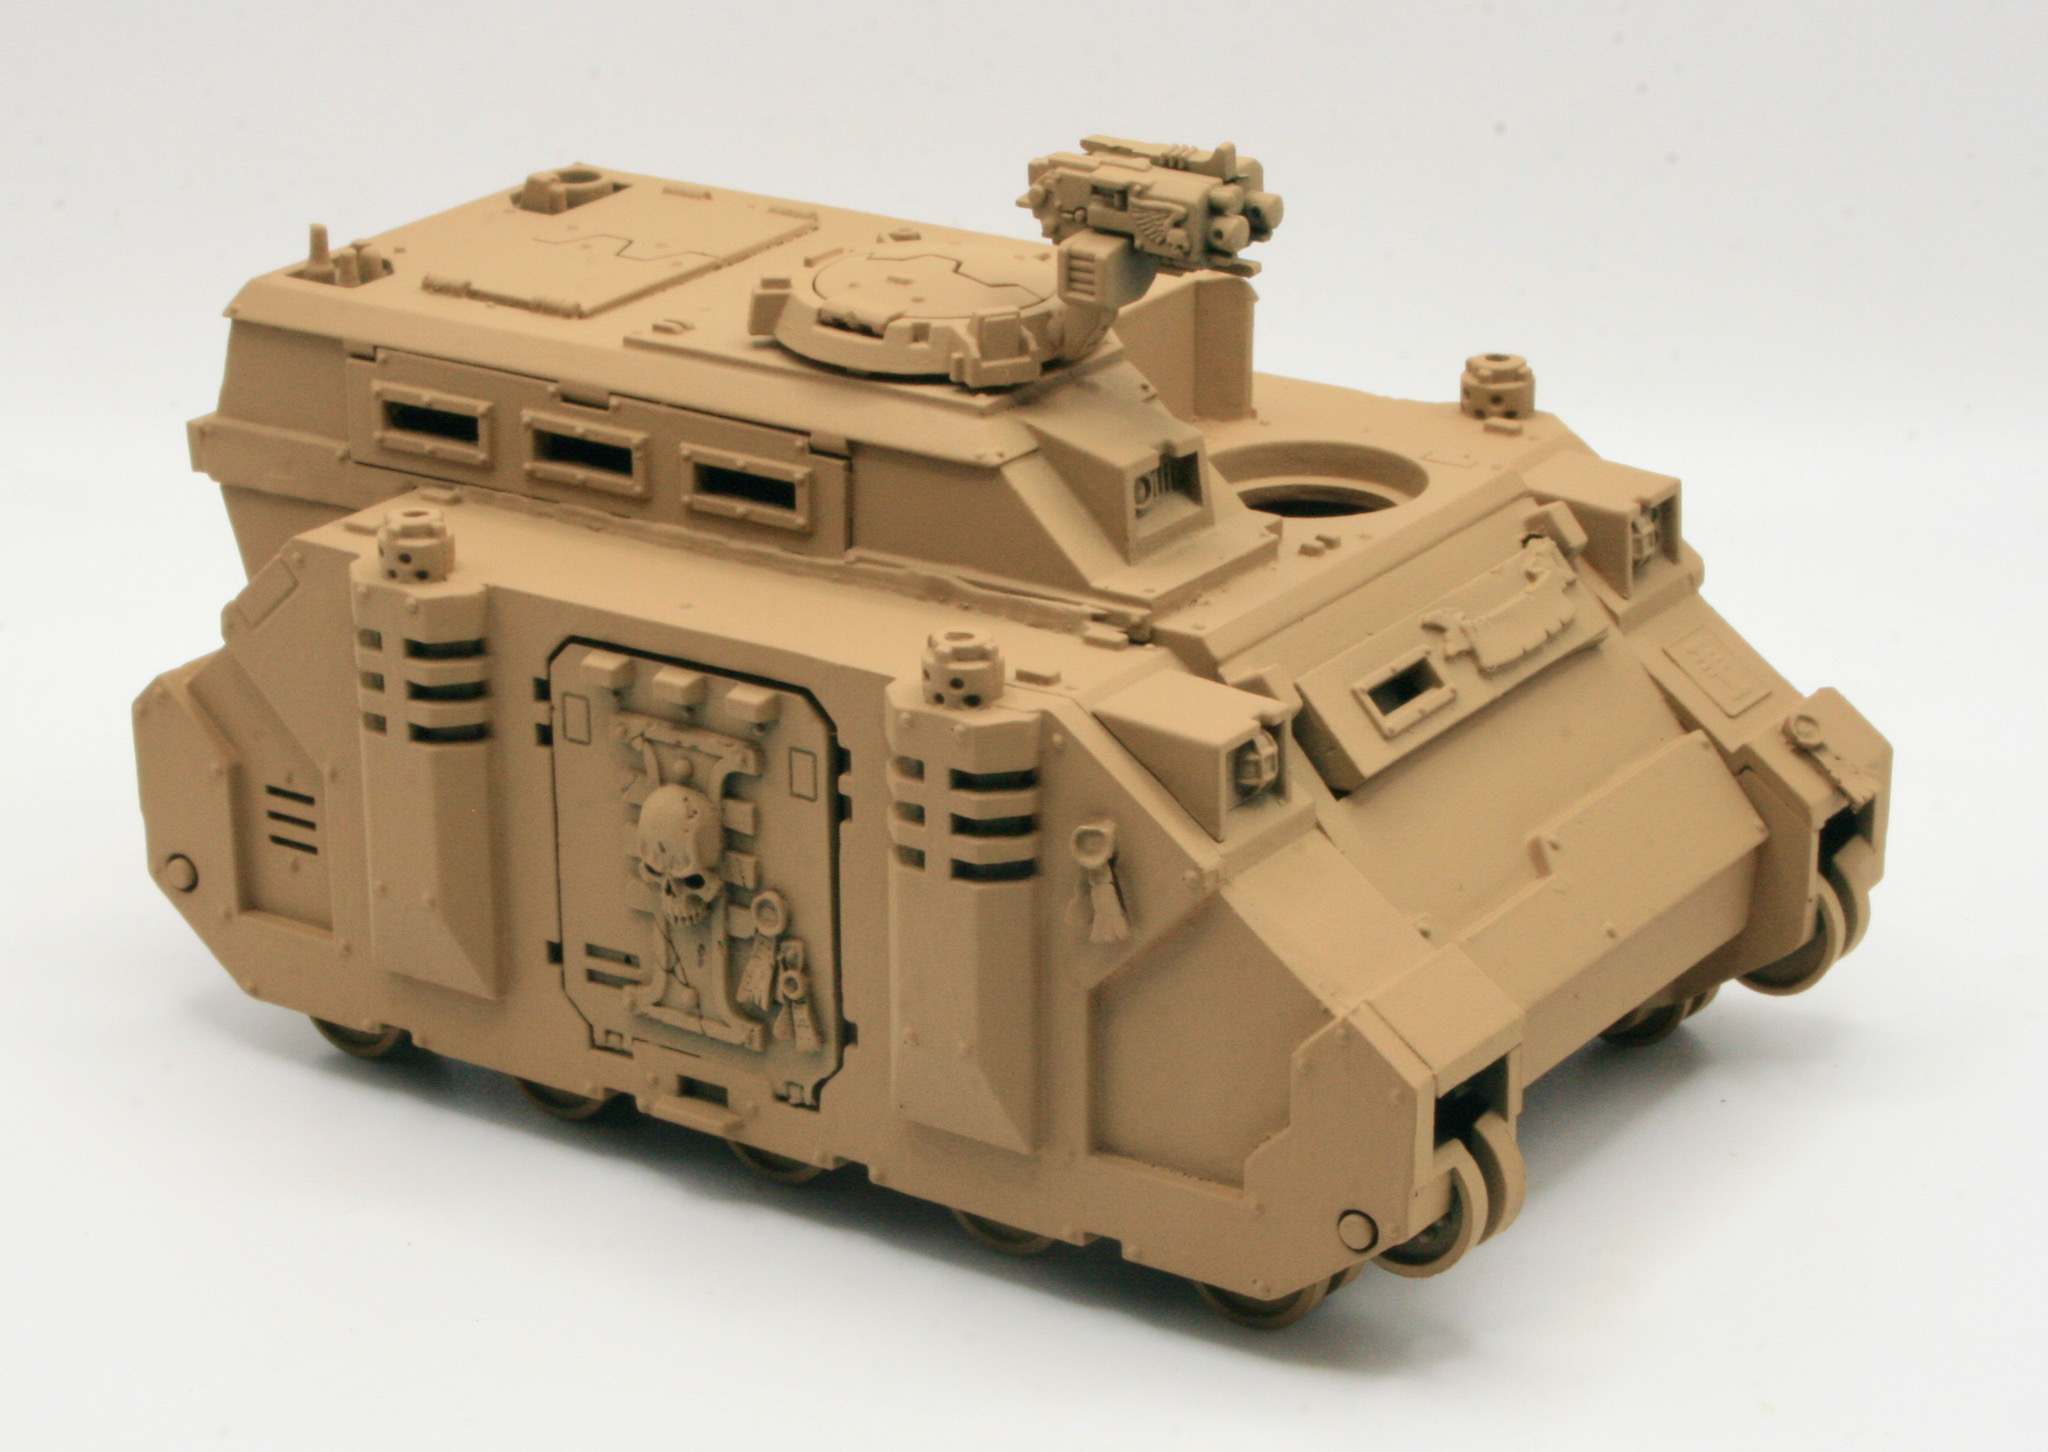
The first thing I did was spray the model with Citadel Zandri Dust.
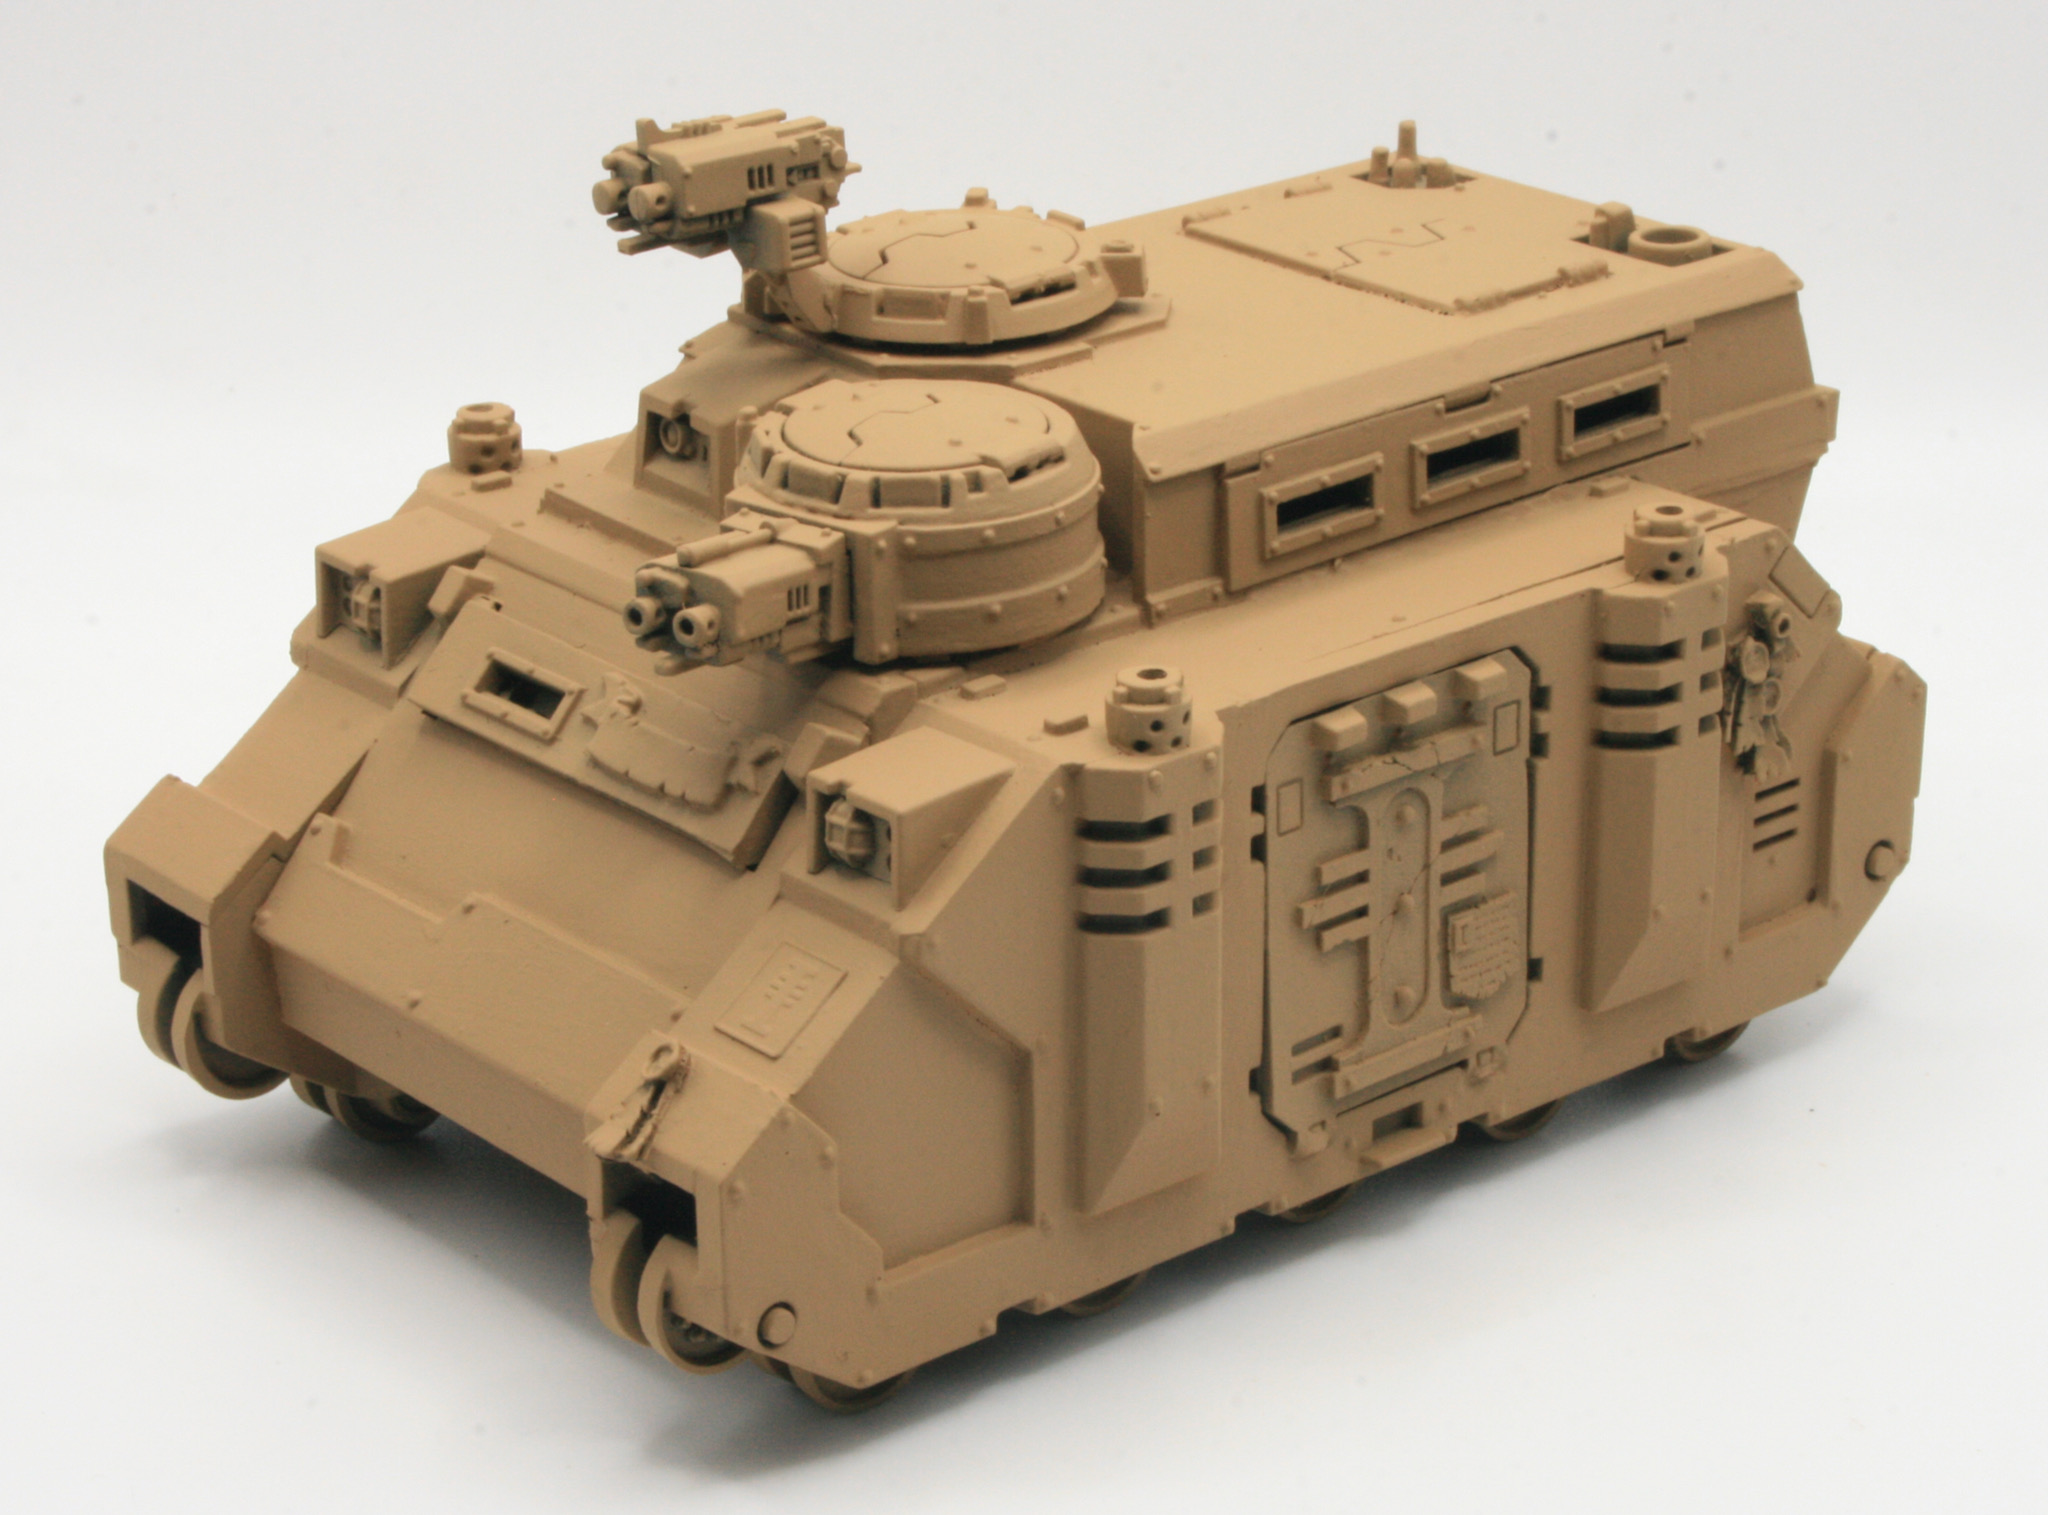
This certainly covered the model well, and looked better than the Tausept Ochre paint.

I started the detailing, using Leadbelcher on the weapons and the exhausts.
The next step was painting the iconography and purity seals. For the skull I used Ushabti Bone.

I painted the purity seals using Ushabti Bone for the paper and for the wax seals I used Mephiston Red.

Here is the Repressor with the dozer blade and turret.
I had used shades on the blade and the turret. I still have some work to do on the iconography before I shade the rest of the vehicle. I decided that I would go down the full inquisitorial look for the iconography, as opposed to doing stone or bronze on some of my other vehicles.

For the skull I used Ushabti Bone. Once shaded this will then be highlighted with more Ushabti Bone and then White Scar for the highlights.

I painted the inner part of the Inquisition symbol with Mephiston Red. The outer part was done with Retributor Armour. I was pleased with how this went and how it looks.

I painted the purity seals using Ushabti Bone for the paper and for the wax seals I used Mephiston Red. For the eagle and Inquisitorial symbol on the back ramp I used Retributor Armour.

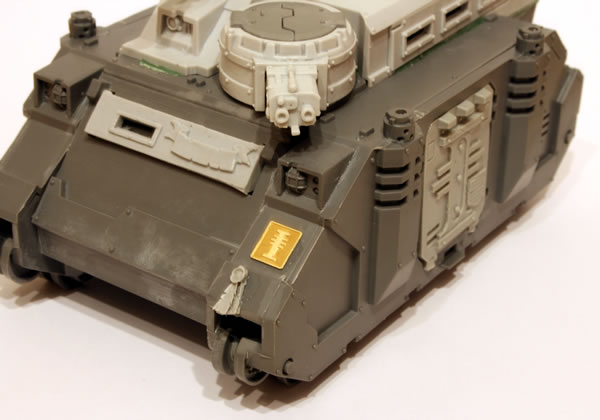
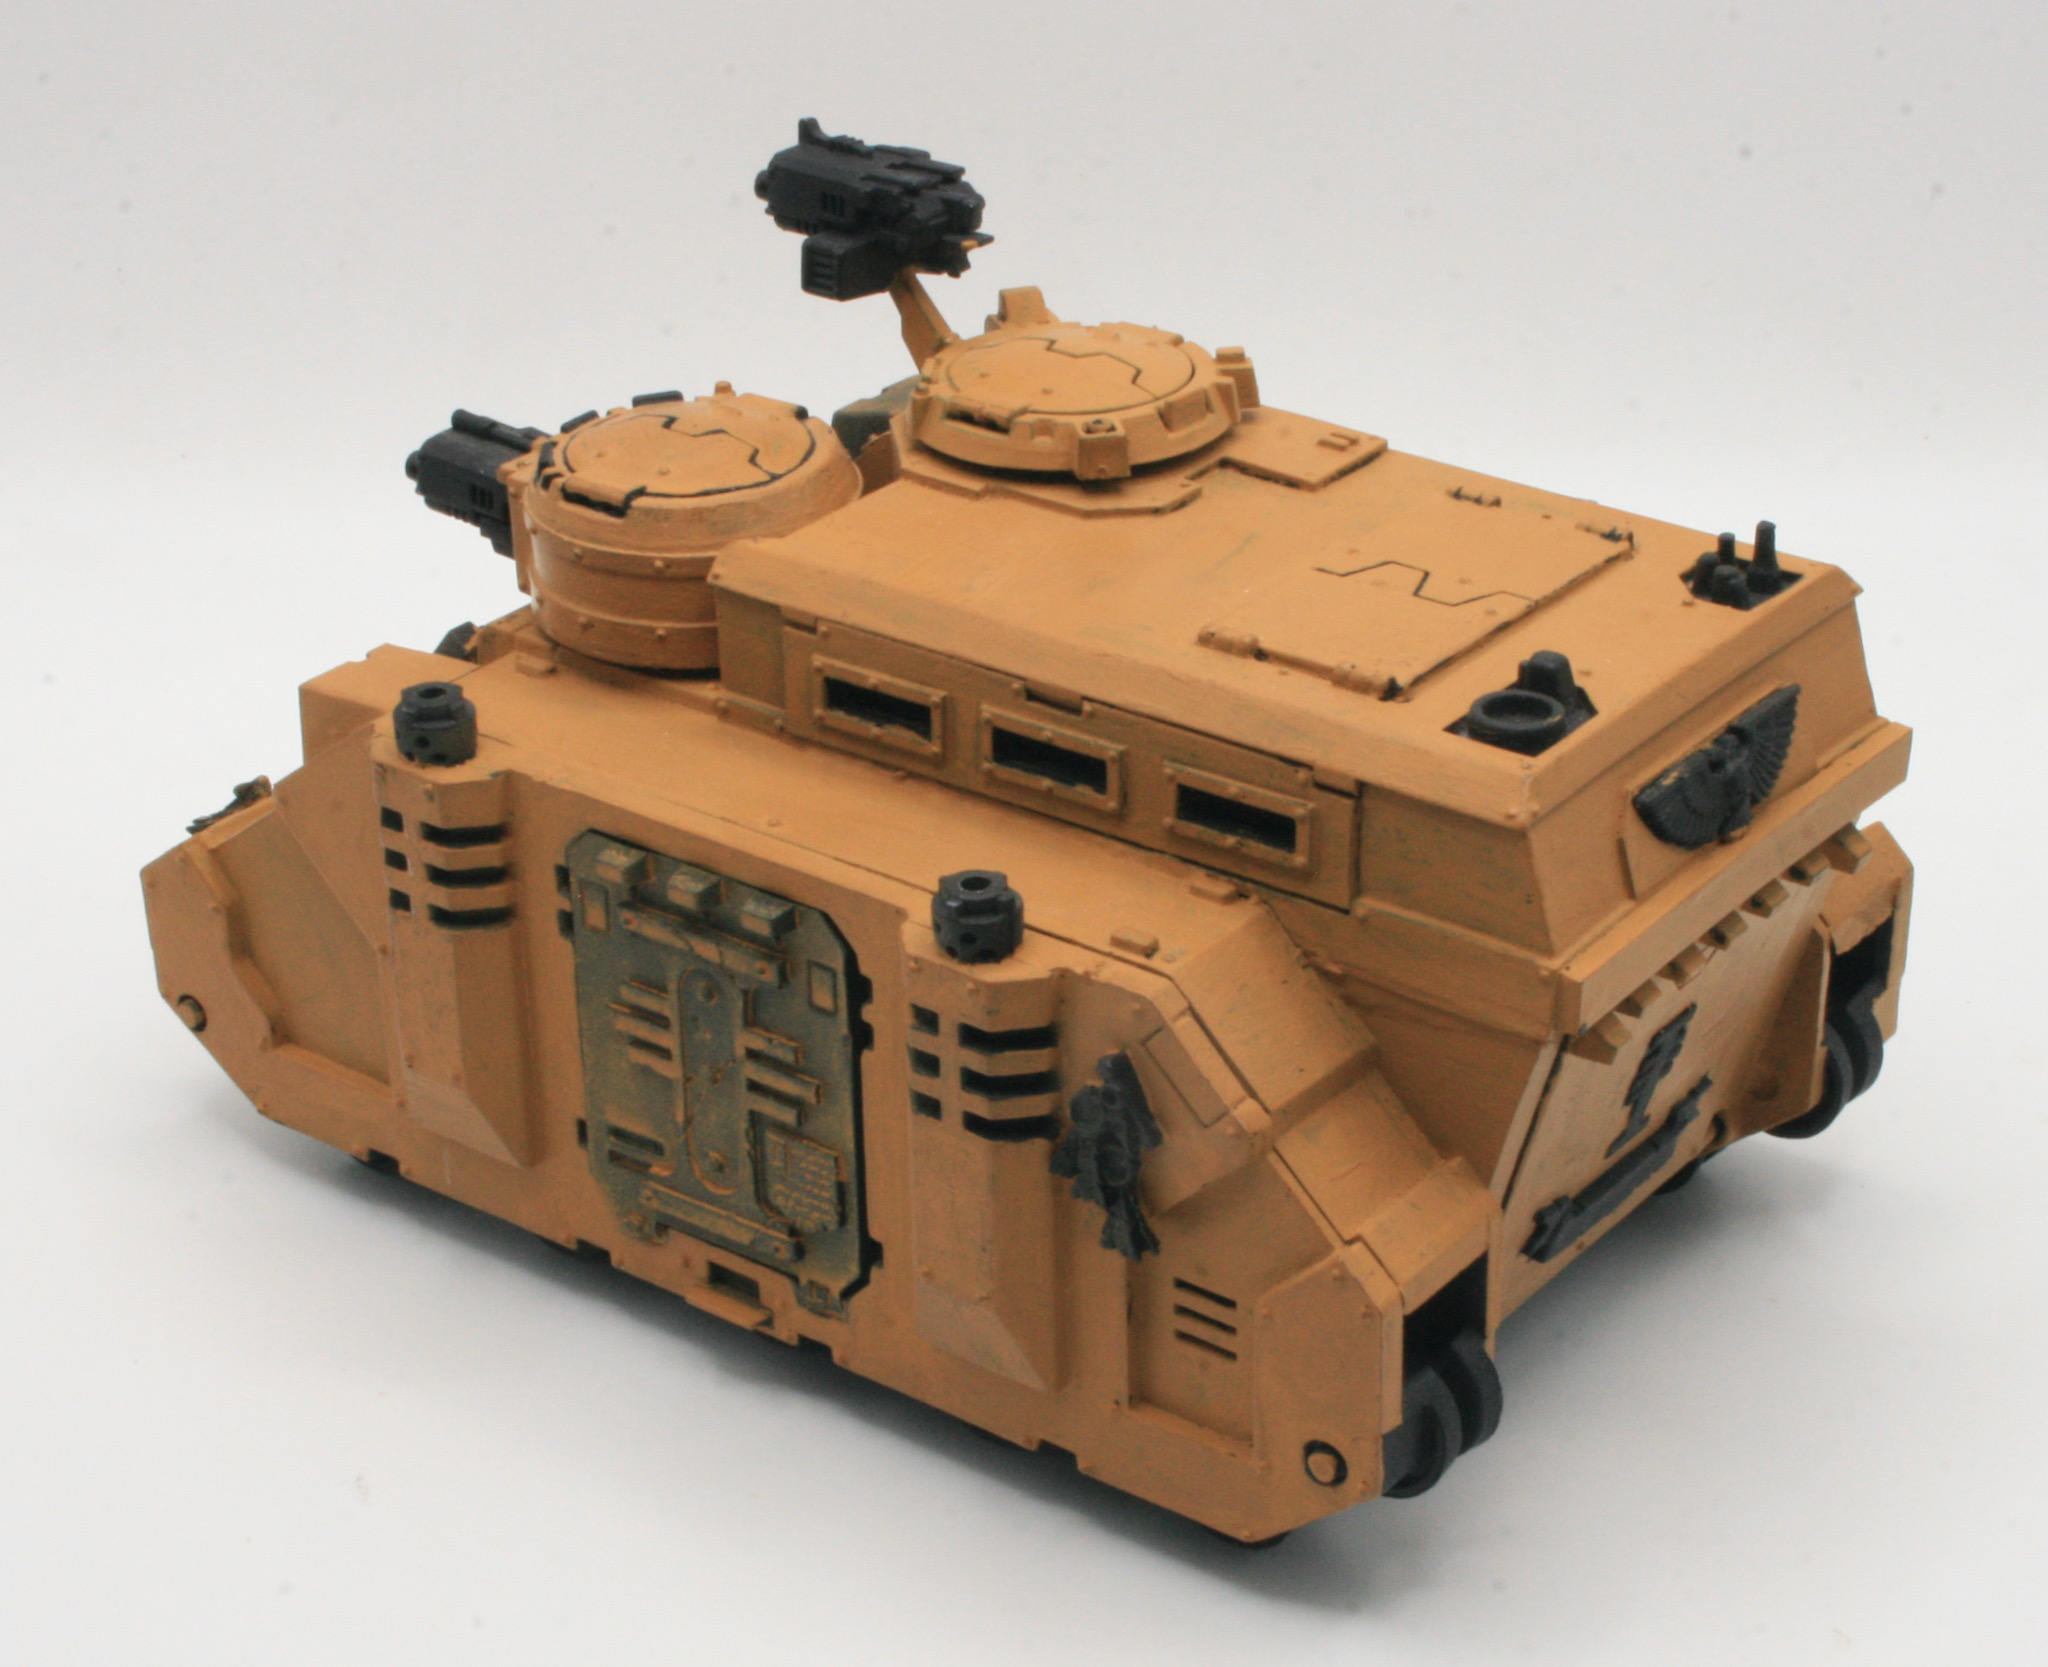
I wanted to give the model a wash to add shadow, so shaded the model using Seraphim Sepia Shade.

The rear view.

This is the Repressor with the front turret and dozer blade. I am liking how this now looks. I did notice that there was some iconography on the front track guard which I had missed.


The next thing I did was more shading of the model. The next stage was some drybrushing, for this I used Citadel Zandri Dust.

The aim here was to add edge highlights to the Repressor. I wanted to achieve a slight dusty effect as well.

After the drybrushing I will then detail the iconography, the weapons, and the exhausts on the model.
I tried a new technique that I picked up from my FLGS. It was to use a metallic gold Sharpie pen on the front iconography. It was easy to apply and I quite liked the end result. You have to be careful to be accurate, as unlike acrylic paint, which you can remove quite easily if you make a mistake. This is a permanent marker and won’t budge!

The tracks for the Repressor were given a spray of Mechanicus Standard Grey.

I then did a heavy drybrush of Gorthor Brown. The tracks, once dry, I then gave them a wash of Agrax Earthshade Shade.
The next step was to paint and highlight the iconography.

This is to brighten up the purity seals and other iconography after it was dulled down by the shades and washes.

Despite having already affixed tracks to other Rhino variants on my workbench, I found this one quite challenging. No idea why, but it was more difficult to fix the tracks on the Repressor.

I also managed to break off the cupola double bolter, so I had to glue that back on. I also added the dozer blade.

I also took the time to brighten up the purity seals and other iconography after it was dulled down by the shades and washes. I also highlighted the purity seals with some White Scar paint.
However, I think I overdid this, they are too bright for the model. I decided to dull these down a bit with some Citadel Seraphim Sepia Shade.

I was pleased with this, giving the purity seals an older worn look to them.

There is still some work to do with this model, but I am pleased I have made progress and nearly finished it.
