There are Orks who have looted Imperial weaponry. Not only can they use Space Marine weapons they can also borrow the transport.
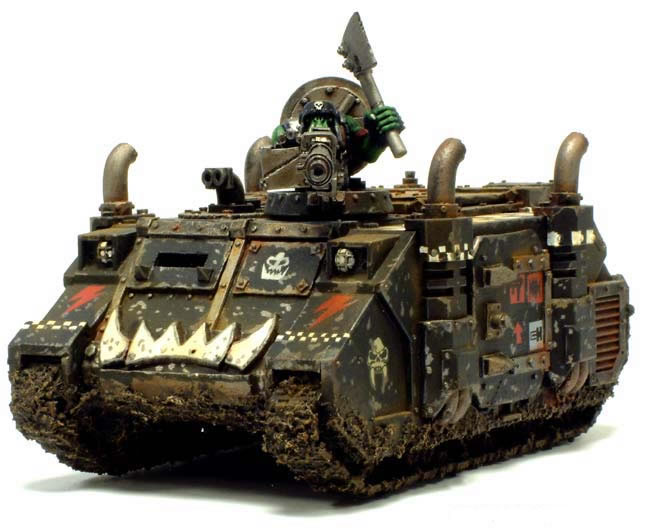
A Looted Rhino is an Imperial Rhino armoured personnel carrier that has been looted from a previous battlefield by Ork Lootas and is now used as a transport for their WAAAGH!. These machines are “upgraded” with Ork technology and are capable of loading a group of Ork Boyz. While in battle, Looted Rhinos are fast, and are usually outfitted with a gunner. Looted Rhinos have been used as weapons during many past Ork invasions. However, Looted Rhinos are more prone to breakdowns and often possess inferior armoured protection and do less damage than their Imperial counterparts because of the Orks’ lack of maintenance and care for their stolen vehicles.
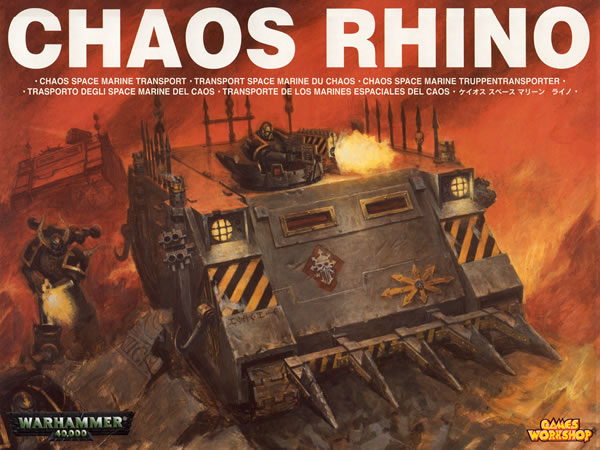
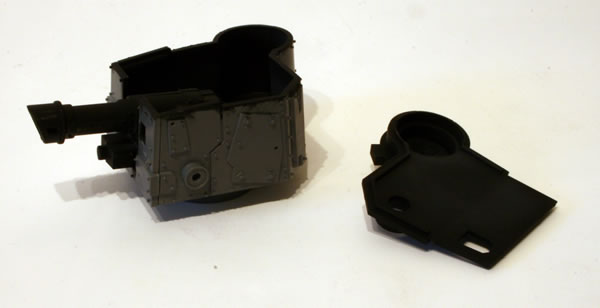
The starting point for the Looted Rhino was a Chaos Rhino.
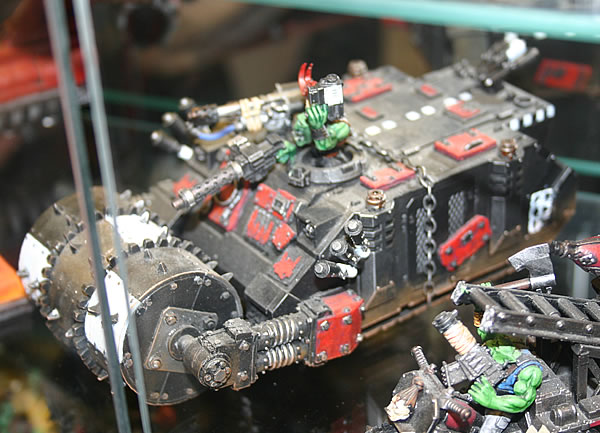
I then spent some time looking on the web for other Looted Rhinos. An obvious model to look at was the Forgeworld Looted Rhino. This conversion kit contains quite a few resin pieces which replace substantial parts of the original plastic kit.

This includes new doors, a new front panel and additions to the engine panels and exhausts. Forgeworld also had another Looted Rhino on their GamesDay display.
This conversion had a death roller and various Orky panels as well as a Big Shoota and grenade launchaz.
I have been looking on the web to see how other people have been converting Rhino’s for use as an Ork Looted Rhino.
One such (now defunct) site is Scarpia’s Warhammer World which has an article on how to convert a Rhino into a looted Ork version.

Though I do think this is a nice model, it still looks too Imperial for my liking.
Having taken on all these various versions I decided on a particular course of action. I would redo the side doors, the front panel, the rear door. I would also redo the top door and try and make a variant or two which could jsut slot into place. I wouldn’t have a roller, but would use one of the Chaos spikey front ends. I decided to use the Chaos Havoc Launcher with a Killa Kan and use the supplied Burna with the Rhino.
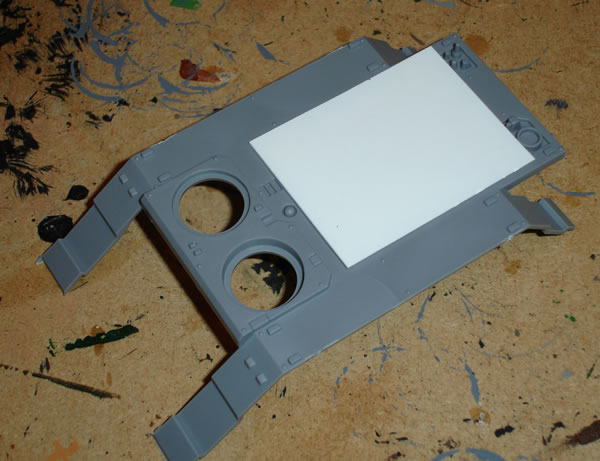
The first thing I decided to do was change the front left panel. So I removed the rivets and the other protruding plastic.
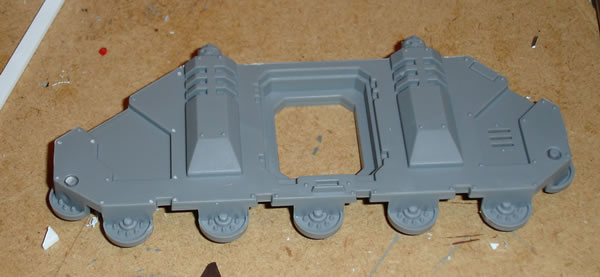
I then stuck down a piece of plasticard to which I added three panels and a covering strip. These were glued together using plastic cement glue. I then added Orky rivets using sliced plastic rod and stuck down with super glue.
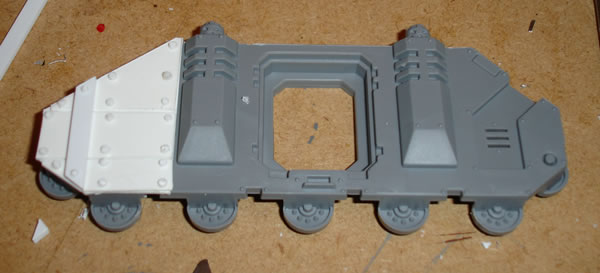
I then added a door again using plasticard with plastic strip for the hinge and supporting struts. I also thought that the panels looked too new so I hacked them about with a sharp knife. I also hacked some of the Rhino structure as well.
This is a close-up of the front left panel.
This is a close-up of the new side door.

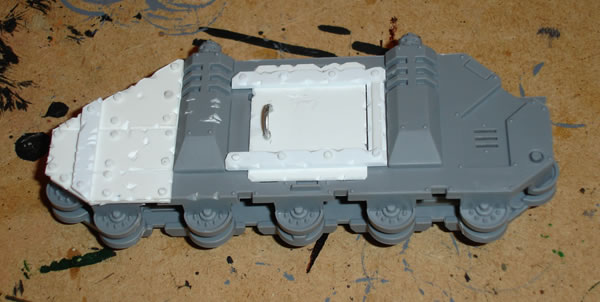
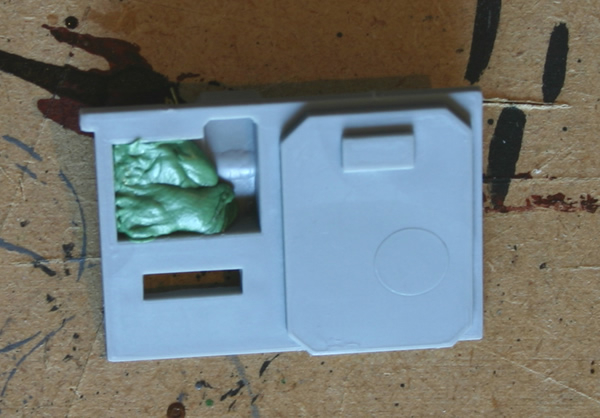
Rather than use the standard Rhino top door I have decided to make an Orky version. I started off with a piece of plasticard to fit the hole.
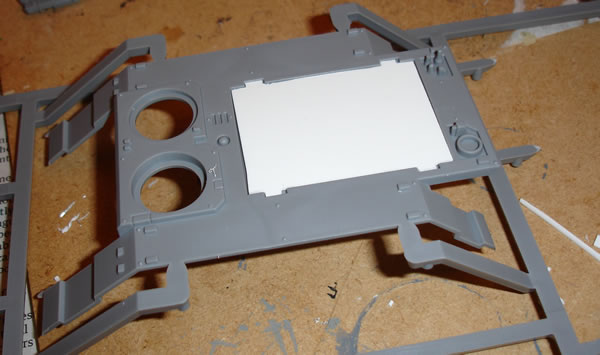
I then stuck a larger piece
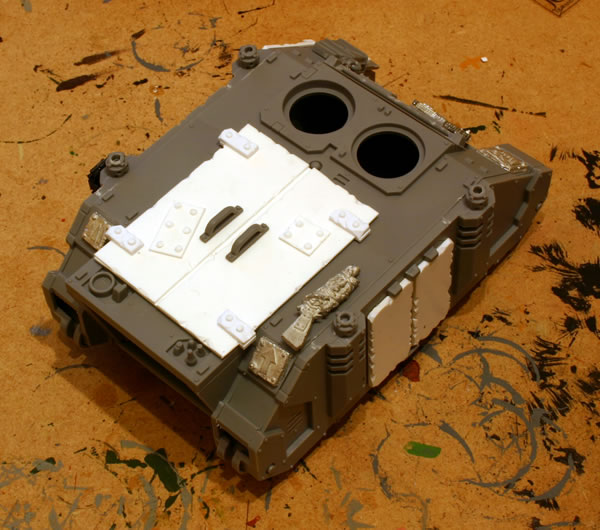
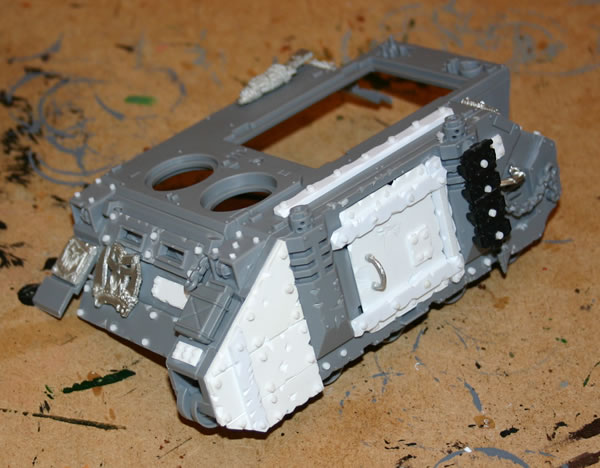
In this picture of my Looted Rhino, you can see I have started on the roof hatch which I am replacing the supplied one with an Orky version. On top of the plasticard cover (see above) I stuck two hatch doors (sutiably weathered). I also added hinges to the hatches as well.
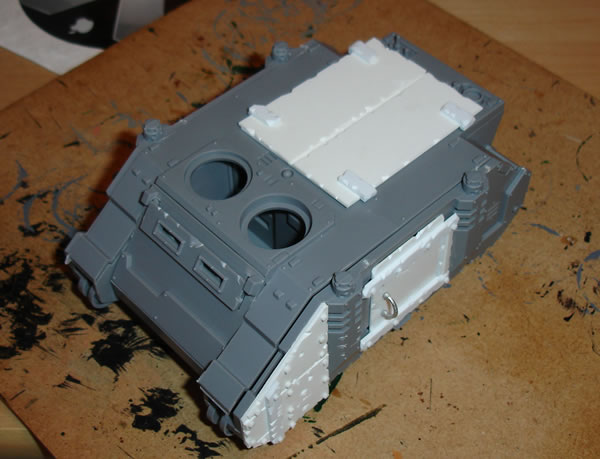
I have not actually stuck the model together, but I kind of pushed it together so that you could see how it was looking.
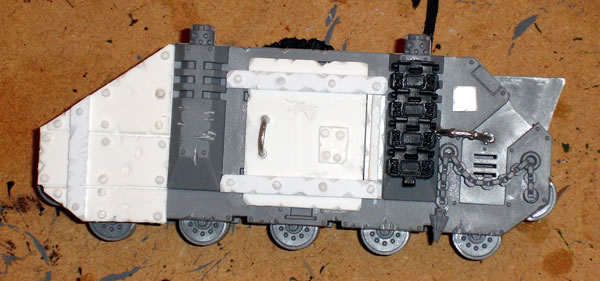
I have added some Imperial tracks as additional armour, a chain (from the Chaos Vehicle sprue), some cabling from an Ork Killan Kan extras sprue and some additional armour plates.
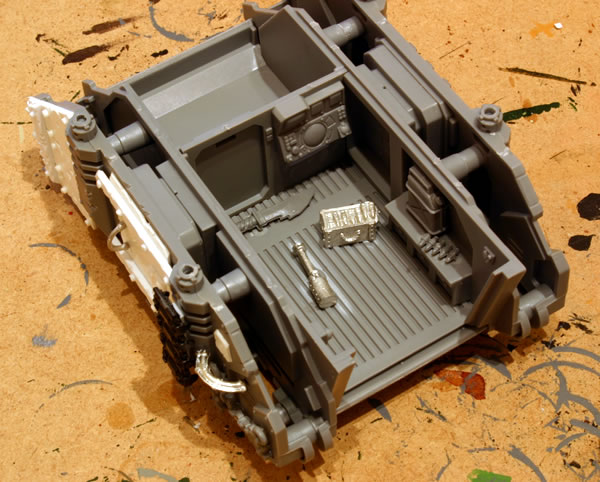
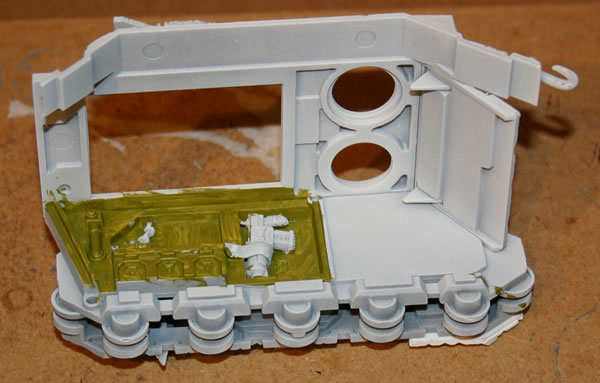
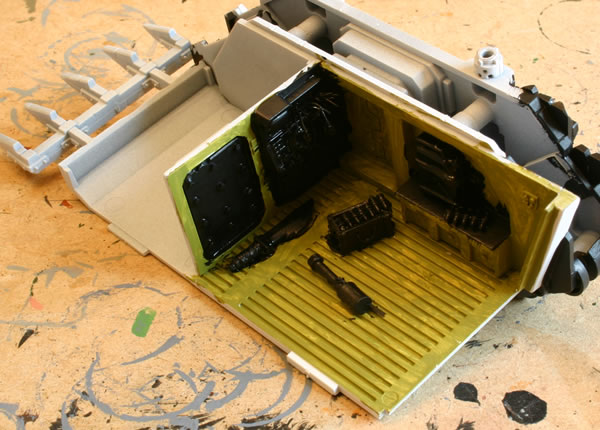
I am adding a detailed interior. I have put in a fuel can and some bullets, as well as an ammo box, a *spare* grenade and an Ork knife.
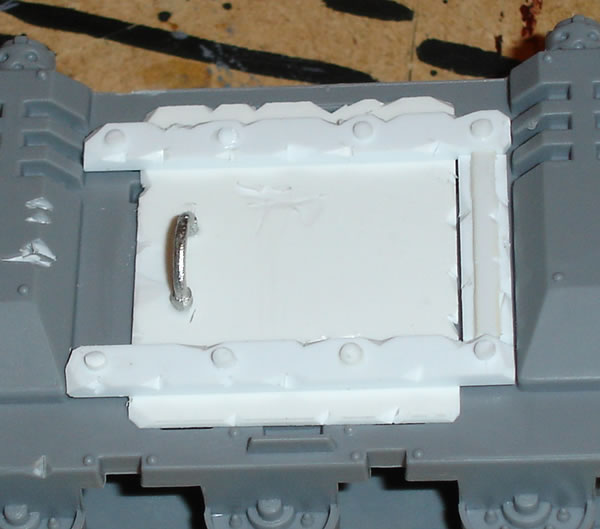
The top hatch has had some rivets added, as well as handles and some additional armour plates. I still need to add rivets to the hatches themselves and I will be using a smaller diameter of plastic rod to do those. A tip I picked up from George Dellapina was to put a bit of superglue somewhere and then using the point of the modelling knife pick up the individual rivet, dip it into the superglue and then stick down where you want to. Problems are that occasionally you lose one… The superglue will often harden, but this is only a crust and can be cracked allowing access to unhardened superglue. The handles are from the Ork Trukk as is the metal fuel can (yes I know great location for a tank of fuel….).
I added some metal glyphs from the Ork Wrecker Trukk and (I think an Ork Warbike Model). Also from the bike was a wrapped shotgun. I have added the doors on the right side. I added some tracks to add additional armour as well.
Chains from the Chaos Vehicle sprue were also added.
Holes were drilled in the exhaust vents.

I also managed to find my Snotling models which will become grot riggers.
I do hope that Forgeworld release their version in Epic scale one day…
On the right side I wanted a similar yet different effect. I added some plastic strips to the rear engine vent, and added cut rod for rivets. I added my own doors and added scratch-built hinges.
I then added a multitude of rivets.
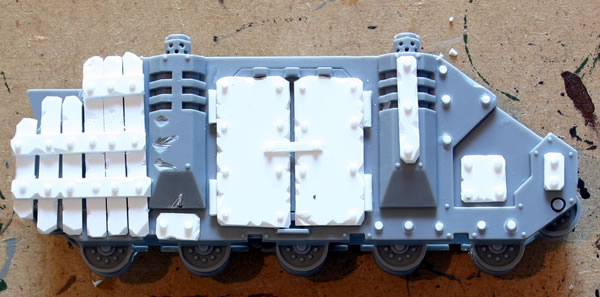
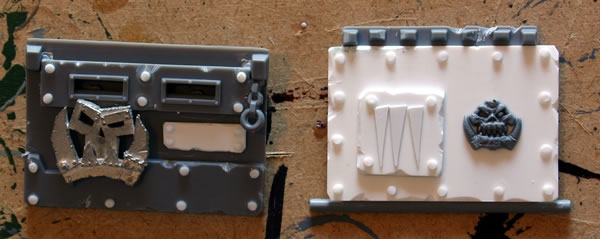
You can see here how it looks on the side of the Rhino. I also added a few metal glyphs (from the Gorkamorka Wrecker Trukk) and the shotgun from the Gorkamorka Ork Biker. You can also see the extra rivets I added to the top hatch.
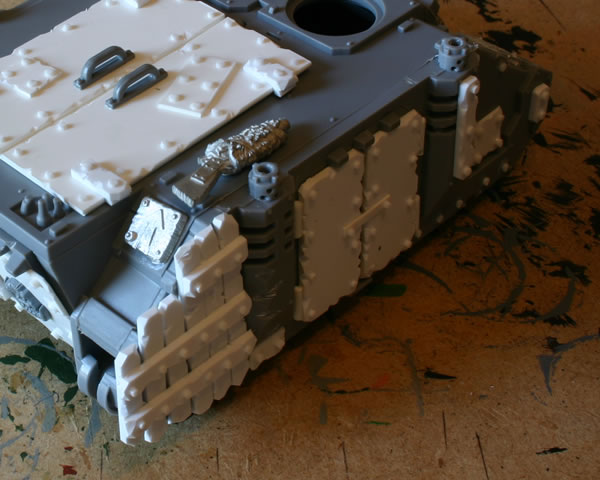
One area which I think will need work is the area circled below.
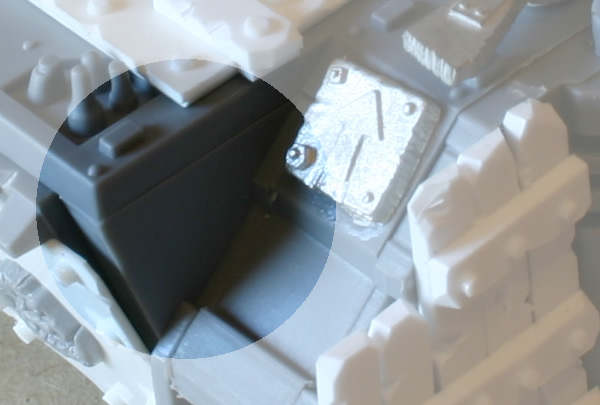
Because of the way the model fits together it doesn’t look like it will be possible to do this before I put the model together. Eventually I may just ignore it!
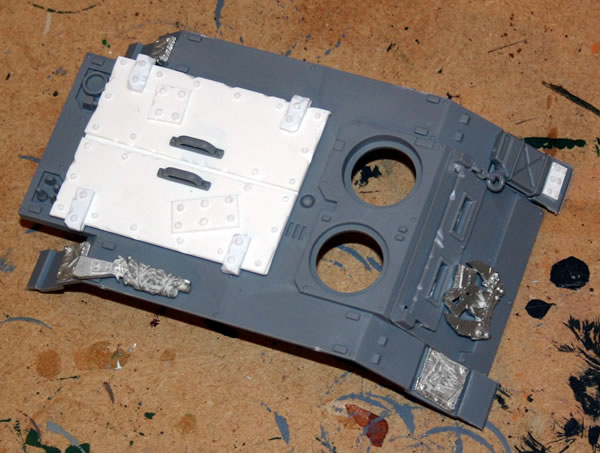
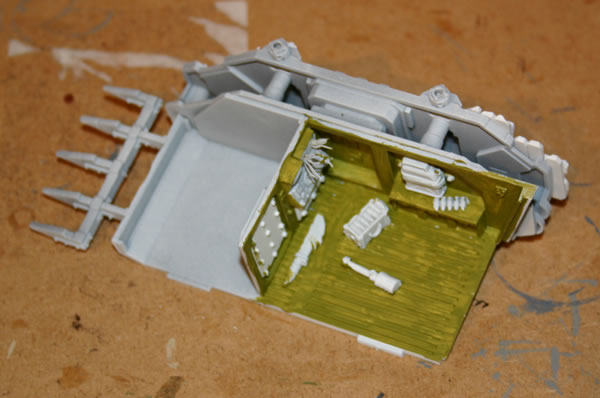
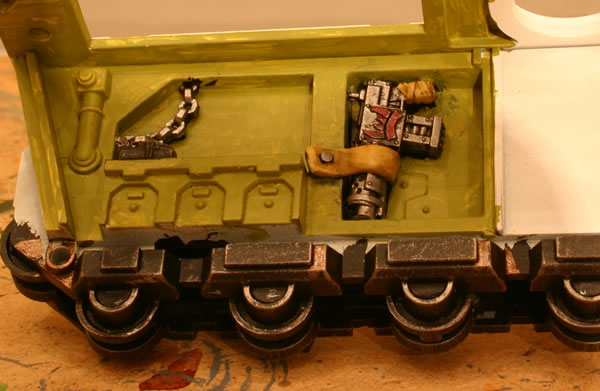
On the inside of the track units I added another fuel can and an Ork Shoota as well as some spare ammo. I added straps made out of Green Stuff and some sliced plastic rod as bolts.

I also added a chain from the Chaos Vehicles sprue.

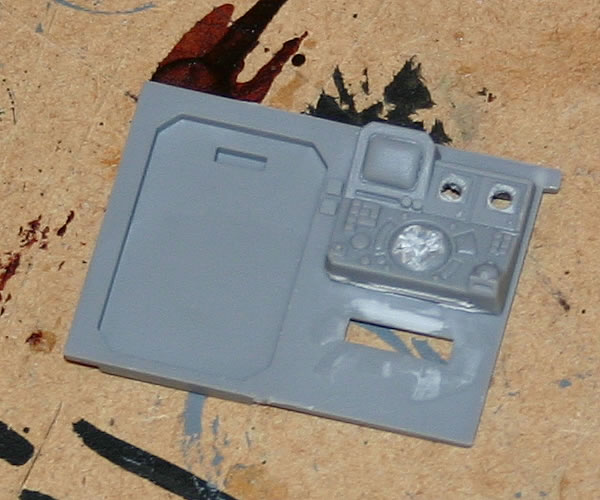
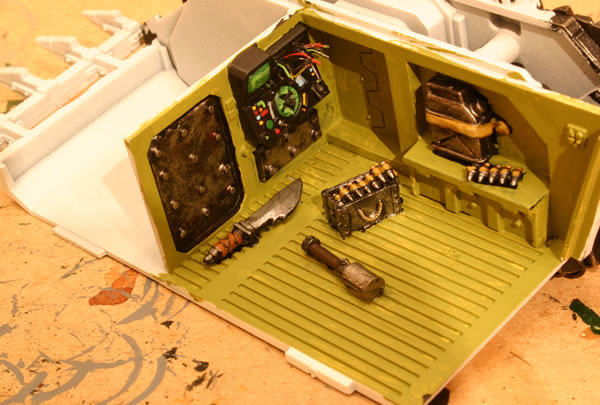
Following an idea from Tas on the EpiComms forums I have “smashed* the glass of the auspex where some ham fisted mek-boy hit it in frustration! I have also drilled holes to have some wiring which has been pulled out.
After the cracked glass of the auspex on the Ork Looted Rhino I have added the wires to the drilled holes.
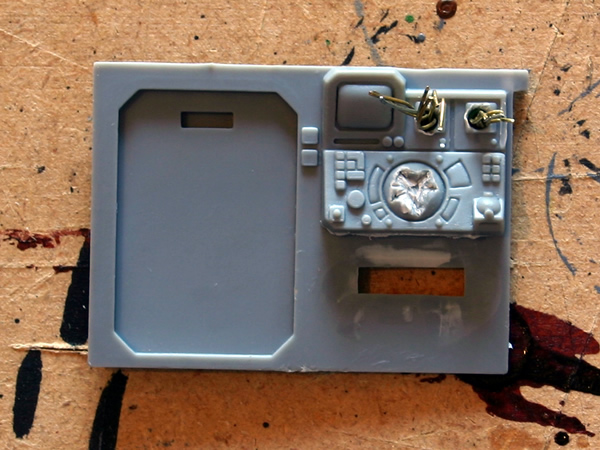
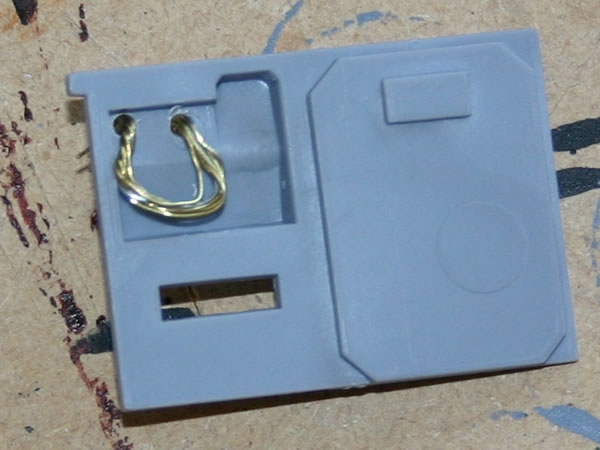
I then used some green stuff to secure the wire.
The top hatch has had more rivets added using the smaller plastic rod.
I have not glued it in as I might do some variants in the future such as an Ork Razorback or Whirlwind.
The front has had an icon, a plate and some chain added and some additional rivets.
The back ramp has been replaced by an armour plate with glyph and Ork icon. I am also detailing the inside of the ramp as well.

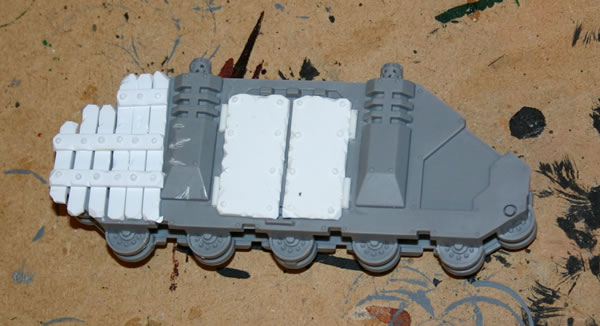
I then prepared the model for undercoating by basically splitting it in two. I stuck the floor and the right side together.

I then stuck the roof, the right side and the front panel together.
In the end this was a mistake as it was a real pain to eventually put the two halves together and I certainly wouldn’t recommend doing it this way and if (or when) I make a second Ork Rhino I won’t be doing it this way.
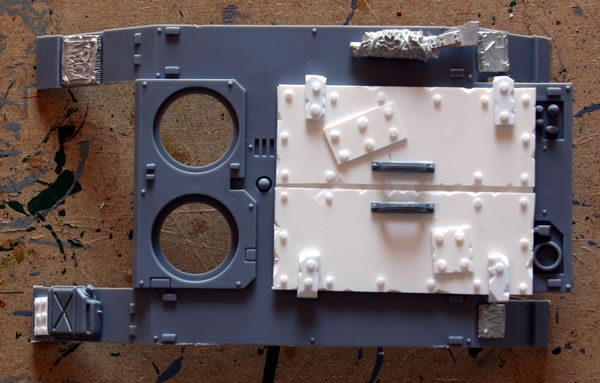
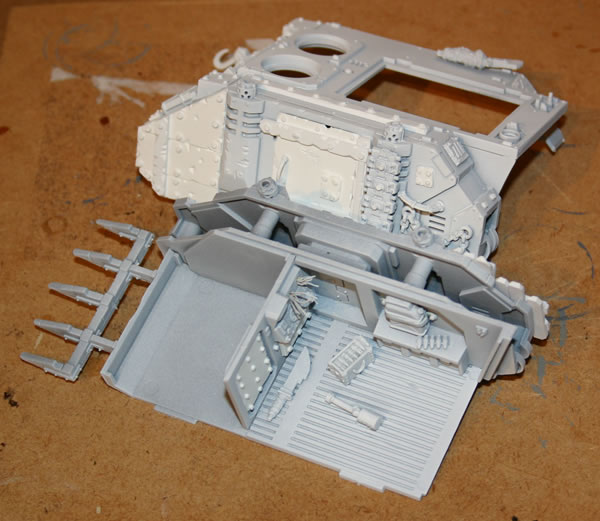
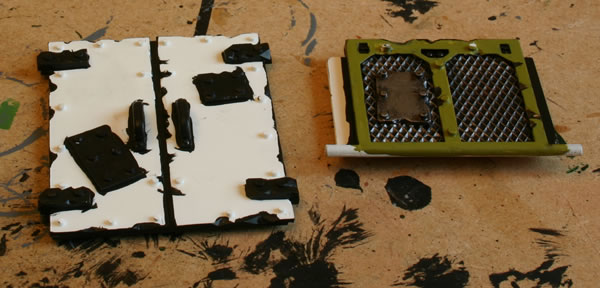
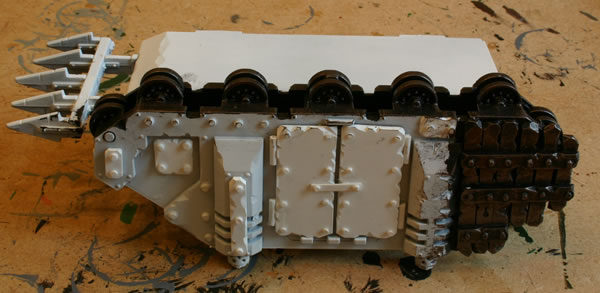
I then gave the model a white undercoat, here is the floor and the left.
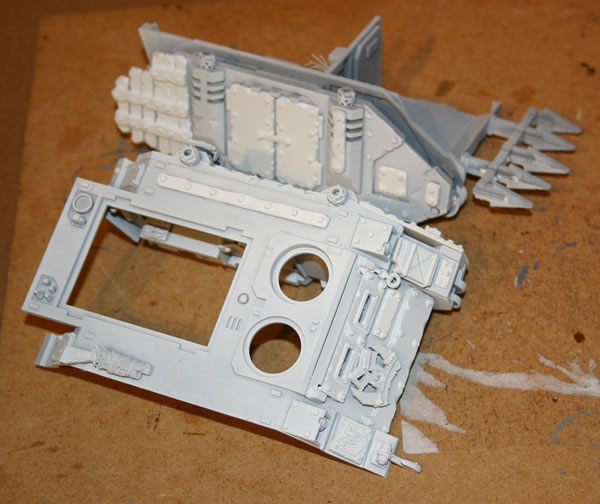
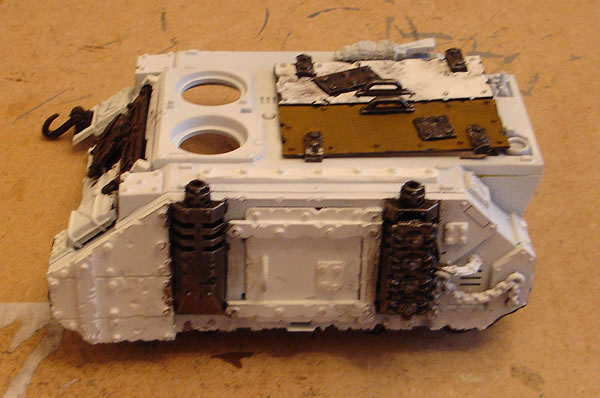
Here is the top and the right.
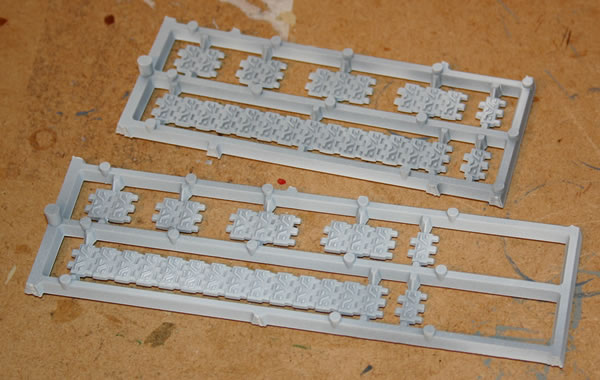
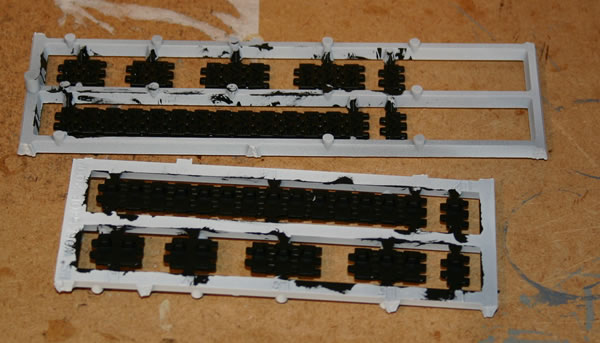
I also undercoated the tracks which I left on the sprue.
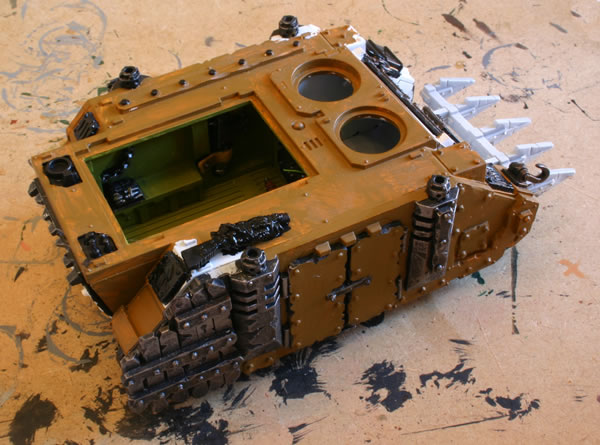
One of the things I wanted to do with my Ork Looted Rhino was a detailed painted interior.
Having undercoated the model, I gave the interior a coat of Camo Green to give it an armoured vehicle green look.
The bitz inside will be undercoated black.
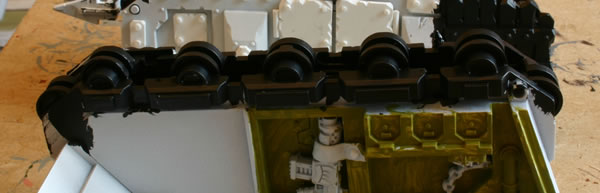
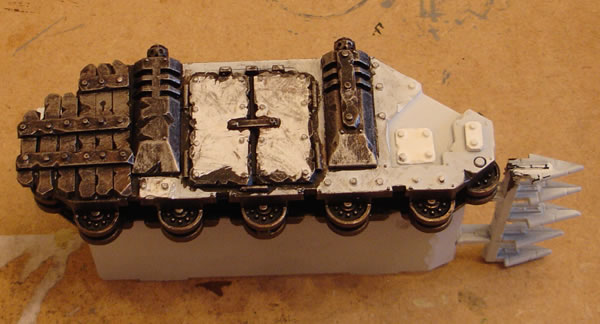
Having undercoated the Rhino white, I painted the wheels of the track sections black. You can see how I have also painted one the Ork armoured panels black as well.
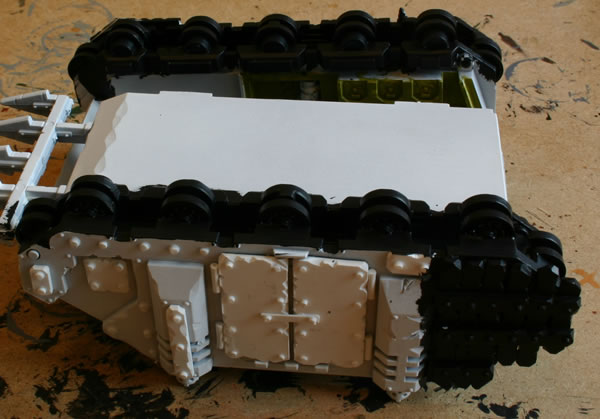
The axels were also painted black.
The inside bitz were painted with Chaos Black.
I drybrushed the bitz inside with Tin Bitz and Boltgun Metal. I then started added detailing to the control panel and painted the wiring.
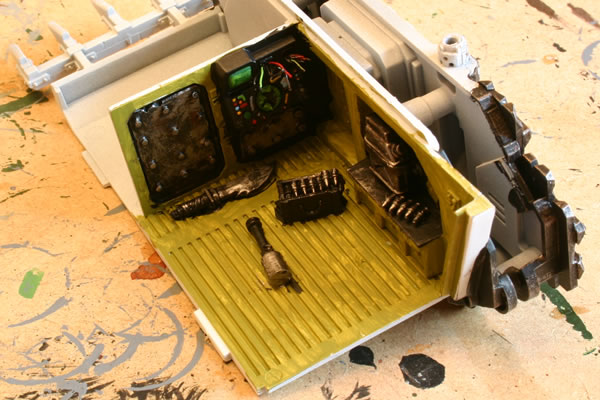
I added detailing to the Ork Shoota and painted the restraining straps with Snakebite Leather.
I painted a lot more of the detail and added some brown to the other bitz.
For the top hatch I painted various aspects of it black, whilst the inside of the rear hatch was mainly black with some of the green interior paint.
For the top hatch I then gave it a drybursh of Tin Bitz and Boltgun Metal.

I painted the tracks black.
I drybrushed the tracks with Tin Bitz and Boltgun Metal.
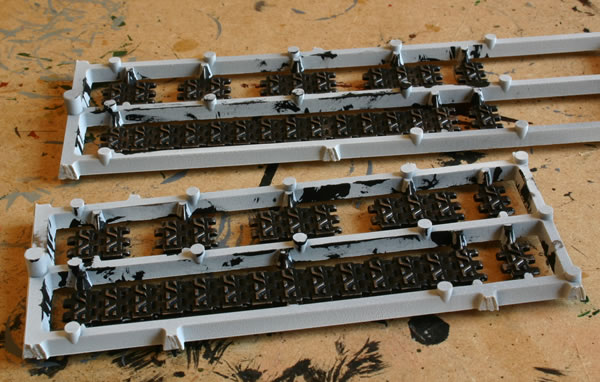
I drybrushed the tracks with Tin Bitz and Boltgun Metal.
… and one of the Ork’s added armour panels.
At this point I then decided to do the exhausts in a similar manner.
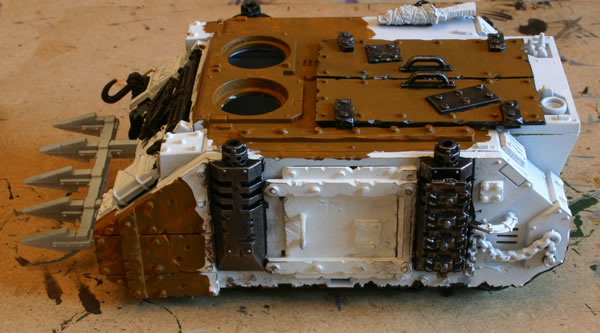
This is the left side. You can see I have also done some black on the front panel. I have started the brown with the hatch to see if it worked. I used Snakebite Leather (it was this colour or the Vomit Brown I used on my Ork Fighter Bommer).
More Snakebite Leather…


Even more Snakebite Leather… As you can see it is now looking a lot better.

I am pleased with the inside.

tIt’s just a pity that for most of the time it won’t be seen…

I still have to paint some of the detail black and finish off the brown basecoat. I will then give it a wash and a drybrush before adding more detail.

I have painted more of the detail black (notably the gun (from the Gorkamorka Ork Biker) and the Ork Glyphs). I have also painted more of the hull.
I still have to paint the front and the side as well as the spiky bit at the front, bit I am making progress.


Finished off the base coat. Here it is with the hatch off and the rear ramp down.

Next will be to give it a wash of dark ink with some paint to offset the gloss of the ink. Here it is “closed down” with the hatch on and ramp up. The hatch was scratchbuilt.


I have started work on an Ork Gunner for my Looted Rhino. I have used a resin Twin Big Shoota from Forge World.

Here is how it is looking with the gunner. Not sure what I am going to do with the other hatch space.

Another alternative weapon I am looking at for my Looted Rhino is using a Burna/Skorcha. The metal part is from a Killa Kan.

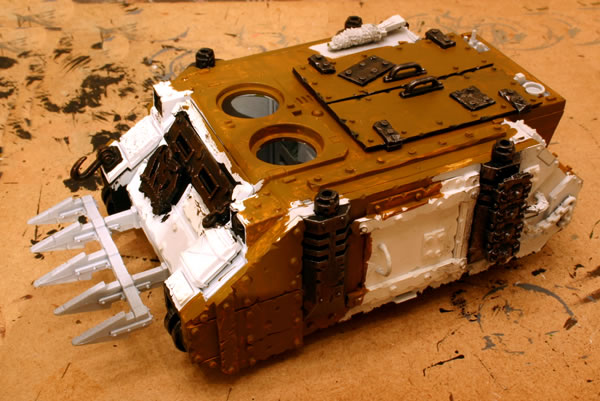
Having finished the base coat I gave the Looted Rhino a wash consisting of Chestnut Ink, Scorched Brown paint (which helps remove the gloss of the ink) and some water to thin the wash down.


Some more views


Of course one of the problems with using a wash like this and having a detailed interior is that when the wash leaks through the door gaps (as it usually will) it stains the interior paintwork.

There are other issues as well as the wash missed bits of the bodywork leaving the raw basecoat. So I have a bit of touching-up to do on the rear ramp.

The next thing I did was to drybrush the whole Rhino. I used Snakebite Leather which I added some Bleached Bone when I added the second drybrush highlight.


I undercoated the twin-linked big shoota gunner, and it was only after I placed him on the Rhino I realised that I had glued him into the cupola incorrectly, made him look more like an AA gunner than a normal gunner, ah well time to break him apart.

I have been thinking about using the turrets from the Ork Battlewagon on my Looted Rhino. When I was constructing the Ork Battlewagon I decided against using the included turret. This is how the Battlewagon looks with the included turret, though I decided not to use it with the Battlewagon, made it a little too tall for my liking.

So it made sense for me to use it on another vehicle.

I decided that I would use two undercoats, a black undercoat for some of the model and a white undercoat for the main bodywork. In order to achieve this I masked off the areas of the model that would be brown.
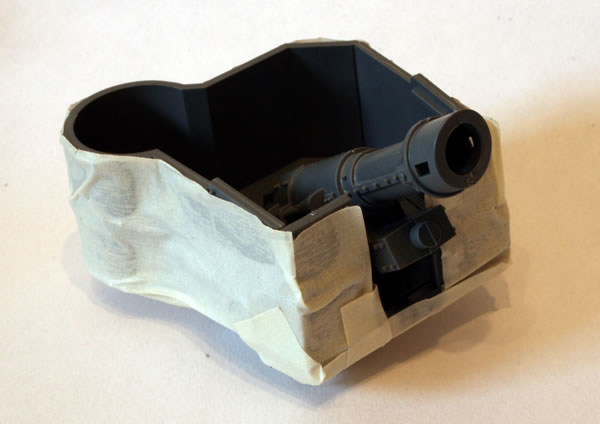

I decided that as I was using this on the Looted Rhino that I could get away with using an Imperial turret hatch and so I could use one of the Ork turret hatches (or mini turret) on another Ork vehicle.
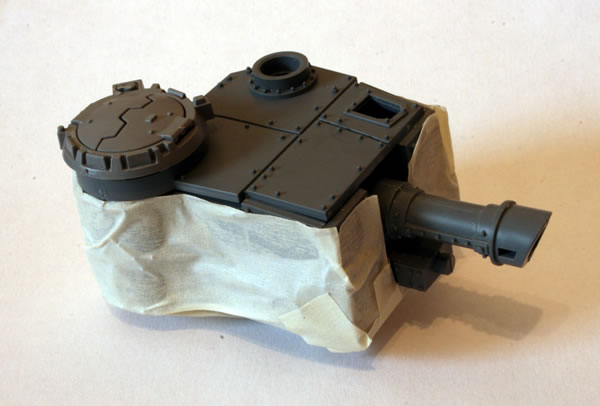
I then gave the model a black undercoat.


There was an Imperial Predator turret ring in the Rhino kit and this nicely fitted the Ork Battlewagon turret, as well as fitting the Rhino hatch area.
So here is how it looks on the looted rhino.

The Battlewagon had additional smaller turrets, and a Heavy Bolter cupola so I decided to try them out as well and see how they looked.
The turrets and the cupola were given a white undercoat.


So here are some photographs seeing how the different turrets look on the looted rhino.

Here is the smaller turret.


So here are some more photographs seeing how the Heavy bolter cupola looks on the looted rhino.

Remembering that as well as the extra turrets I do need to finish this model, I painted the front spiked prow with black paint.

I started painting the base coat on the Battlewagon turrets that I intend to use with the Looted Rhino.

I started painting the base coat on the Battlewagon turrets that I intend to use with the Looted Rhino.


I was painting the tracks for my Repressor and Razorback when I realised I had three sets of tracks. It took me a while, before I realised that the tracks were for my Ork Looted Rhino. I actually thought I had affixed them, but obviously I hadn’t.
So, I went through some boxes and I got the Looted Rhino and reflected on progress. Yes the base coat was done and there was quite a bit of weathering.
Though I hadn’t used it as a transport in games, I have used it as scenery in a few games.

So I started looking at progress on the model.

I still needed to do the iconography, some of the attached baggage. I also needed to do the front hatches. Though I had done most of the interior and was pleased with that.

Looking over the model I realised I still needed to do a fair amount of work to get it done.

Ah well, back it goes on the workbench.
I had painted the tracks on the sprues.

I had drybushed them with Leadbelcher.
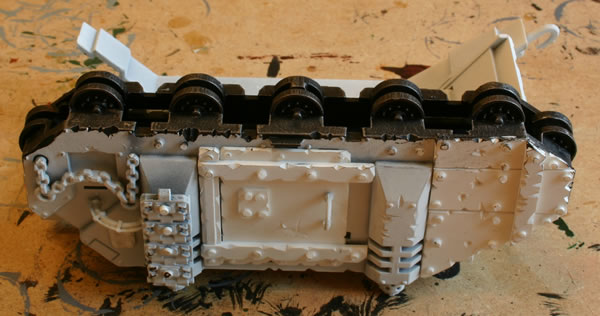
I realised I had no idea how the different parts were affixed to the Rhino. I also had no idea where the kit instructions were. So, a quick Google search found some Rhino instructions. The tracks were marked L and R, which of course meant left and right. It was useful to see the instructions as there were seven parts for each track.
I snipped them off the sprues and affixed them to the Looted Rhino with superglue.

This is the underneath view.

They were relatively easy to fix, though they were a little tight fitting them under the fenders or mudguards. I now need to touch them up where they joined the sprue. I will then do some additional weathering, using shades and drybrushing.
When I was constructing the Ork Battlewagon I decided against using the included turret. So I decided to have a go at seeing how it and some smaller turrets looked on my Ork Looted Rhino.
Having given the turrets a white undercoat back when I started the model I then gave them a base coat of Snakebite Leather. So this is where I was at with them when I looked at finishing the Ork Looted Rhino.

I suspect the white part of the turret was where I was holding it while painting it.

Here is the smaller front turret.

Here is the Heavy Bolter cupola.

For some arcane reason (probably lack of time and motivation) I put the turrets away for a few years…
Getting them out again recently I decided to finish them off. The first challenge was that Snakebite Leather is no longer available. However using a paint compatibility chart, I completed the turrets using Balor Brown.
However it wasn’t an exact match, so I repainted the whole turret using Balor Brown.

I did the same for the smaller turret and the cupola.

Now I had to work out how to make these newly painted turrets look like the same as the Looted Rhino bodywork even though they were painted years apart. My own guide was not as useful as I hoped as the paints, inks and washes I used back then are no longer available.
I also found a Flamer cupola as well.

However the metal component makes this unbalanced, so would need to be glued in, rather than being removable.
Having painted the turrets, I gave the Heavy Bolter Cupola a wash of Agrax Earthshade.

This wasn’t quite the effect I wanted, in order to match the existing Rhino body. Close, but not close enough.
There are Orks who have looted Imperial weaponry. Not only can they use Space Marine weapons they can also borrow the transport. I wrote about my Ork Looted Rhino and where I was in progressing it.
When I was constructing the Ork Battlewagon I decided against using the included turret. So I decided to have a go at seeing how it and some smaller turrets looked on my Ork Looted Rhino. I attempted to paint them to match the existing paintwork using a wash of Agrax Earthshade. This didn’t work. I then tried using Snakebite Leather contrast paint.

I was really pleased with the end result. So I did the same for the other turrets.

Here is the larger turret.

I am pleased with how well this process matches my existing process.


I then attached two glyphs to the big turret on my Ork Looted Rhino.
