Inquisitorial Valkyrie lands to disembark some Storm Troopers.

From a demonstration game at Bristol Conflict 2003.
More photographs of Inquisitorial Storm Troopers Valkyrie Transport and Imperial Guard Valkyrie Transport.
warhammer, wh40k, flames of war, bolt action, aeronautica imperialis, star wars, models, news, views and stuff
Inquisitorial Valkyrie lands to disembark some Storm Troopers.
From a demonstration game at Bristol Conflict 2003.
More photographs of Inquisitorial Storm Troopers Valkyrie Transport and Imperial Guard Valkyrie Transport.
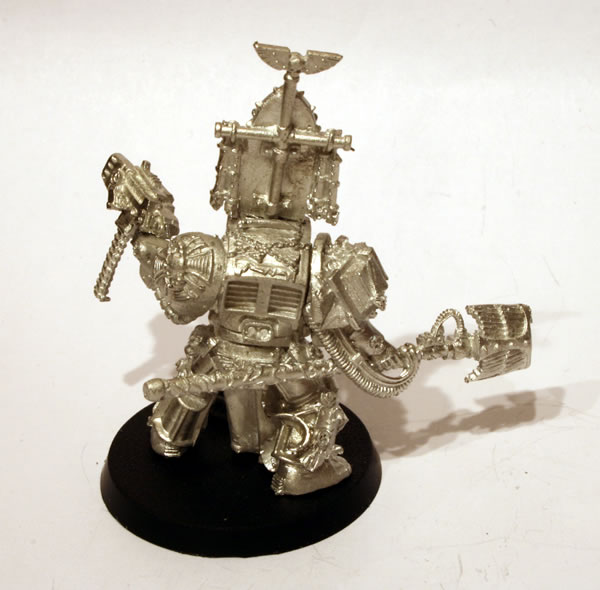
As part of my Daemonhunters’ army I have a retuine for my Daemonhunter Inquisitor including an Acolyte, a trainee Inquisitor.
Having painted the parchment on the figure, I added the writing. I have also highlighted the purple cloak with Warlock Purple paint.
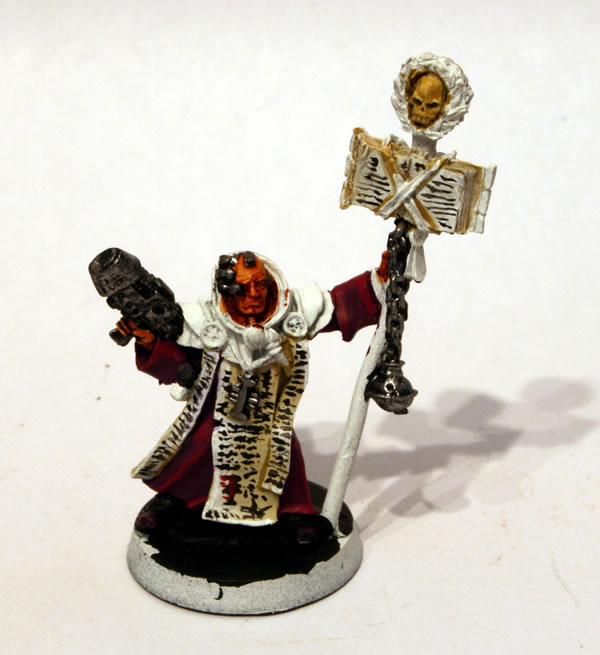
Personally I am not too happy with the text writing so I may start over and try again.
Full workbench feature on the Acolyte.
After quite a long time I have finally finished the first of my Grey Knights.
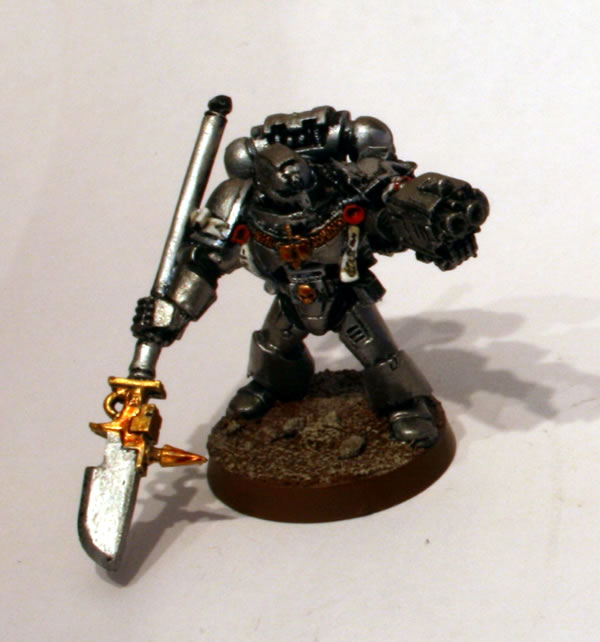
These were started a few years ago and I never really got around to spending huge amounts of time on them, as other projects always seemed to take over.
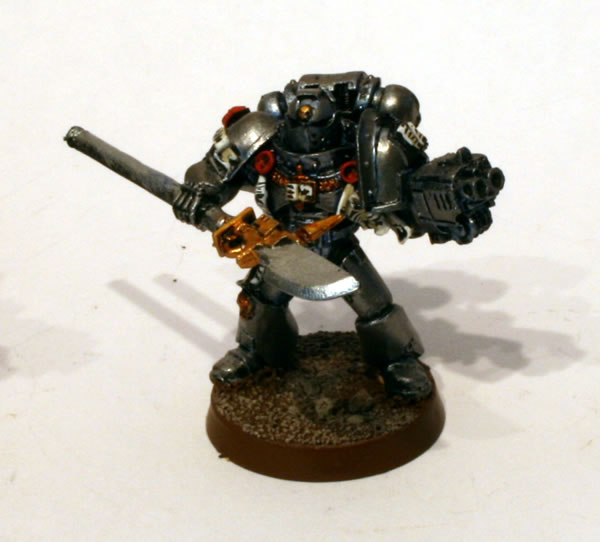
I am quite pleased with them and I am using them as the basis for my other Grey Knights.
I am using desert basing to fit in with my desert terrain.
You can see how I painted these Grey Knights in the full workbench feature on them.
Having finished a lot of my Grey Knights Land Speeder, I started working on the crew.
I started with a black basecoat and then gave the armour a basecoat of Boltgun Metal.
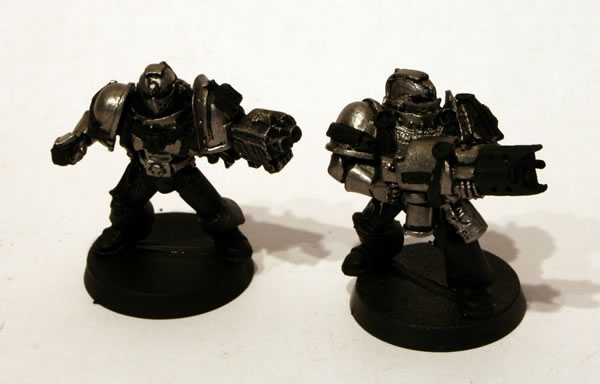
Next stage will be highlights and details.
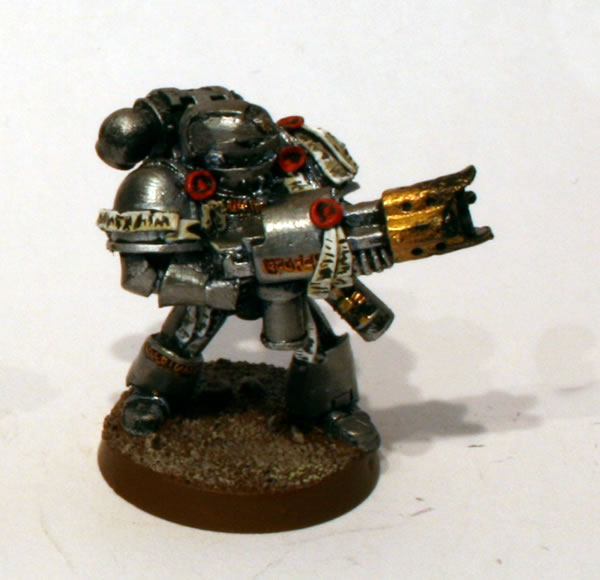
My main force of Daemonhunters Inquisitorial Stormtroopers are based on the Cadian Kasrkin, this was a boxed set I got years ago (when they came out if I remember correctly). They were stuck and based a few years back, as well as undercoated white, and then (as I guess with many miniatures) left in a box.
I recently got them out to start painting them. The first stage was a basecoat of Desert Yellow. These are the heavy weapon troopers and the sergeant.
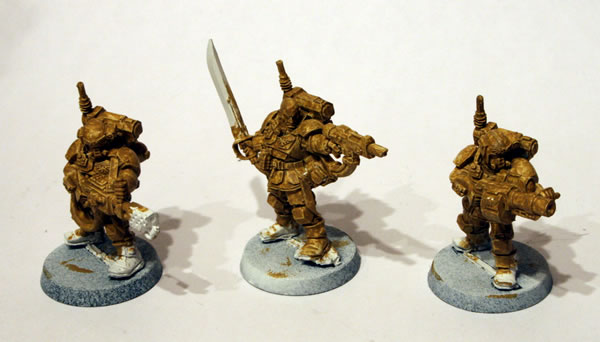
This is quite a watery thin paint compared to other Citadel paints, but was just like thinning any other Citadel paint with water without actually needing to do that. Here is the rear view, and unlike most Imperial Guard, the Cadian Kasrkin have backpacks which identifies them as stormtroopers.
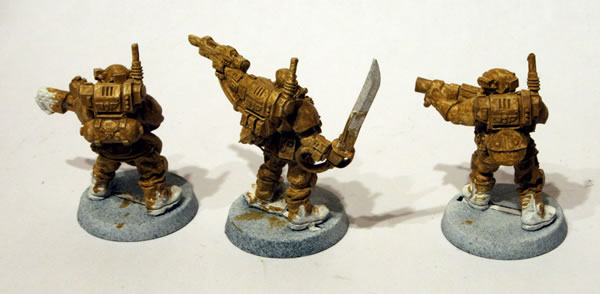
I have left the boots alone, as these will be painted Scorched Brown. I do like these models which are really well sculptured.
Well with Christmas now over and the dust settling I can now take a look at my booty.
Simon very nice of him got me a couple of Grey Knight Terminators which will go nicely with my Librarian.
As well as those two, from the in-laws I got some Tallarn Imperial Guard (to use as I have already done as Inquisitorial Storm Troopers) and Space Marine Veterans (which will be used as the blister pack I got as Grey Knights).
My wife (thank you) got me the Masters of the Chapter boxed set, alas (or luckily) she actually got me two boxes… accidently. So one of those will be going back to be swapped, probably for some of the new Ork models.
No Forge World models, as their shipping delays put people off.
In all a very nice haul.
The greatest threat to the Imperium of Man is, and has always been, the followers of Chaos and the foul daemons of the Warp. The Inquisitors of the Ordo Malleus, the Daemonhunters, are at war with forces too terrible to comprehend and, together with the holy warriors of the Grey Knights, they must take the light of the Emperor into the darkness. The threat of the daemonic is so great that only these heroic warriors have the necessary skills and knowledge to stand against such diabolical foes.
I am slowly building up my Grey Knights army (and doing even less painting).
I purchased the new Space Marine Librarian in Terminator armour as I really do like the model and for me will certainly fit into my Grey Knights army with all the books and purity seals.
Obviously at £8 it is quite expensive for a single model, but then when has Games Workshop ever made “cheap” models.
Nice model and nice that all the weapon options are included.
The model comprises three castings.

The fit of the pieces is okay, but a couple of times as I was sticking another piece on the other arm fell off. It also took a fair bit to get the model onto the 40mm base.
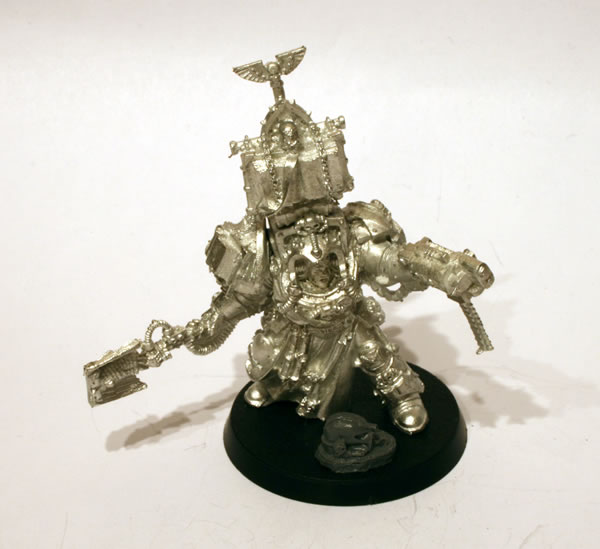
A very ornate model, will be fun to paint.
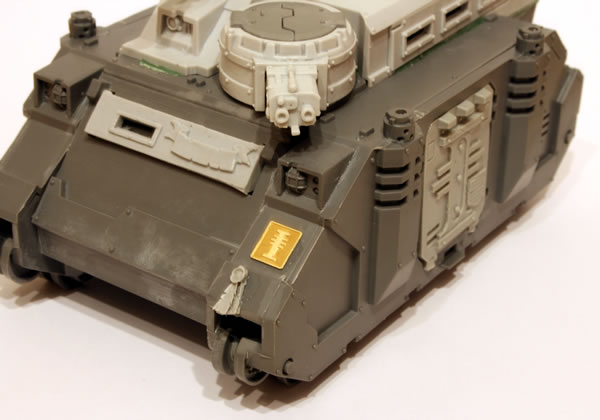
After looking at my Grey Knights Razorback I decided it needed a little more iconography to make it more Grey Knights than just plain vanilla Space Marine, so I added more icons and purity seals.
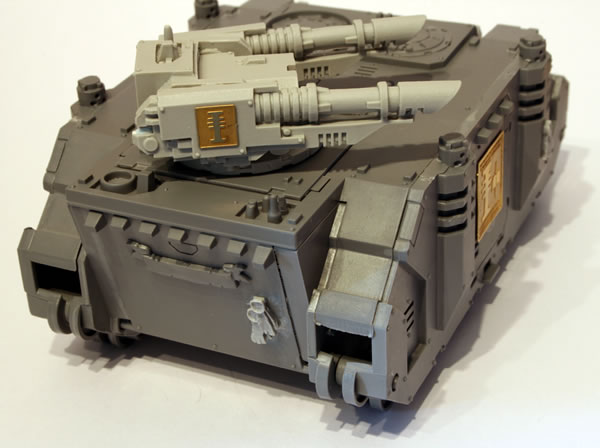
Some to the main weaponry and some to the back door.
Next stage is a black undercoat.
I have added the lascannon sponsons to my Daemonhunters Mark IIb Land Raider.

They fit over the gaps where the doors and lascannon assemblies go on the “traditional” plastic “modern” Land Raider.

I have used Inquisitor Rhino doors on the sponsons, the normal Land Raider doors don’t fit they are slightly bigger.
I much prefer this model over the “modern” Land Raider and if I get a second Land Raider then it will be another Mark IIb.
This then begs the question what do I do with Grey Knights Land Raider doors I have?
Full workbench feature on the Mark IIb Land Raider.
I have been adding some more symbology and seals to my Inquisitorial Stormtrooper Repressor.
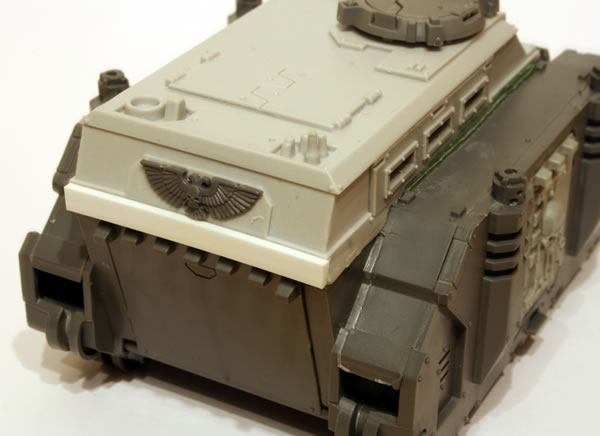
I have been using Forge World’s Inquisitor brass etchings and their resin purity seals.
They are a nice and simple (yet effective) way of adding character to Daemonhunter vehicles.
Workbench feature on the Inquisitorial Stormtrooper Repressor.