Constructing the Legion Deimos Pattern Rhino

I pre-ordered the Horus Heresy Deimos Pattern Rhino and having picked it from my local FLGS I did think, would I leave it on the shelf for a few months (or years) before I started on it. Well I even surprised myself and actually started it a day or so after picking it up.

The model has many more parts and is a more detailed kit than the original plastic Rhino kit that came out in the 1980s.

It does go together quite easily, though I found some parts challenging.

I did think the rear door ramp was hard to attach. Also ensuring there are no gaps with the top superstructure was a bit of a challenge.

I decided not to paint the interior, though I am tempted to get another kit and do the interior on that one.

I added the final parts to the model.

I went with a simplistic version, single bolters.

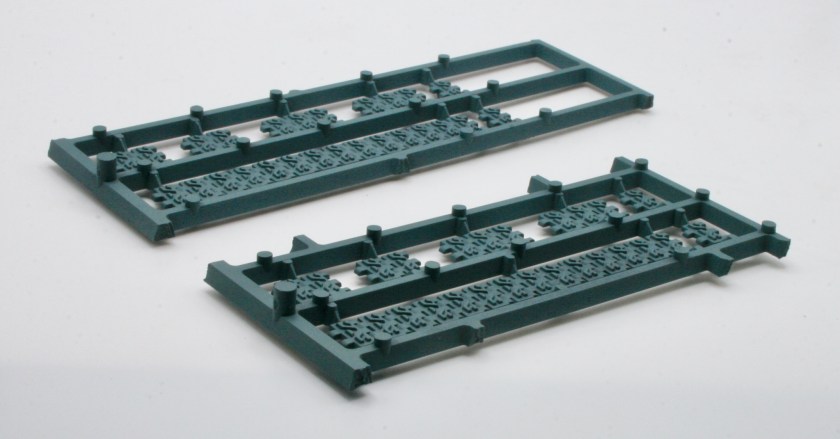
I have left the tracks off and will be painting those separately.

The next stage will be a white undercoat.

Undercoating the Thermic Plasma Conduits

I picked up a copy of Warhammer Imperium Issue 37 which comes with some Thermic Plasma Conduits.

This kit is no longer available from Games Workshop and you get one sprue which allows you to build a series of conduits.

The kit goes together quite easily. I made mine into three large conduits.

The models were then given a white undercoat.

Next step will be the basecoat.

Drybrushing the Converted Factorum Ruins

Having converted and constructed the Ruined Factorum into two different ruins, the next stage was giving them a white undercoat. Then it was onto painting them and giving them a wash. 

I had got a couple of Ruined Factorum sprues that came with Warhammer 40000 Imperium 34. The ruins are from the The Battlezone: Manufactorum – Sub-cloister and Storage Fane kit.  You get two more corner ruins, all coming on a single sprue. I did manage to pick up a second magazine and decided that I would convert them. It was a relatively simple conversion swapping over the corners. 

I then drybrushed them using Citadel Dry paints. I first used some Dawnstone Dry Paint and then a lighter drybrush of Terminatus Stone.

Drybrushing the Ruined Factorum

I got the Ruined Factorum sprue from the Warhammer Imperium part work, issue #31. I constructed the model, undercoated it, and after giving the model a basecoat of Mechanicus Standard Grey Spray I gave the model a wash of Nuln Oil Shade.
Once the model was dry I drybrushed the model. I first used some Dawnstone Dry Paint and then a lighter drybrush of Terminatus Stone.

These photographs don’t really show the finished model, so I think I will need to retake them. This one taken with a phone does show off the drybrushing much better.

White Ruined Factorum

I got a couple of Ruined Factorum sprues that came with Warhammer 40000 Imperium 34. The ruins are from the The Battlezone: Manufactorum – Sub-cloister and Storage Fane kit. There are going to be further releases of these ruin sprues in later issues of Warhammer 40000 Imperium.

Having constructed the models I gave them a white undercoat.

One I am going to paint in the same manner as the first Ruined Factorum I got, the second I am intending to follow the (white and red) paint scheme as outlined in Warhammer 40000 Imperium.

I sprayed the model a few more times with the Corax White spray. I then, following the instructions painted the doors and window frames with Mephiston Red base paint.

The model has two pieces, a larger ruined building and a smaller ruined corner.

The next step will be to wash the model with Nuln Oil Shade.

Painting and Washing the Converted Factorum Ruins

Having converted and constructed the Ruined Factorum into two different ruins, the next stage was giving them a white undercoat. The next step was painting them and giving them a wash. 

I had got a couple of Ruined Factorum sprues that came with Warhammer 40000 Imperium 34. The ruins are from the The Battlezone: Manufactorum – Sub-cloister and Storage Fane kit.  You get two more corner ruins, all coming on a single sprue. I did manage to pick up a second magazine and decided that I would convert them. It was a relatively simple conversion swapping over the corners. 

I gave the ruins a base coat of Mechanicus Standard Grey Spray. The ruins were then given a wash of Nuln Oil Shade.

Constructing the Thermic Plasma Conduits

I picked up a copy of Warhammer Imperium Issue 37 which comes with some Thermic Plasma Conduits.

This kit is no longer available from Games Workshop and you get one sprue which allows you to build a series of conduits.

The kit goes together quite easily. I made mine into three large conduits.

The next stage will be a white undercoat.

Thermic Plasma Conduits


I picked up a copy of Warhammer Imperium Issue 37 which comes with some Thermic Plasma Conduits.

This kit is no longer available from Games Workshop and I did quite like the idea of these and using them with the ruined factorum models that I also got from earlier issues of Warhammer Imperium.

You get one large sprue which splits into two smaller sprues, and allows you to build a series of conduits.

The finished model looks quite effective.

Undercoating the converted ruins.

Having picked up the Ruined Factorum sprue that came with Warhammer 40000 Imperium 31 a couple of weeks back, I set myself a reminder, to purchase issue 34 for the second sprue .

The ruins are from the The Battlezone: Manufactorum – Sub-cloister and Storage Fane kit which did cost £37.50 at Games Workshop and contains two similar sprues. So at £8.99 you would be making a saving of £9.76. However you can’t buy the kit anymore anyhow.

This time, as before, you get two more corner ruins, all coming on a single sprue.  I did manage to pick up a second magazine and decided that I would convert them. It was a relatively simple conversion swapping over the corners. With the larger sides I needed to cut them down.

Having converted and constructed the models, so I now have two different (yet similar) ruins.

I gave them a white undercoat.

You can see what I did by comparing the photo above with the photo of the unconverted ruin.

This is the other converted ruin.

You can see what I did by comparing the photo above with the photo of the unconverted ruin.

I am intending to follow the same painting process I used on the original ruins.

Undercoating some more of the Ruined Factorum

I got a couple of Ruined Factorum sprues that came with Warhammer 40000 Imperium 34. The ruins are from the The Battlezone: Manufactorum – Sub-cloister and Storage Fane kit which did cost £37.50 at Games Workshop and contains two similar sprues. So at £8.99 you would be making a saving of £9.76. However you can’t buy the kit anymore anyhow.

There are going to be further releases of these ruin sprues in later issues of Warhammer 40000 Imperium.

Having constructed the models I gave them a white undercoat.

The model has two pieces, a larger ruined building and a smaller ruined corner.


This is the larger corner ruin.

I bought another sprue. One I am going to paint in the same manner as the first Ruined Factorum I got, the second I am intending to follow the (white and red) paint scheme as outlined in Warhammer 40000 Imperium.