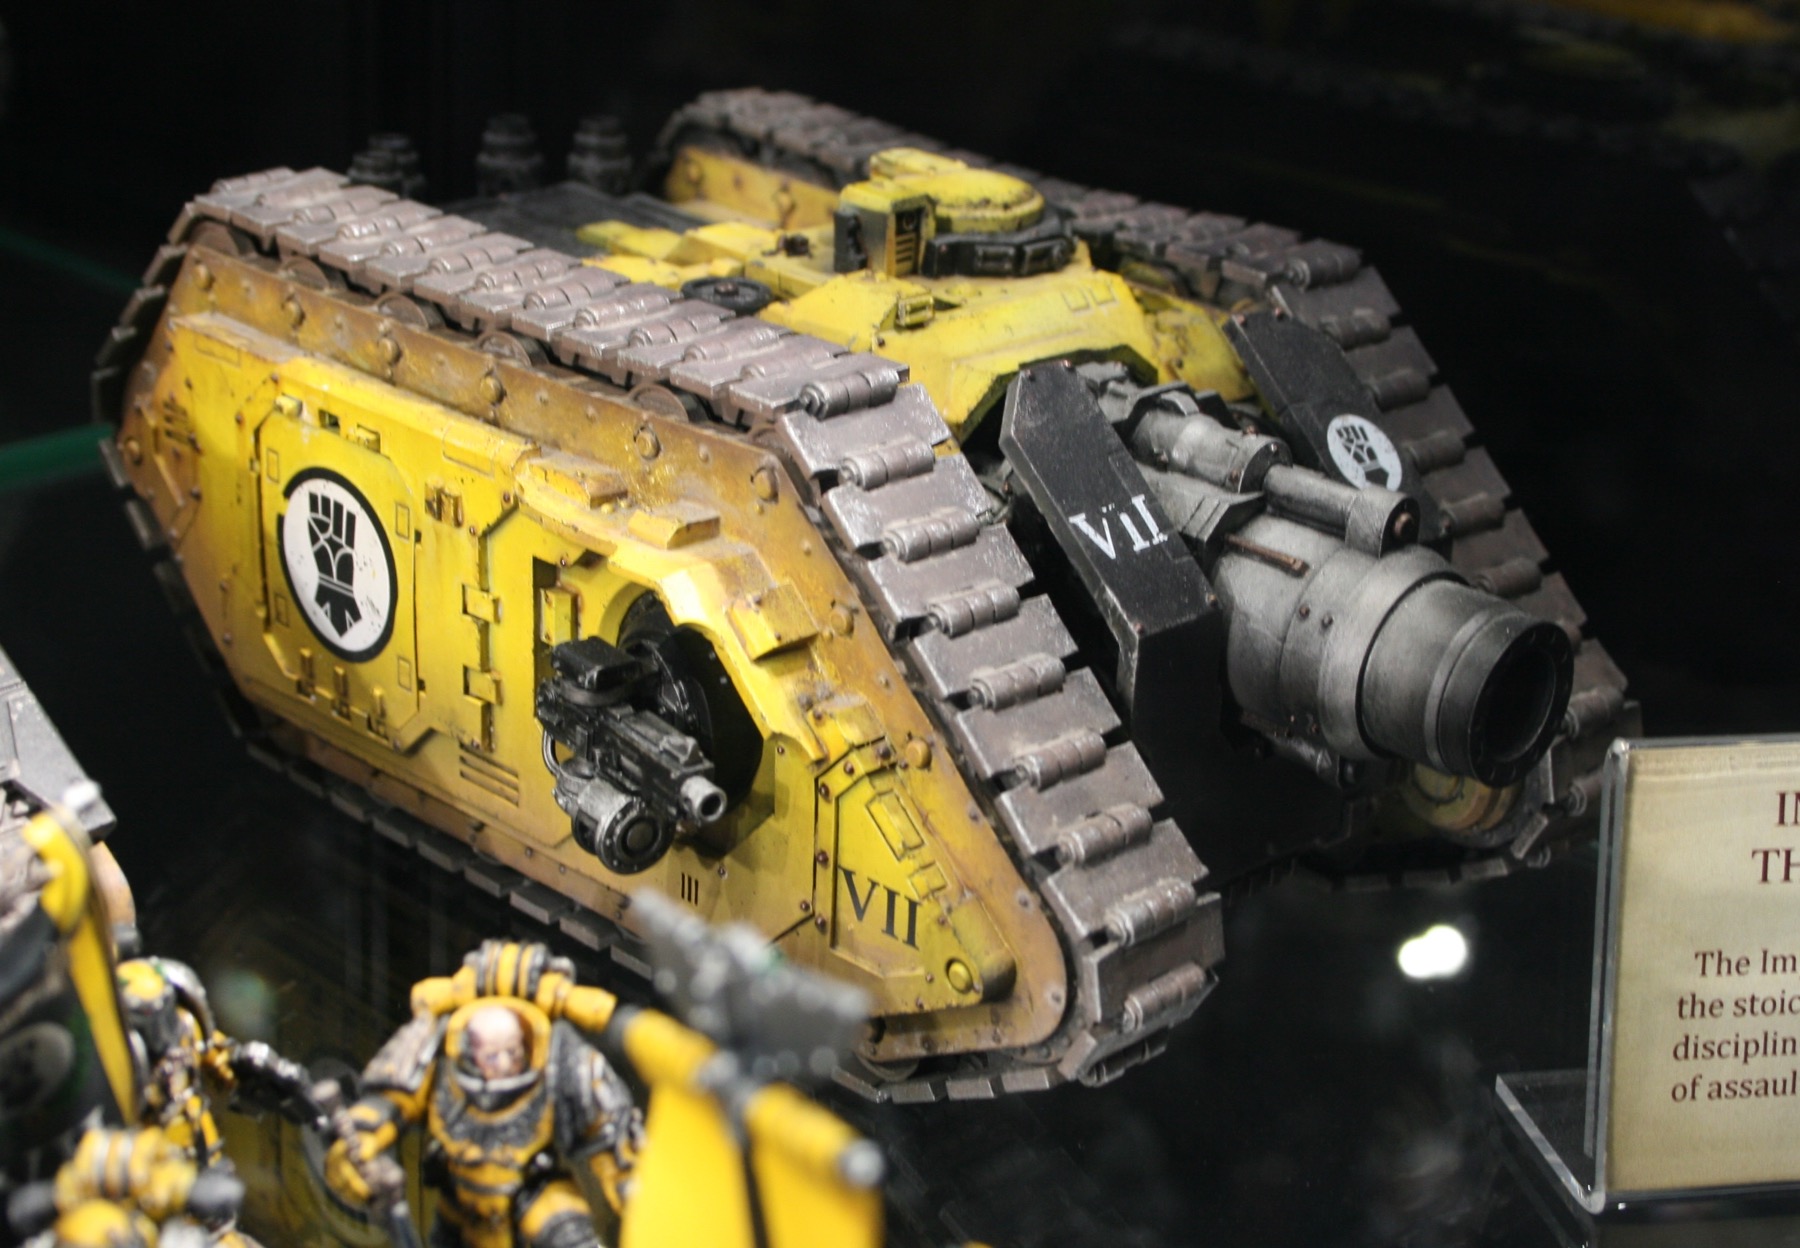
Drybrushing the Land Raider

I have on my workbench a standard Land Raider.

The standard Land Raider, also known as the Land Raider Phobos, is an Imperial main battle tank and troop transport which serves as the “armoured fist of the Space Marines.” It is one of the most resilient and iconic armoured vehicles in the galaxy. The Land Raider’s heritage predates even the founding of the Imperium of Man, yet it remains the single most destructive weapon in the Adeptus Astartes’ arsenal. Protected by bonded Ceramite and Adamantium armour, the Land Raider is nearly impervious to all save the most destructive weaponry.

For the basecoat I used Tausept Ochre. I lost interest in the model, so, it got put into storage. However having liked the paint scheme I was using on my Deimos-pattern Rhino, I decided that I would find the model and paint this Land Raider in the same scheme. The first thing I did was spray the underneath of the model with Citadel Zandri Dust. I gave the model a couple of light sprays of Army Painter Daemonic Yellow. I painted the weapon sub-assemblies. added detailing and painted the iconography. Then using various Citadel shades I washed and shaded the model.

For the next stage I used some Citadel Layer Yriel Yellow. I took a large brush and gave the model, what I would call, a heavy drybrush. I put paint on the brush, and then used some kitchen towel to remove most of the paint, and then using a stippling process added paint to the model.

This was done all across the model and then repeated. I wanted to remove some of the shine from the shade as well.

I then gave the model a light drybrush of Citadel Layer Dorn Yellow. The aim here was to add edge highlights to the Land Raider.

I wanted to achieve a slight dusty effect as well.

After the drybrushing I will then detail the iconography, the weapons, and the engines on the model.

The tracks for the Land Raider were given a spray of Mechanicus Standard Grey.

I then did a heavy drybrush of Gorthor Brown. The tracks, once dry, I then gave them a wash of Agrax Earthshade Shade. After painting and shading them, I drybrushed them lightly, first with Leadbelcher. I then did a very light drybrush with Terminatus Stone.

The next step was to paint and highlight the iconography.

This is to brighten up the purity seals and other iconography after it was dulled down by the shades and washes.

I am really pleased with how this Land Raider has turned out, so much so I have decided that I will paint my Mark IIb Land Raider using the same process and techniques. However I might give the model a white spray first before doing the yellow.

See the workbench feature on the Land Raider.

Drybrushing the Razorback

One model I got many years ago, well in 2006, was a Forgeworld Razorback the one with the much bigger turret, which I much prefer over the plastic kit version that you could get in the shops back then. I recently retrieved it from storage and decided that I would try and finish painting it. I was using Tausept Ochre as the base coat, however having liked the paint scheme I was using on my Deimos-pattern Rhino, I decided that I would paint the Razorback in the same scheme.

Having sprayed the underneath of the model with Citadel Zandri Dust. I gave the model a basecoat of Army Painter Daemonic Yellow. This was followed with Leadbelcher for painting the exhausts and weaponry. The next step was painting the iconography and purity seals. I then slightly messed up the shading on the model, but think I managed to get the effect I was looking for.

For the next stage I used some Citadel Layer Yriel Yellow. I took a large brush and gave the model, what I would call, a heavy drybrush. I put paint on the brush, and then used some kitchen towel to remove most of the paint, and then using a stippling process added paint to the model.

The plan was that this would take the flat surfaces of the model back to the base colour.

I then gave the model a light drybrush of Citadel Layer Dorn Yellow.

The tracks for the Razorback were given a spray of Mechanicus Standard Grey.

I then did a heavy drybrush of Gorthor Brown. The tracks, once dry, I then gave them a wash of Agrax Earthshade Shade. I then did a heavy drybrush of Gorthor Brown. The tracks, once dry, I then gave them a wash of Agrax Earthshade Shade. After painting and shading them, I drybrushed them lightly, first with Leadbelcher. I then did a very light drybrush with Terminatus Stone.

The next step was to paint and highlight the iconography.

This is to brighten up the purity seals and other iconography after it was dulled down by the shades and washes.

See the workbench feature on the Razorback.

Shading the the Space Marine Dreadnought

This Space Marine Dreadnought was one of the models included the Assault on Black Reach boxed set. The Warhammer 40,000 Assault on Black Reach was 5th edition’s “boxed game” or “starter set”. Having constructed the model I then put it away for a while… I got the model out of storage and decided I would paint this up as an Imperial Fists Dreadnought to accompany my new Deimos-pattern Rhino. I gave it a white undercoat using White Scar spray. The next stage was the base coat and I did consider to either use a yellow spray, or to use the new Imperial Fist contrast paint. In the end I went with the new Imperial Fist contrast paint and I was quite pleased with the end result.

I knew that though this looked quite good, it wasn’t quite the effect I wanted, so I shaded most of the model with Reikland Fleshshade Shade. This was the process I used on the Deimos-pattern Rhino.

I will do some further Shading with Nuln Oil and Seraphim Sepia, especially on the back of the model.

See the workbench feature on the Space Marine Dreadnought.

Shading the Land Raider

I have on my workbench a standard Land Raider. For the basecoat I used Tausept Ochre. I lost interest in the model, so, it got put into storage. However having liked the paint scheme I was using on my Deimos-pattern Rhino, I decided that I would find the model and paint this Land Raider in the same scheme. The first thing I did was spray the underneath of the model with Citadel Zandri Dust. I gave the model a couple of light sprays of Army Painter Daemonic Yellow. I painted the weapon sub-assemblies. added detailing and painted the iconography.

I attached the lascannons to the Land Raider and then started to shade the model. The side sponsons I did glue in. The frontal lascannons I left unstuck as I wanted to ensure I could get behind them.

I shaded the model with Reikland Fleshshade Shade. This was the process I used on the Deimos-pattern Rhino.

It didn’t cover as well as I would have liked, so I will be going over the model again.

I will do some further shading with Seraphim Sepia Shade and Agrax Earthshade Shade, especially over the rear engine area.

See the workbench feature on the Land Raider.

Scorpius Missile Tank coming soon

GW have announced the Scorpius Missile Tank for The Horus Heresy.

Built on the ubiquitous Deimos Rhino chassis the Scorpius Missile Tank was designed at the request of none other than the close-combat hungry Space Wolves. All of their huffing and puffing couldn’t blow down the fortified xenos bastion-cities they came up against in their earlier campaigns, but a massive missile launcher system was just the ticket to bring them tumbling down. Their Barrage weaponry provides invaluable indirect fire against all sorts of targets – whether they are clad in ceramite or not.

Feels a little tall for me, but then again most Space Marine Whirlwind variants are on the tall side.

This is of course a new plastic kit based on the original Forge World resin kit.

Here is that model (well three of them) in The Battle of Signus Prime display at Warhammer World.

Shading the Razorback

One model I got many years ago, well in 2006, was a Forgeworld Razorback the one with the much bigger turret, which I much prefer over the plastic kit version that you could get in the shops back then. I recently retrieved it from storage and decided that I would try and finish painting it. I was using Tausept Ochre as the base coat, however having liked the paint scheme I was using on my Deimos-pattern Rhino, I decided that I would paint the Razorback in the same scheme.

Having sprayed the underneath of the model with Citadel Zandri Dust. I gave the model a basecoat of Army Painter Daemonic Yellow. This was followed with Leadbelcher for painting the exhausts and weaponry. The next step was painting the iconography and purity seals.

So, there I was ready to shade my Razorback in the same way as my Deimos-pattern Rhino. I did bring up my painting guide on the website. Even so I completely misread what I had done! Instead of using Citadel Reikland Fleshshade Shade I used Seraphim Sepia Shade.

Thought I had used Seraphim Sepia Shade on the Rhino, the primary and first shade was in fact Reikland Fleshshade.

It seemed to be okay.

However it wasn’t quite the same look as the Rhino. So I got out the Reikland Fleshshade.

This again wasn’t quite right, so I did some more shading.

I think the next stages of drybrushing will help soften the effect of the shading.

See the workbench feature on the Razorback.

Iconography on the Land Raider

I have on my workbench a standard Land Raider. For the basecoat I used Tausept Ochre. I lost interest in the model, so, it got put into storage. However having liked the paint scheme I was using on my Deimos-pattern Rhino, I decided that I would find the model and paint this Land Raider in the same scheme. The first thing I did was spray the underneath of the model with Citadel Zandri Dust. I gave the model a couple of light sprays of Army Painter Daemonic Yellow. I also painted the weapon sub-assemblies.

I started detailing and painting the iconography. Purity seals were Ushabti Bone for the paper and Mephiston Red for the red wax.

I painted the door iconography with Mechanicus Standard Grey aiming for a stone effect.

See the workbench feature on the Land Raider.

Iconography on the Razorback

One model I got many years ago, well in 2006, was a Forgeworld Razorback the one with the much bigger turret, which I much prefer over the plastic kit version that you could get in the shops back then. I started this model back then, then out it in storage. I recently retrieved it from said storage and decided that I would try and finish painting it. I was using Tausept Ochre as the base coat, however having liked the paint scheme I was using on my Deimos-pattern Rhino, I decided that I would paint the Razorback in the same scheme.

Having sprayed the underneath of the model with Citadel Zandri Dust. I gave the model a basecoat of Army Painter Daemonic Yellow. This was followed with Leadbelcher for painting the exhausts and weaponry.

The next step was painting the iconography and purity seals. Purity seals were Ushabti Bone for the paper and Mephiston Red for the red wax.

For the brass etchings, I did consider painting these up, but in the end I painted them with a base coat of Warplock Bronze.

I had intended to use Sycorax Bronze, however my post of this was a little dried up… so I had to throw it away.

I did try out a wash on the main weaponry to see the effect it would have on the bronze painted iconography.

I also painted the door panels with Warplock Bronze.

This is the front of the Razorback.

I painted the front icon with Mechanicus Standard Grey aiming for a stone effect, after shading and drybrushing.

See the full workbench of the Razorback.

Contrasting the Space Marine Dreadnought

This Space Marine Dreadnought was one of the models included the Assault on Black Reach boxed set. The Warhammer 40,000 Assault on Black Reach was 5th edition’s “boxed game” or “starter set”.

Having constructed the model I then put it away for a while…

I got the model out of storage and decided I would paint this up as an Imperial Fists Dreadnought to accompany my new Deimos-pattern Rhino.

I gave it a white undercoat using White Scar spray.

The next stage was the base coat and I did consider to either use a yellow spray, or to use the new Imperial Fist contrast paint.

In the end I went with the new Imperial Fist contrast paint and I was quite pleased with the end result.

Space Marine Dreadnought

I think for the next stage I will now shade some of the mechanics of the Dreadnought.

Legiones Astartes Imperial Fists

Having painted my Deimos-pattern Rhino in Imperial Fists colours,  decided that I would probably need some Space Marines as well. As it happens I have some Space Marines from the various Warhammer 40k boxed sets I have bought over the years.

The plan was to try out some paint schemes.

They are relatively easy to put together.

The first attempt was not successful.

I had given the model a white undercoat and then a yellow spray, but the spray was too heavy. Still I tried a wash and then realised I would need to start again…

So onto the next model.

I gave the model a white undercoat using a White Scar spray.

I then base coated the model using the new Imperial Fist contrast paint.

I think the next stage will be detailing the weaponry and other non-yellow parts of the model. Though probably a drybrush first, perhaps.