Revisiting the Ork Trukk

Trukks are designed to transport mobs of choppa-wielding Boyz into combat as quickly as possible.  The original Ork Trukk model was designed for Gorkamorka, and then became part of Warhammer 40K with Codex Orks. It was really way too small and needed to be updated, and updated it was back in January 2008 with the release of the new Ork Trukk.

The model was constructed as per the instructions, Generally I try and build as much of the model as possible to avoid having to glue painted parts together.

The chassis was painted black and the flatbed was given a green spray.

The flatbed has the side armour and broading ramps.

I gave the flatbed a wash, however I actually ran out of wash before I managed to finish it.

I need to finish off the shading of the flatbed.

See how I made the Trukk.

Ork Warbiker

Ork Warbikes are ramshackle devices created from as many parts as possible, designed and maintained by the Mekboyz to fulfill two important Ork urges: to move as fast as possible and to make as much noise while doing so.

This model is an original Ork Warbike from Gorkamorka, so has a fair few of metal parts. After sticking the model together I gave it a white undercoat. I then painted the metal parts black.

I then used Tinbitz on the tracks.

In storage the bike has lost it’s totem and the driver is now in bits (again).


Launcha for the Grot Bomb Launcha

The Forgeworld Grot Bomb Launcha is probably one of my all time favourite models.  I have three of these, one is finished, the other two are a work in progress.

I found the chassis of one in of the boxes with my Land Raiders. Having painted the chassis with a spray of Citadel Zandri Dust. I painted the exhausts and the rear deck with Leadbelcher. I then gave the model a wash using Citadel Shade Agrax Earthshade. I drybrushed the model. I gave the tracks a heavy drybrush of Gorthor Brown, followed by a lighter drybrush of Leadbelcher.

The launcher system (launcha) was already painted black and drybrushed with a metallic paint. Though I think this one was from my other Grot Bomb Launcha.

I touched up the white paint on the Grot Bomb pilot to later paint with green flesh tones.

I also need to paint the driver. Well I also need to find the driver as well.

Still some work to do.

See the workbench feature on the Grot Bomb Launcha.

Found the missing part

The Land Raider is an Imperial main battle tank and troop transport which serves as the “armoured fist of the Space Marines.”The Land Raider’s heritage predates even the founding of the Imperium of Man, yet it remains the single most destructive weapon in the Adeptus Astartes’ arsenal. The Mark IIb Land Raider Phobos is one of the earliest marks of the standard pattern of Land Raider. The Mark IIb Land Raider Phobos is the only pattern of the standard Land Raider Phobos that uses the older armoured sponsons, as they do not allow the weapons they hold to fully rotate.

I got a Forge World MkIIB Land Raider and was originally painting it up as a Grey Knights Land Raider in desert camouflage.

I wrote up some reflections recently on my MkIIB Land Raider, on the current state of the painting and what I needed to do next.

I also noticed that there is a part missing the, the hull top front bolters. I will have to find where I put that piece.

Well I was pleased to find the missing parts and these have now been reunited with the Land Raider.

Forge World MkIIB Land Raider

Still got to decide what colour I will be painting the model.

See the full Mark IIb Land Raider workbench.

Further work on my Grot Bomb Launcha

The Forgeworld Grot Bomb Launcha is probably one of my all time favourite models.  I have three of these, one is finished, the other two are a work in progress.

I found the chassis of one in of the boxes with my Land Raiders. Having painted the chassis with a spray of Citadel Zandri Dust, I used some other brown paints to paint the boxes on the chassis. I painted the exhausts and the rear deck with Leadbelcher. I then gave the model a wash using Citadel Shade Agrax Earthshade.

I then drybrushed the model with various shades of brown. I found the tracks. These had been undercoated black. I gave them a heavy drybrush of Gorthor Brown, followed by a lighter drybrush of Leadbelcher.

I also used Leadbelcher lightly on the motorcycle engine.

I had already painted the fuel tank.

More work to do.

Tallarn Imperial Guard

As well as my other Daemonhunters Inquisitorial Stormtroopers which are based on the Cadian Kasrkin I have also decided to add a unit based on the Tallarn or I may just use them as inducted Imperial Guard. I have had these models for a fair while.

I did look at my original painting scheme that I was using for the blister pack of Tallarn Imperial Guard. I had used a basecoat of Desert Yellow followed by a wash consisting of Chestnut Ink and Scorched Brown paint.

However I did think about doing something slightly different now that Contrast paints were available. I had painted some Star Wars Legion Rebel Troopers with Citadel Snakebite Leather Contrast paint and had been impressed with the results.

I painted the models with Snakebite Leather Contrast paint, after giving them another spray with Citadel Corax White to improve the effect of the contrast paint.

The next step was a drybrush. The other Tallarn models I painted I had  drybushed the three models with Snakebite Leather and Bleached Bone. Neither of these paints were available any more. So using this chart I used Layer Balor Brown instead of Snakebite Leather and used Layer Ushabti Bone instead of Bleached Bone.

Here are three troopers.

Here are the commanders (or sergeants) for the platoon.

Here are three more of the troopers.

Unlike highlighting and glazes and the suchlike, drybrushing does not give as neat as a finish as those methods. However I quite like the dusty look for these desert based models and these are going to be gaming models, not Golden Demon entries!

See the workbench journey for this Tallarn Imperial Guard boxed set and the workbench feature on the Tallarn Imperial Guard blister.

Tallarn Missile Launcher Team

As well as my other Daemonhunters Inquisitorial Stormtroopers which are based on the Cadian Kasrkin I have also decided to add a unit based on the Tallarn or I may just use them as inducted Imperial Guard. I have had these models for a fair while.

I did look at my original painting scheme that I was using for the blister pack of Tallarn Imperial Guard. I had used a basecoat of Desert Yellow followed by a wash consisting of Chestnut Ink and Scorched Brown paint.

However I did think about doing something slightly different now that Contrast paints were available. I had painted some Star Wars Legion Rebel Troopers with Citadel Snakebite Leather Contrast paint and had been impressed with the results.

I painted the models with Snakebite Leather Contrast paint, after giving them another spray with Citadel Corax White to improve the effect of the contrast paint.

The next step was a drybrush. The other Tallarn models I painted I had  drybushed the three models with Snakebite Leather and Bleached Bone. Neither of these paints were available any more. So using this chart I used Layer Balor Brown instead of Snakebite Leather and used Layer Ushabti Bone instead of Bleached Bone.

These are the two crew for the missile launcher team.

Unlike highlighting and glazes and the suchlike, drybrushing does not give as neat as a finish as those methods. However I quite like the dusty look for these desert based models and these are going to be gaming models, not Golden Demon entries!

See the workbench journey for this Tallarn Imperial Guard boxed set and the workbench feature on the Tallarn Imperial Guard blister.

Making progress on the Repressor

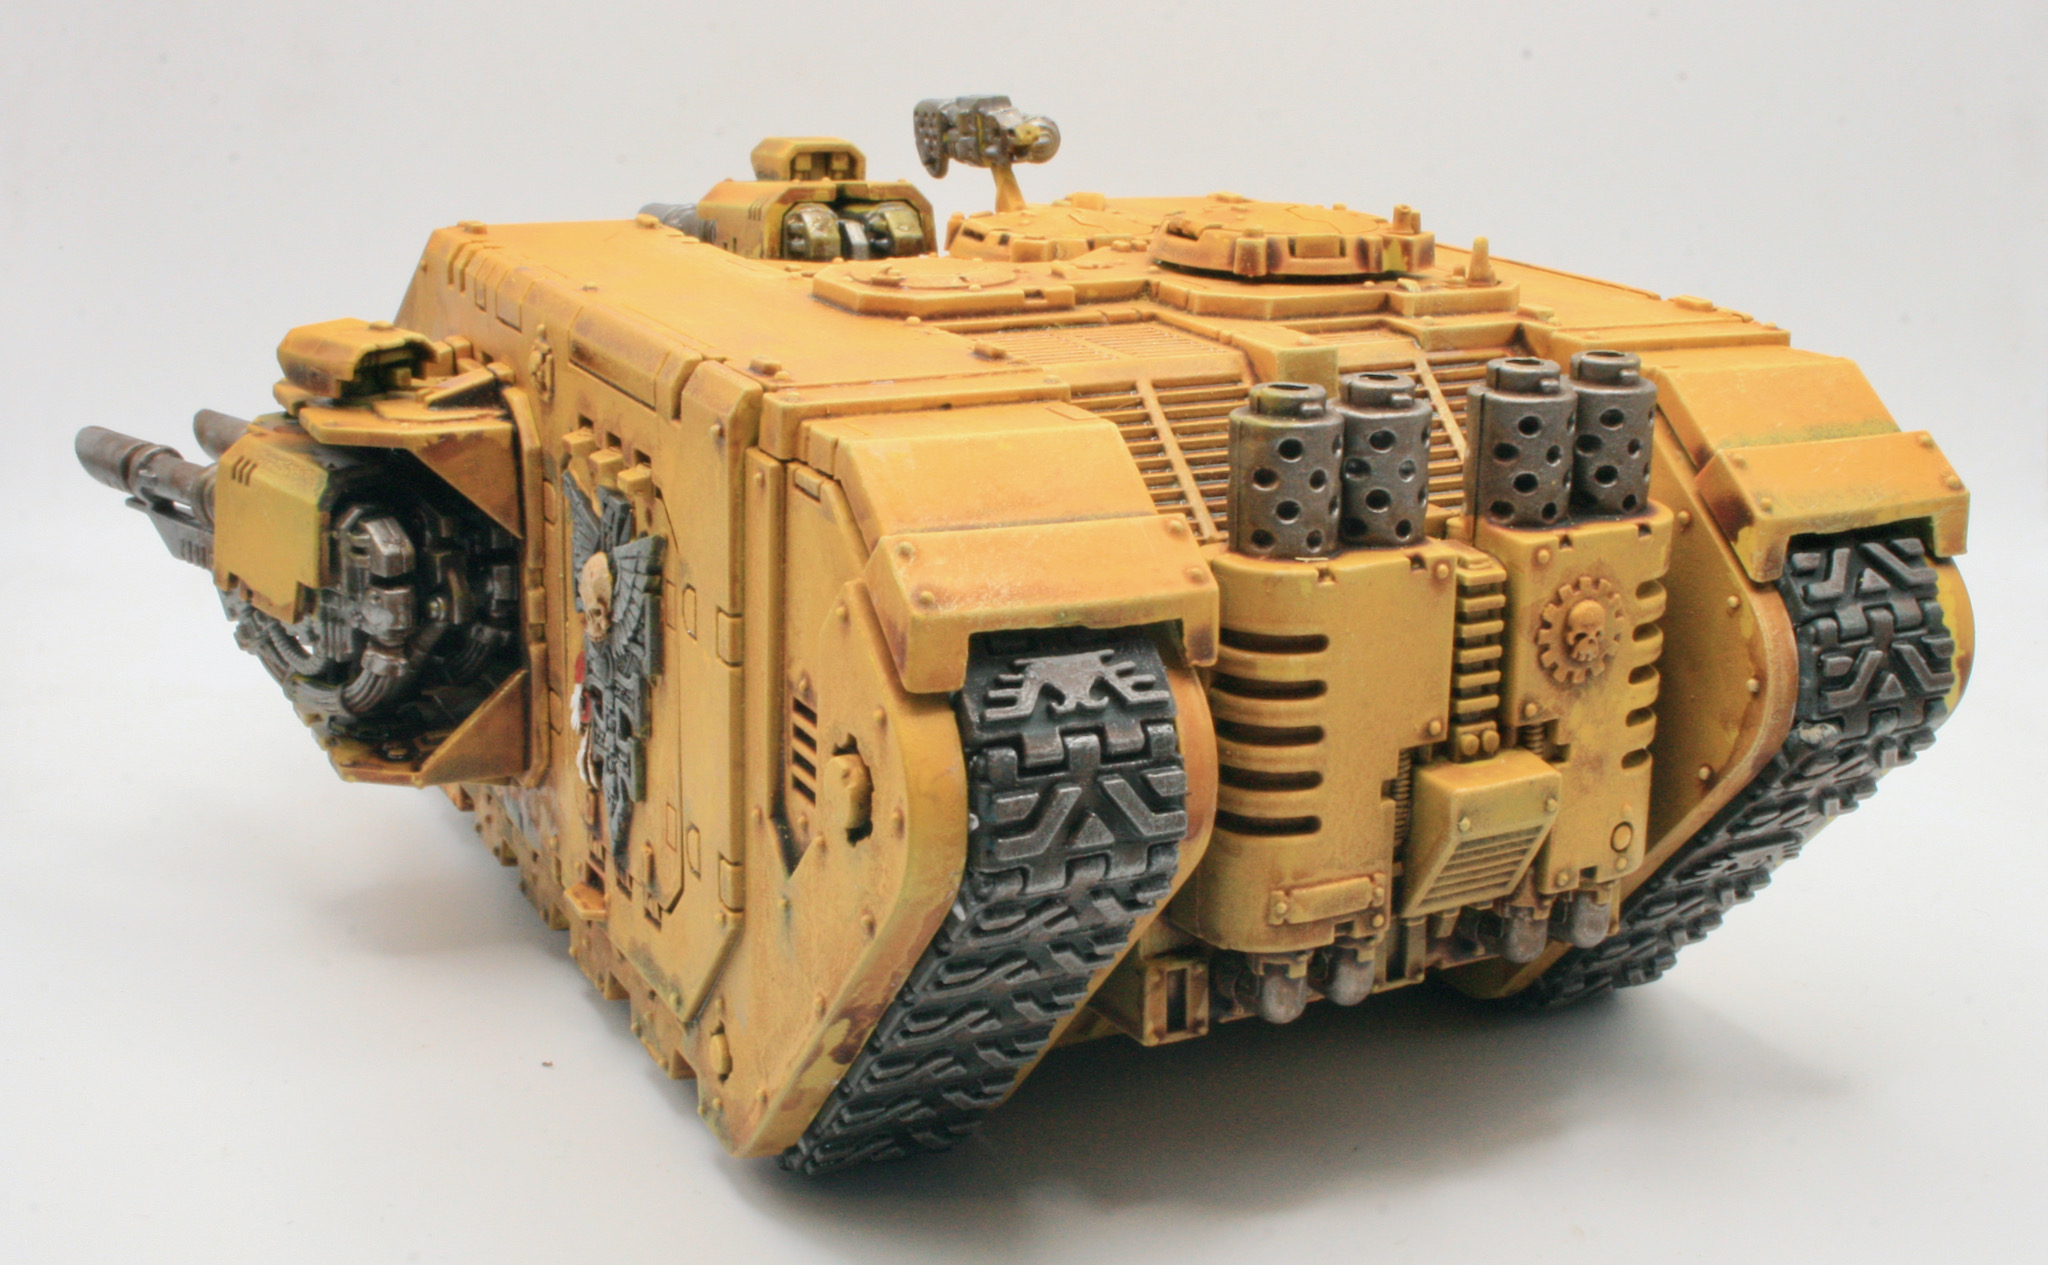
The Repressor tank is often used by Sisters of Battle as transport, and by the Adeptus Arbites in an anti insurgency role. I said  in a blog post back in 2004.

“I do like this model and I am intending to get one to use with my Daemonhunters army as a transport for the Storm Troopers”.

I did get one that Christmas as a present. Though I actually started building and painting this model back in 2007, I recently retrieved it from storage and decided that I would try and finish painting it. I realised I had made quite significant progress.

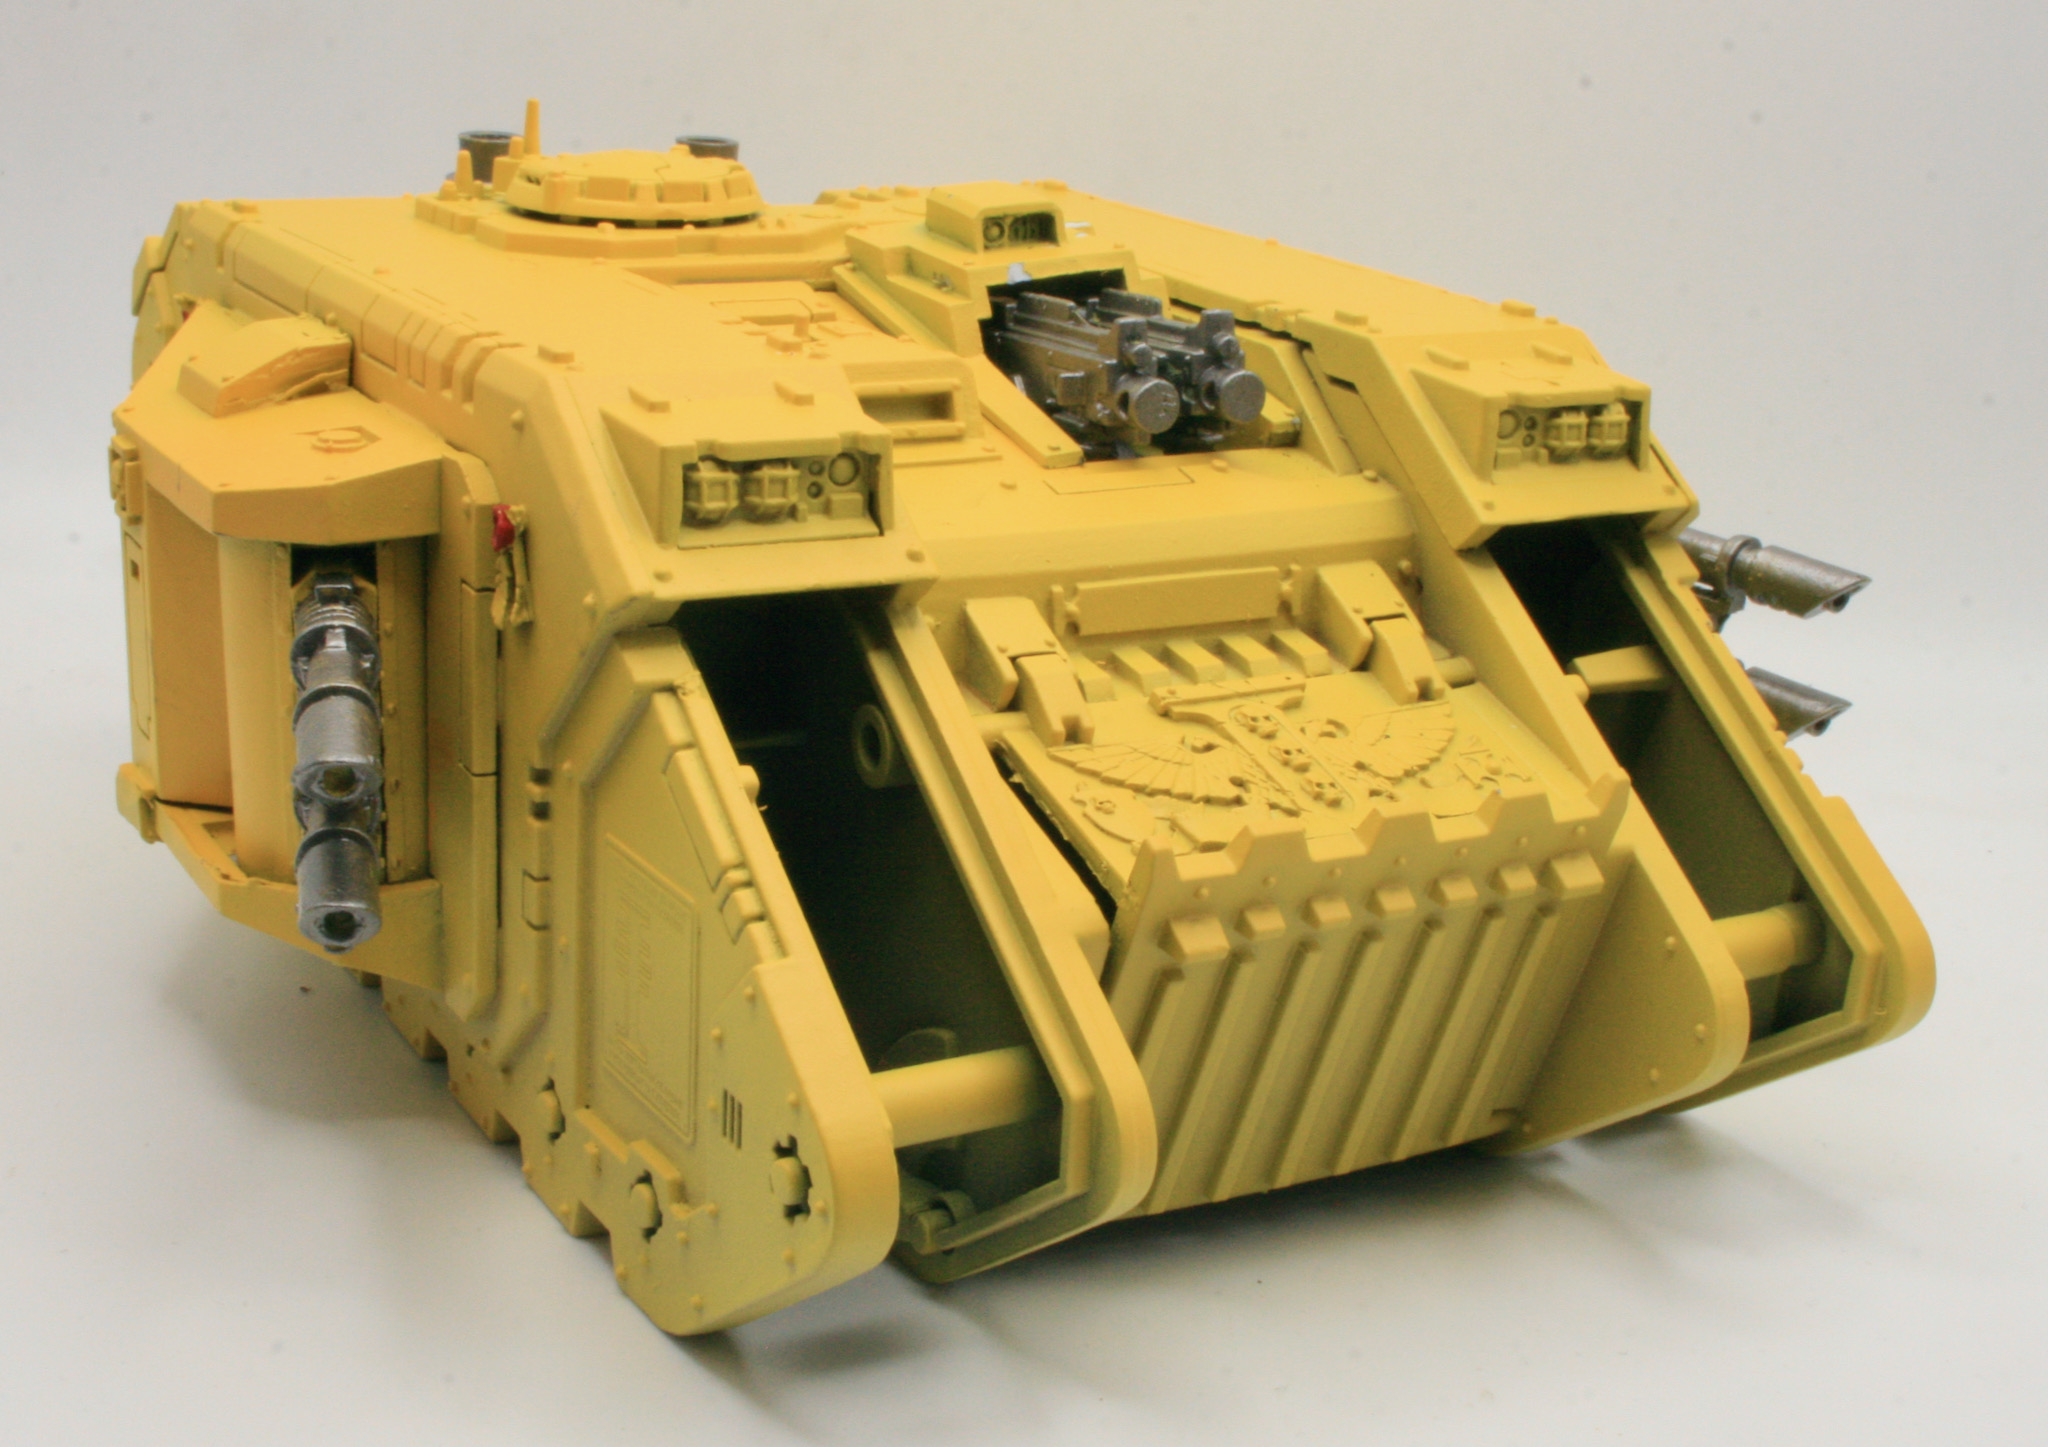
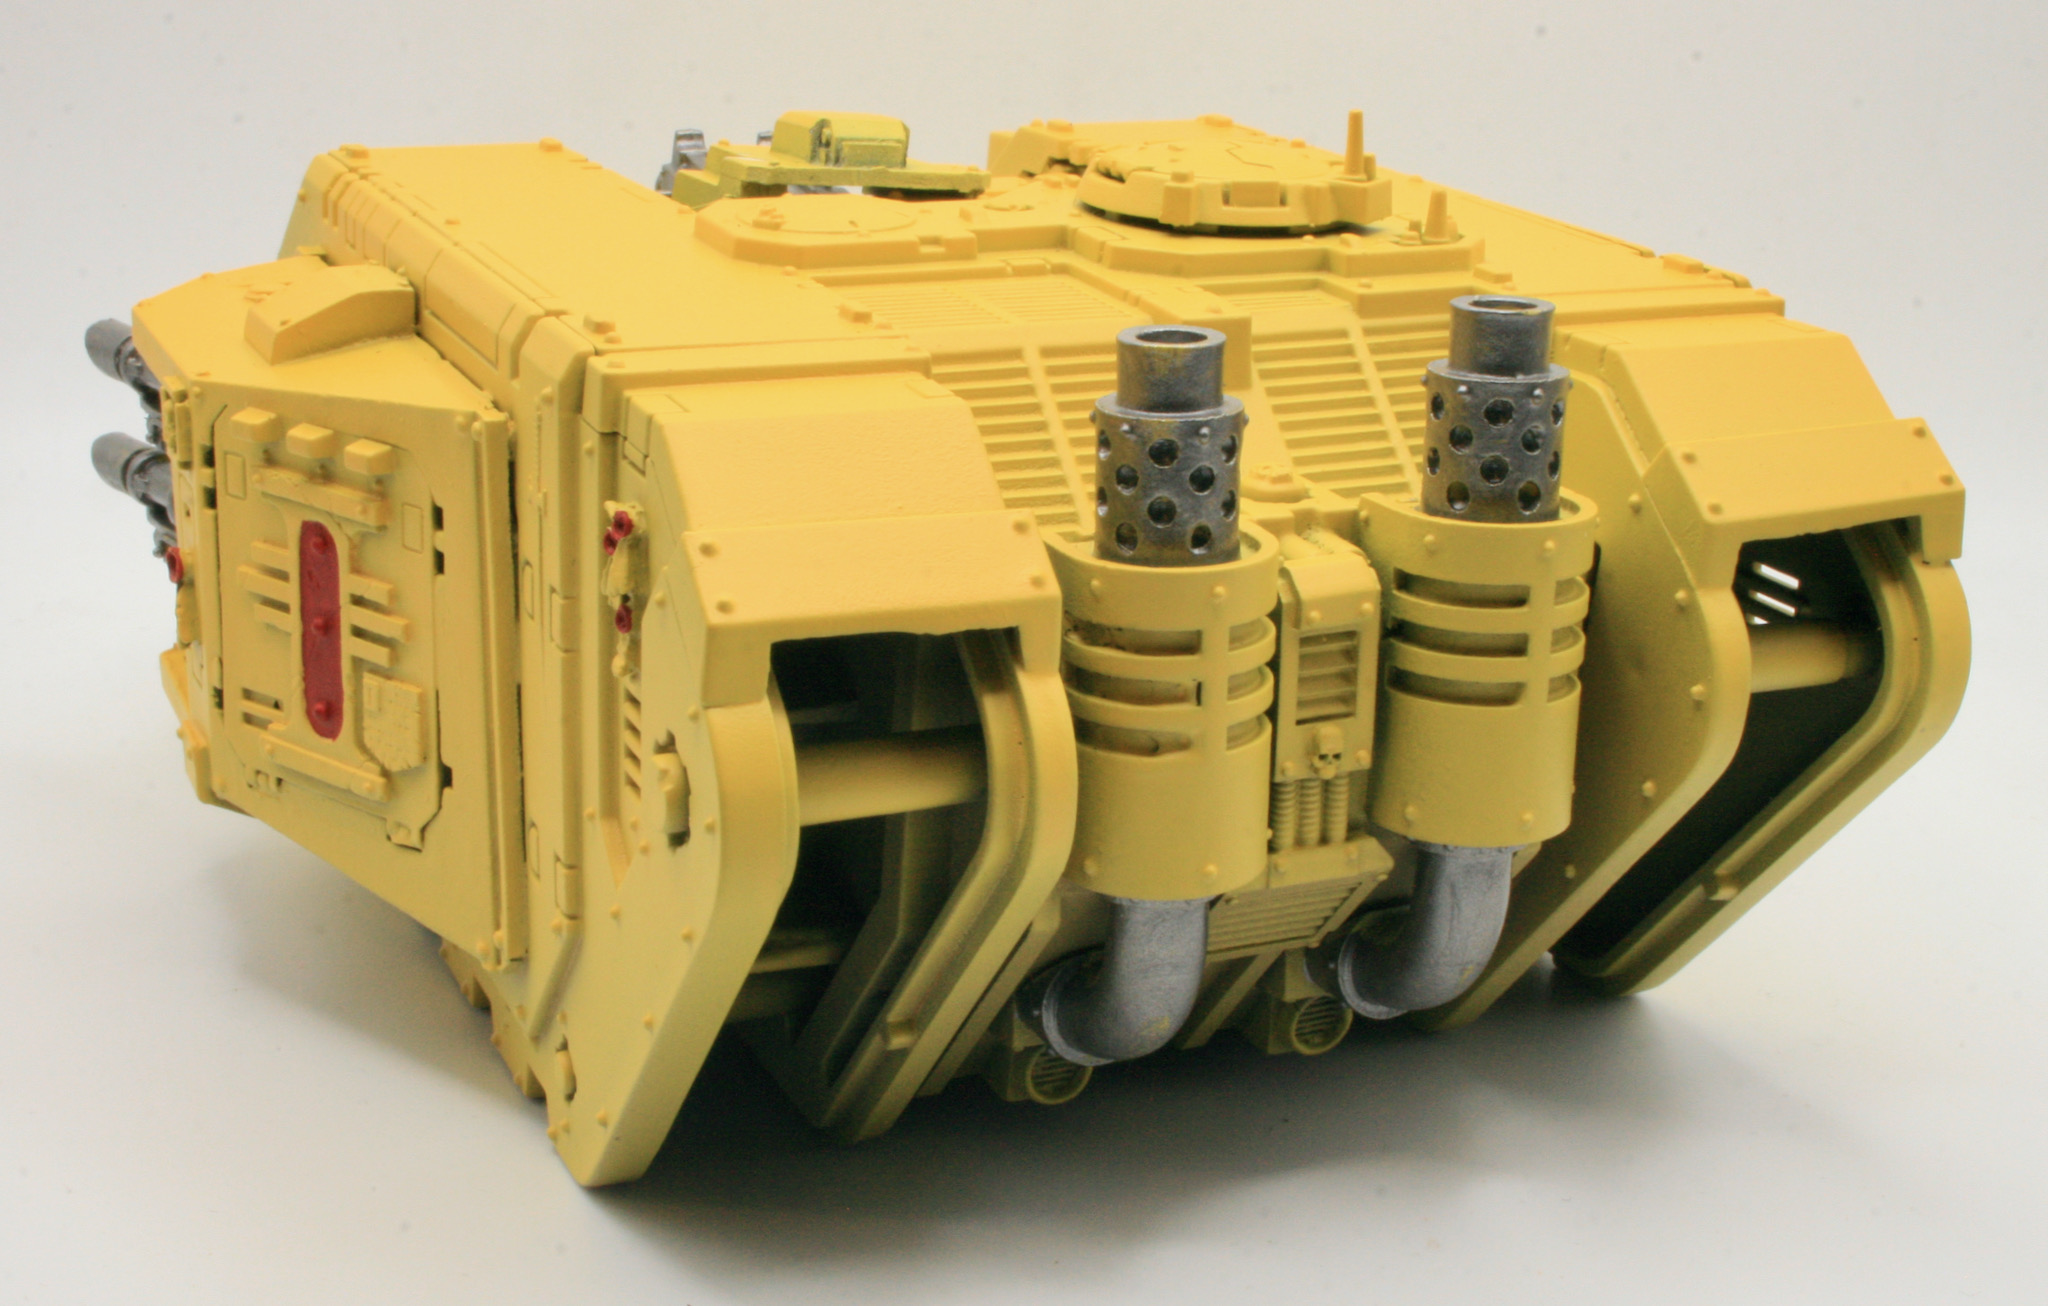
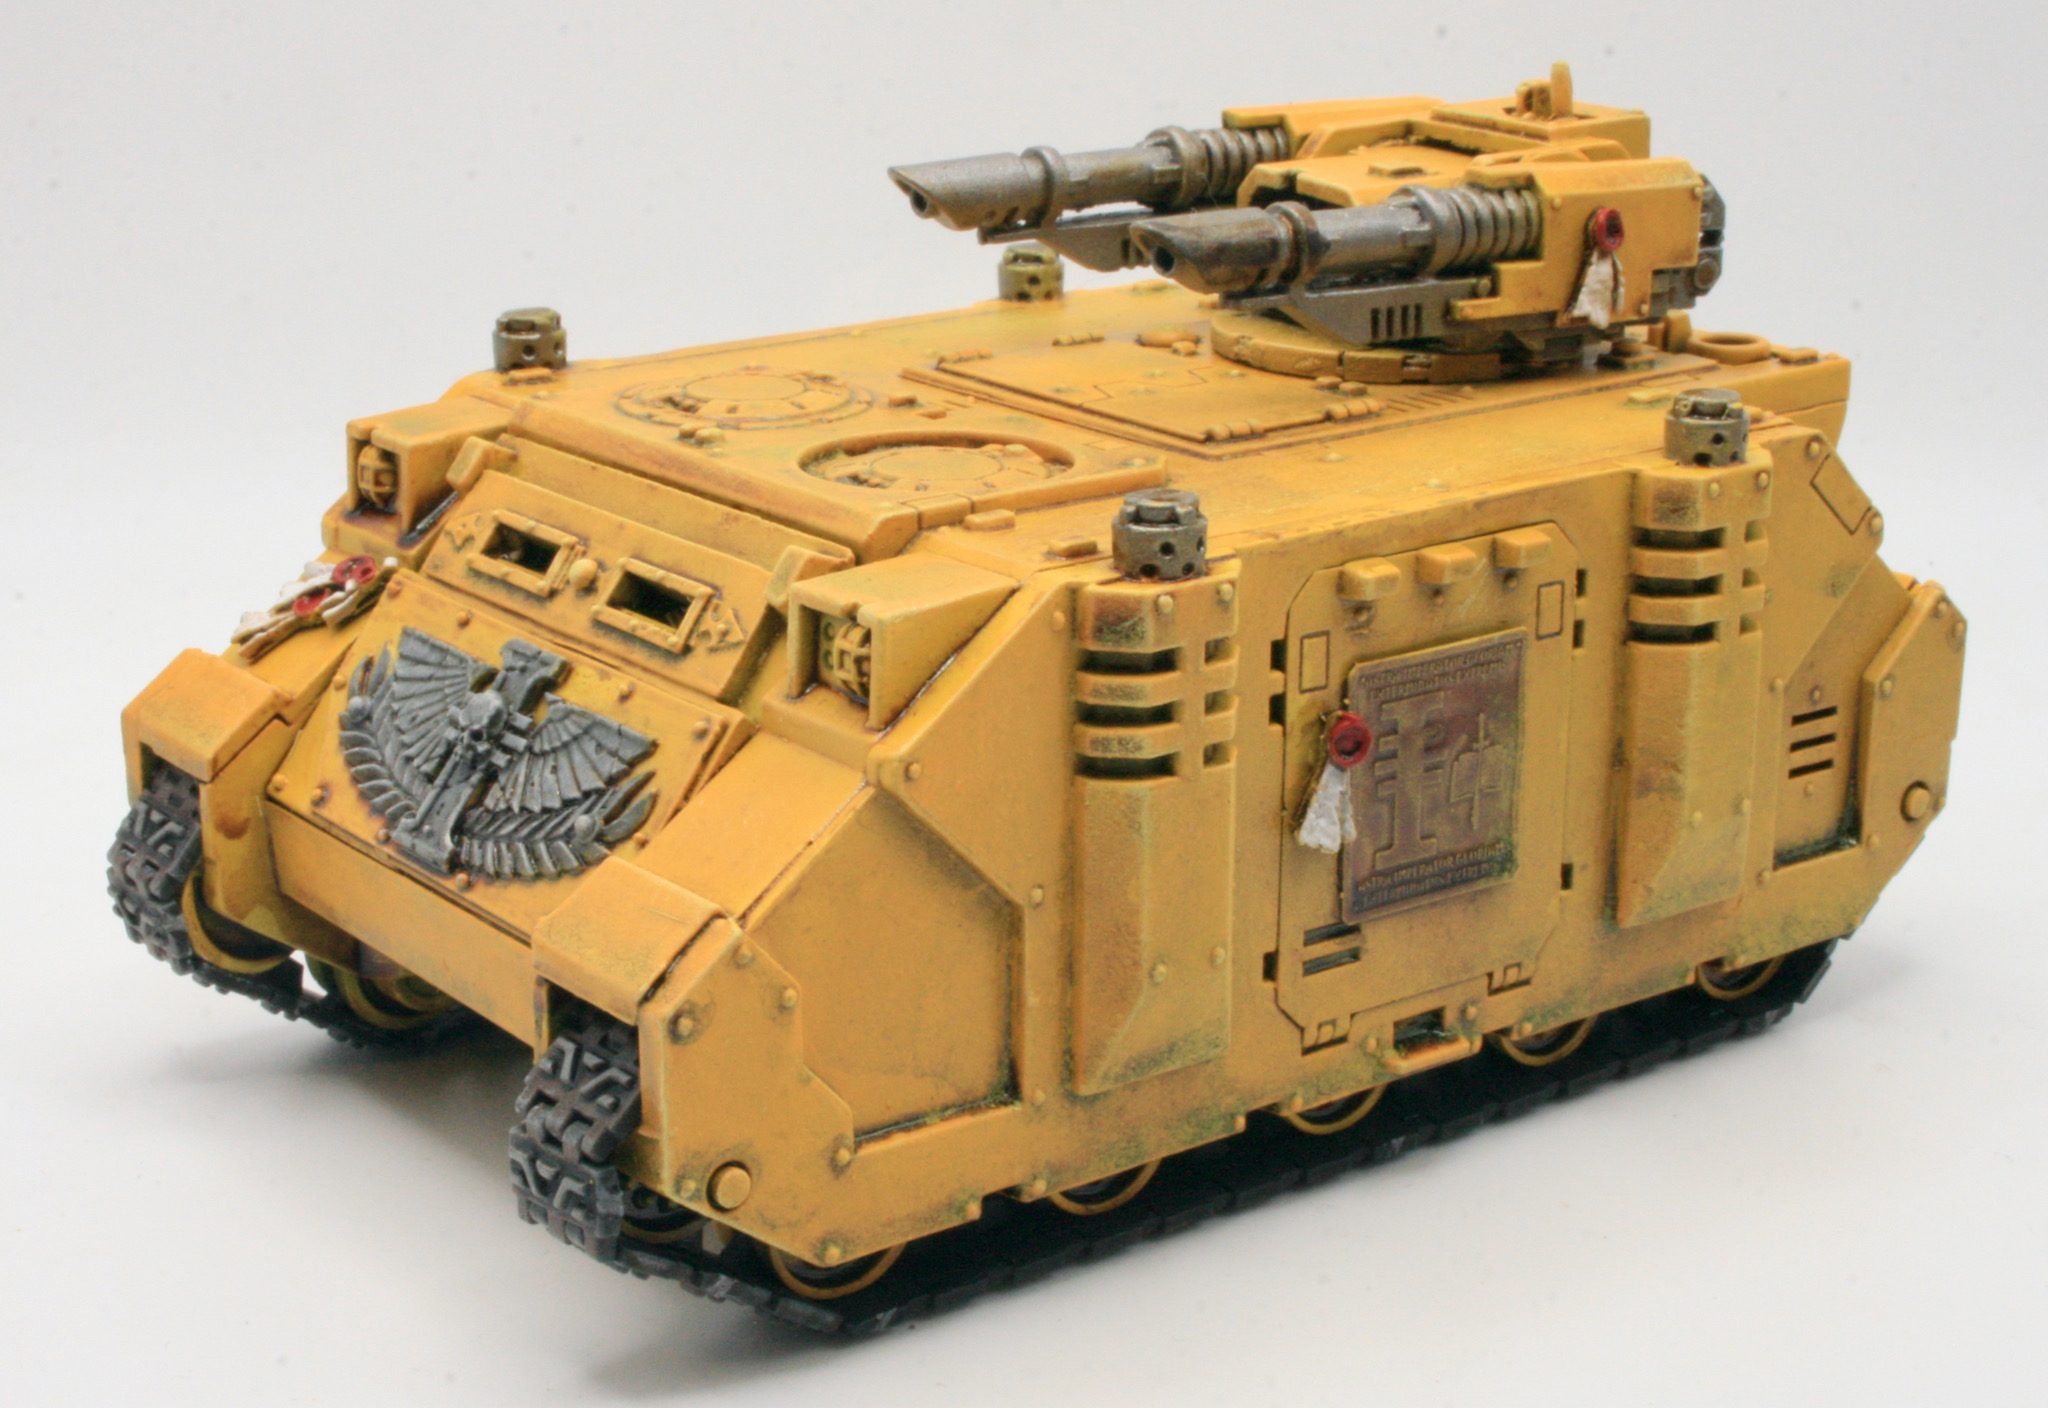
Having sprayed the model with Citadel Zandri Dust. I started the detailing, using Leadbelcher on the weapons and the exhausts. The next step was painting the iconography and purity seals.

Here is the Repressor with the dozer blade and turret.

I had used shades on the blade and the turret. I still have some work to do on the iconography before I shade the rest of the vehicle.

Hekaton Land Fortress revealed

Hekaton Land Fortress

So this beast of a armoured vehicle was revealed at the NOVA Open.

The Hekaton Land Fortress is the Kin’s signature combat vehicle. This chunky Heavy Support tank packs overwhelming firepower onto a rugged frame, and can lug around a hefty 12 models.

I really liked the Sagitaur ATV which was announced in July. Back then I said

We’ve also been told that the Sagitaur isn’t the only vehicle in the Leagues of Votann’s garage. I wonder what else is in that garage?

Well, now we know there was something else in that garage and it is bigger and meaner, the Hekaton Land Fortress.

This is the kind of styling and look that I was hoping we would see with the Cargo-8 Ridgehauler, alas we didn’t.

Now though I would be happy to use these as a Squat, sorry Leagues of Votann, vehicle, I wonder how it compares to human sized models to be used slightly differently. Always difficult to gauge the size of a model from a photograph and no comparative models next to it.

So yes I am interested in the Hekaton Land Fortress as well as the Sagitaur ATV, however I want to see them in the “flesh” before making that purchase.

Basecoating and shading the other Ruined Factorum

Having picked up the Ruined Factorum sprue that came with Warhammer 40000 Imperium 31 a couple of weeks back, I also purchased issue 34 for the second sprue .

The ruins are from the The Battlezone: Manufactorum – Sub-cloister and Storage Fane kit which did cost £37.50 at Games Workshop and contains two similar sprues. So at £8.99 you would be making a saving of £9.76.

You get two corner ruins, all coming on a single sprue. They go together really easily. There are two corners, whereas with the other sprue you got a large corner and a smaller corner. This one is similar, but the smaller ruined corner is larger and the larger corner is smaller (if that makes sense).

I used Humbrol Tank Grey 67 spray to give the underfloor a darker feel before giving the model a coat of  Mechanicus Standard Grey Spray.

I gave the models a wash of Nuln Oil Shade.