Shading the Razorback

One model I got many years ago, well in 2006, was a Forgeworld Razorback the one with the much bigger turret, which I much prefer over the plastic kit version that you could get in the shops back then. I recently retrieved it from storage and decided that I would try and finish painting it. I was using Tausept Ochre as the base coat, however having liked the paint scheme I was using on my Deimos-pattern Rhino, I decided that I would paint the Razorback in the same scheme.

Having sprayed the underneath of the model with Citadel Zandri Dust. I gave the model a basecoat of Army Painter Daemonic Yellow. This was followed with Leadbelcher for painting the exhausts and weaponry. The next step was painting the iconography and purity seals.

So, there I was ready to shade my Razorback in the same way as my Deimos-pattern Rhino. I did bring up my painting guide on the website. Even so I completely misread what I had done! Instead of using Citadel Reikland Fleshshade Shade I used Seraphim Sepia Shade.

Thought I had used Seraphim Sepia Shade on the Rhino, the primary and first shade was in fact Reikland Fleshshade.

It seemed to be okay.

However it wasn’t quite the same look as the Rhino. So I got out the Reikland Fleshshade.

This again wasn’t quite right, so I did some more shading.

I think the next stages of drybrushing will help soften the effect of the shading.

See the workbench feature on the Razorback.

Iconography on the Land Raider

I have on my workbench a standard Land Raider. For the basecoat I used Tausept Ochre. I lost interest in the model, so, it got put into storage. However having liked the paint scheme I was using on my Deimos-pattern Rhino, I decided that I would find the model and paint this Land Raider in the same scheme. The first thing I did was spray the underneath of the model with Citadel Zandri Dust. I gave the model a couple of light sprays of Army Painter Daemonic Yellow. I also painted the weapon sub-assemblies.

I started detailing and painting the iconography. Purity seals were Ushabti Bone for the paper and Mephiston Red for the red wax.

I painted the door iconography with Mechanicus Standard Grey aiming for a stone effect.

See the workbench feature on the Land Raider.

Iconography on the Razorback

One model I got many years ago, well in 2006, was a Forgeworld Razorback the one with the much bigger turret, which I much prefer over the plastic kit version that you could get in the shops back then. I started this model back then, then out it in storage. I recently retrieved it from said storage and decided that I would try and finish painting it. I was using Tausept Ochre as the base coat, however having liked the paint scheme I was using on my Deimos-pattern Rhino, I decided that I would paint the Razorback in the same scheme.

Having sprayed the underneath of the model with Citadel Zandri Dust. I gave the model a basecoat of Army Painter Daemonic Yellow. This was followed with Leadbelcher for painting the exhausts and weaponry.

The next step was painting the iconography and purity seals. Purity seals were Ushabti Bone for the paper and Mephiston Red for the red wax.

For the brass etchings, I did consider painting these up, but in the end I painted them with a base coat of Warplock Bronze.

I had intended to use Sycorax Bronze, however my post of this was a little dried up… so I had to throw it away.

I did try out a wash on the main weaponry to see the effect it would have on the bronze painted iconography.

I also painted the door panels with Warplock Bronze.

This is the front of the Razorback.

I painted the front icon with Mechanicus Standard Grey aiming for a stone effect, after shading and drybrushing.

See the full workbench of the Razorback.

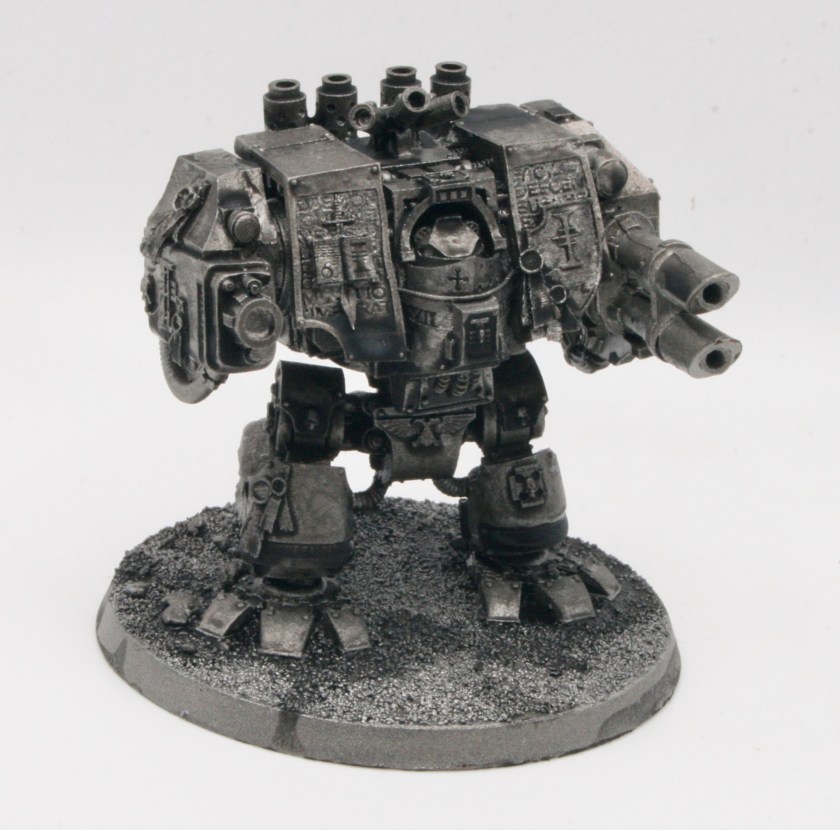
Looking again at my Grey Knights Dreadnought

I have had a Mark IV Forge World Grey Knights Dreadnought on my workbench for a while.

After getting some weapon arms for the model. I gave the main model a black undercoat and started base coating with a metallic paint. The weapons I had given a white undercoat.

Getting it out from storage, I decided to almost start again and gave the model a base spray of Leadbelcher. I sprayed the arms separately.

I then attached the weapon arms.

Next stages will be washing and highlighting.

See the full workbench feature on my Grey Knights Dreadnought.

Found the missing part

The Land Raider is an Imperial main battle tank and troop transport which serves as the “armoured fist of the Space Marines.”The Land Raider’s heritage predates even the founding of the Imperium of Man, yet it remains the single most destructive weapon in the Adeptus Astartes’ arsenal. The Mark IIb Land Raider Phobos is one of the earliest marks of the standard pattern of Land Raider. The Mark IIb Land Raider Phobos is the only pattern of the standard Land Raider Phobos that uses the older armoured sponsons, as they do not allow the weapons they hold to fully rotate.

I got a Forge World MkIIB Land Raider and was originally painting it up as a Grey Knights Land Raider in desert camouflage.

I wrote up some reflections recently on my MkIIB Land Raider, on the current state of the painting and what I needed to do next.

I also noticed that there is a part missing the, the hull top front bolters. I will have to find where I put that piece.

Well I was pleased to find the missing parts and these have now been reunited with the Land Raider.

Forge World MkIIB Land Raider

Still got to decide what colour I will be painting the model.

See the full Mark IIb Land Raider workbench.

Land Raider Iconography

I have on my workbench a standard Land Raider. For the basecoat I used Tausept Ochre. I lost interest in the model, so, it got put into storage. However having liked the paint scheme I was using on my Deimos-pattern Rhino, I decided that I would find the model and paint this Land Raider in the same scheme. The first thing I did was spray the underneath of the model with Citadel Zandri Dust. I gave the model a couple of light sprays of Army Painter Daemonic Yellow. I also painted the weapon sub-assemblies.

I started detailing and painting the iconography.

For the skull and the paper on the purity seals I used Ushabti Bone. For the wax seals I used Mephiston Red.

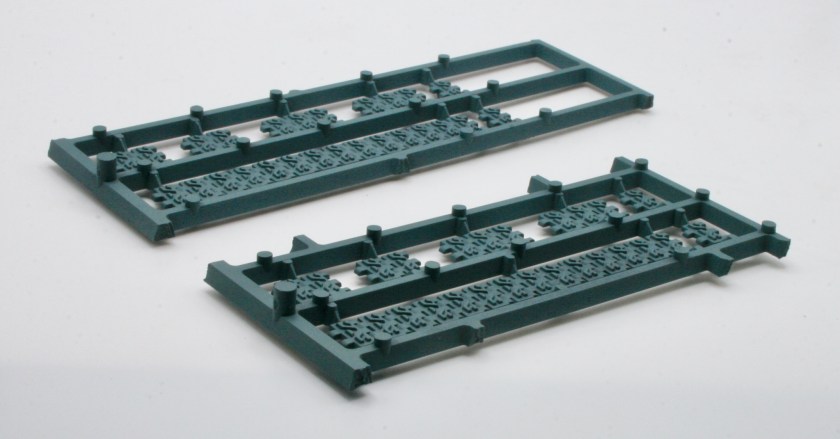
Painting tracks

Having started repainting my Land Raider, a MkIIb Land Raider, the Razorback and the Repressor, I decided to paint the tracks. Having liked what I did with the Deimos-pattern Rhino tracks, I went with the same process.

I had done a few different things with the different tracks, but most had a black undercoat.

I gave the Land Raider tracks a spray of Mechanicus Standard Grey.

I did the same for the Rhino tracks.

The tracks for the Deimos-pattern Rhino are much better than the tracks you get with the Rhino kit.

The next step will be a heavy drybrush of Gorthor Brown, then a wash of Agrax Earthshade Shade. The tracks will be finished off with a light drybrush, first with Leadbelcher, then Terminatus Stone.

Detailing the Land Raider

I have on my workbench a standard Land Raider. For the basecoat I used Tausept Ochre. I lost interest in the model, so, it got put into storage. However having liked the paint scheme I was using on my Deimos-pattern Rhino, I decided that I would find the model and paint this Land Raider in the same scheme. The first thing I did was spray the underneath of the model with Citadel Zandri Dust. I gave the model a couple of light sprays of Army Painter Daemonic Yellow. I also painted the weapon sub-assemblies.

I painted the lascannons with Citadel Leadbelcher.

This how they look attached the Land Raider.

I have also painted the exhausts and other weapons.

This is the Land Raider with an alternate hull frontal weapon, twin linked bolters.

Next stage will be the icongraphy.

Land Raider Lascannons

I have on my workbench a standard Land Raider. For the basecoat I used the Foundation Paints from Games Workshop, specifically Tausept Ochre. I lost interest in the model, so, it got put into storage. However having liked the paint scheme I was using on my Deimos-pattern Rhino, I decided that I would find the model and paint this Land Raider in the same scheme. The first thing I did was spray the underneath of the model with Citadel Zandri Dust. I gave the model a couple of light sprays of Army Painter Daemonic Yellow.

Back when I constructed the model, having made the hull I kept the weapons as separate assemblies.  The Lascannons for the Land Raider had been given a black undercoat some time ago when I undercoated the model.

I gave the weapon assemblies a partial basecoat of Citadel Zandri Dust. I then gave the weapon assemblies a couple of light sprays of Army Painter Daemonic Yellow.

This is how the weapons look attached to the Land Raider.

You can also see that I have started detailing the model, painting the flamer and exhausts with Citalde Leadbelcher.

The next stage will be painting the weapons with Leadbelcher.


Painting the Land Raider basecoat

As well as the Forgeworld MkIIB Land Raider I have on my workbench I also have a standard Land Raider. For the basecoat I used the Foundation Paints from Games Workshop, specifically Tausept Ochre. I lost interest in the model, so, it got put into storage.

However having liked the paint scheme I was using on my Deimos-pattern Rhino, I decided that I would find the model and paint this Land Raider in the same scheme. The first thing I did was spray the underneath of the model with Citadel Zandri Dust.

Games Workshop don’t do a yellow spray and I don’t have an airbrush. I did use a paint comparison site to find a close alternative to Yriel Yellow. The Daemonic Yellow spray from Army Painter seemed like a good choice, and my local FLGS had one in stock, which I bought for the Deimos-pattern Rhino.

I gave the model a couple of light coats of Daemonic Yellow.

The rear view.

The main weapons will be painted separately.

Next stage will be painting the weapons and the exhausts, as well as the iconography.