Decided that I would reboot a conversion idea I had for a 40K Ork Trukk with Krooz Missilz.
Many years ago I made a simple conversion to create an Epic Ork Trukk with Krooz Missulz (aka an Orkish version of the Imperial Deathstrike Missile Launcher. The model is built using a Flakwagon base, a firing platform from a Pulsa Rokitt and the Krooz Missulz? Well it’s a 40k scale Fighta-Bommer Missile.

In the most recent versions of Warhammer 40K there are no models and no rules for this kind of weapon. However there were rules for Apocalypse some years ago for what looked like a Krooz Missilz, but was described as a Pulsa Rokkit.
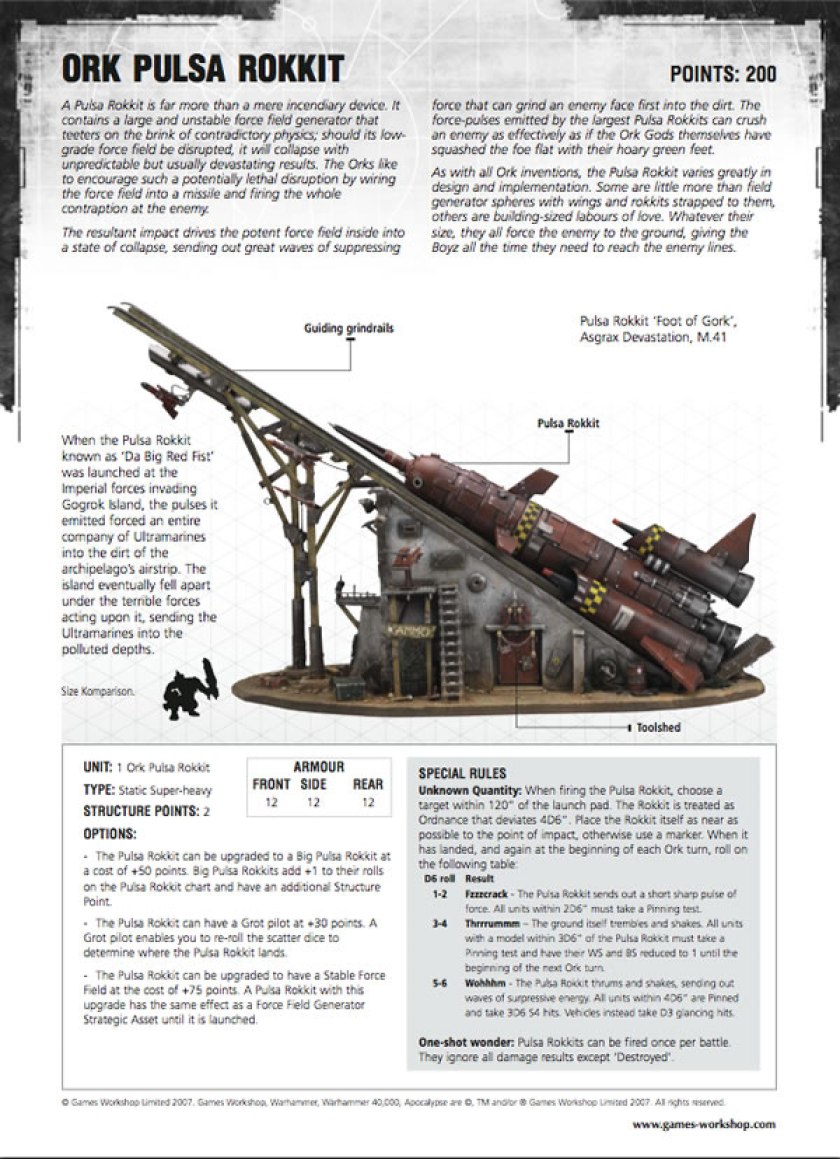
The (scratchbuilt) model used for the data sheet was much larger than the original metal Pulsa Rokkits from an earlier edition of Warhammer 40K. Those metal ones were much more like the Epic version.
I had planned to make a 40K version of this rocket many years ago. However like many projects it got shelved and I never made much progress with it. Having found some of the parts I decided to restart the project.
I am going to be using one of my unfinished Ork Trukk models as the platform for the rocket.

The flatbed doesn’t have the sides, so can be used for this, or other Ork heavy weapons.

The base for the missile part of the model will be the fuel tank from a 1/300th Academy Space Shuttle model kit.

In the kit, the rocket boosters were attached to the fuel tank. The rocket boosters were separated and will be used as different kinds of Ork rokkits. The fuel tank was then ready for conversion.
You can see how large the fuel tank is compared to the trukk.

I did though first, using a Grot Bomb Launcha firing frame, mock up the Ork Trukk with Krooz Missilz.

This was working for me. I wanted to Orkify the missile, so started to add details using spare parts from various kits and some plasticard and plastic struts.


Pleased with how it is looking, but the missile needs a lot more work.