Ork Big Trakk

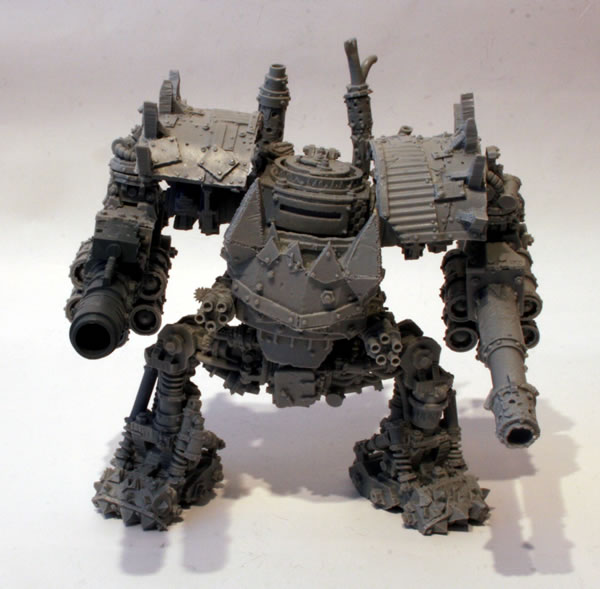
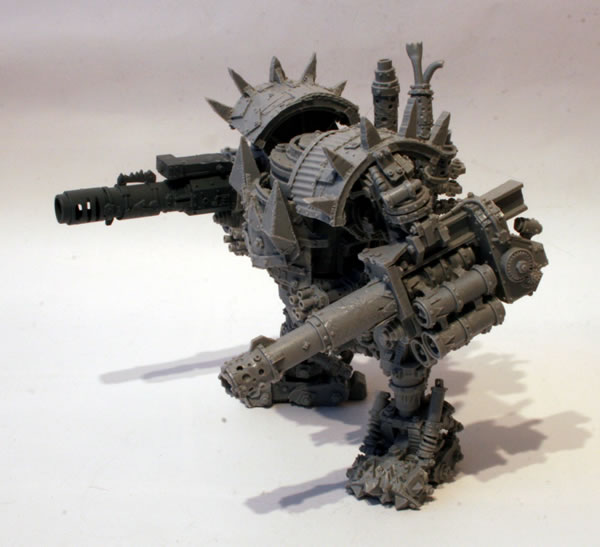
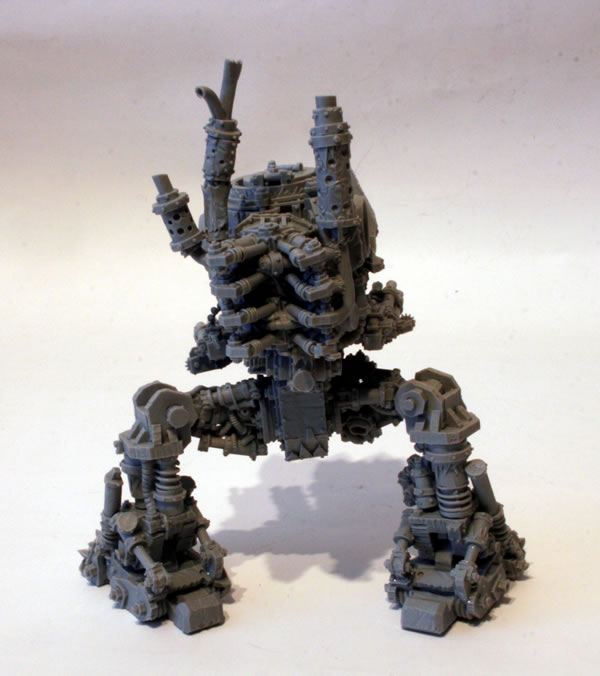
This is not a simple kit, and it is furtherly complicated by a lack of instructions. Hopefully this workbench feature will help anyone else putting one of these wonderful and well detailed models together.

According to a commenter, “There are instructions available now. Just give Forgeworld a call and they will send it to you.”

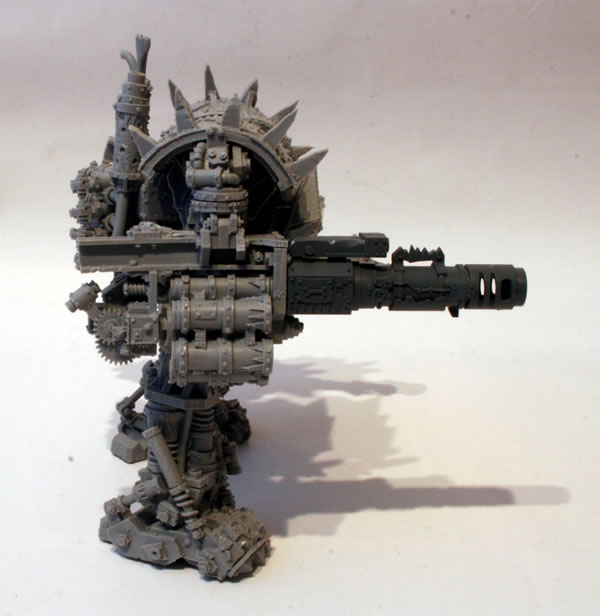
When the Forge World models are cast, the mould is given a spray (I guess) of some kind of lubricant to allow the cast model to be released from the mould easily. However the lubricant also acts as a barrier to paint, so as happened with previous models I (and others) have painted is that the paint flecks off.

Washing the pieces of the kit in water with a drop of washing up liquid should remove the lubricant. Avoid using hot water as this could warp the resin (a useful tip if you need to bend warped resin back to its original shape).

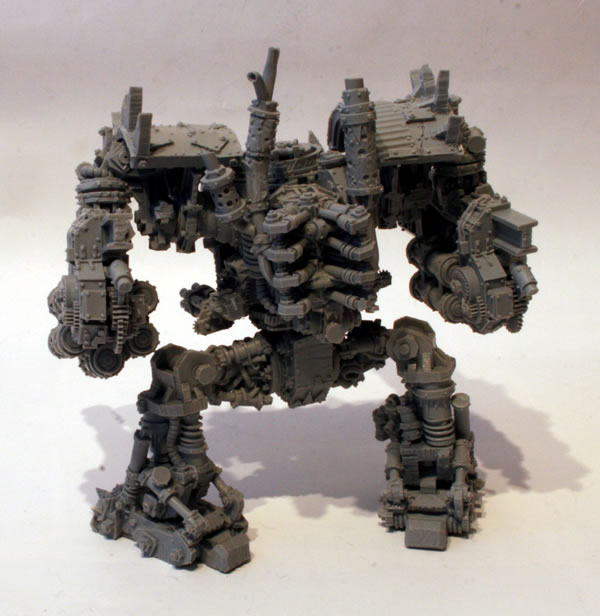
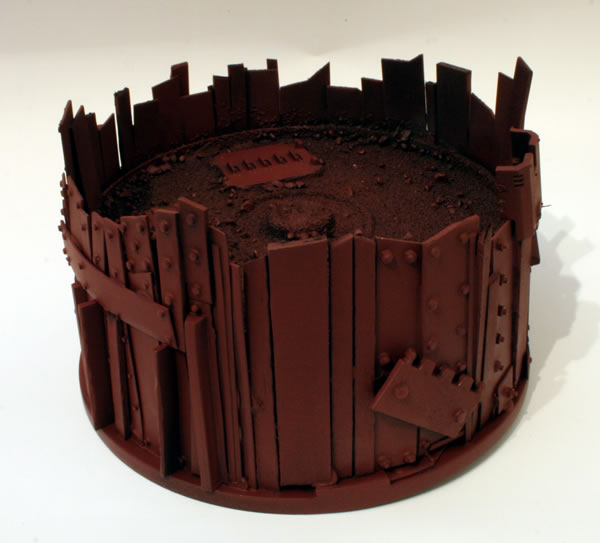
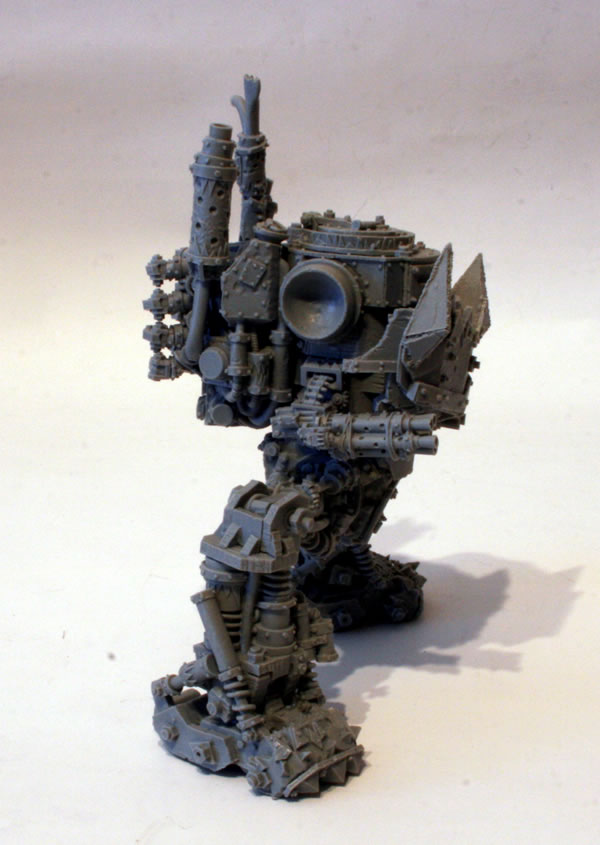
The first stage was fixing the suspension to the main body of the vehicle.

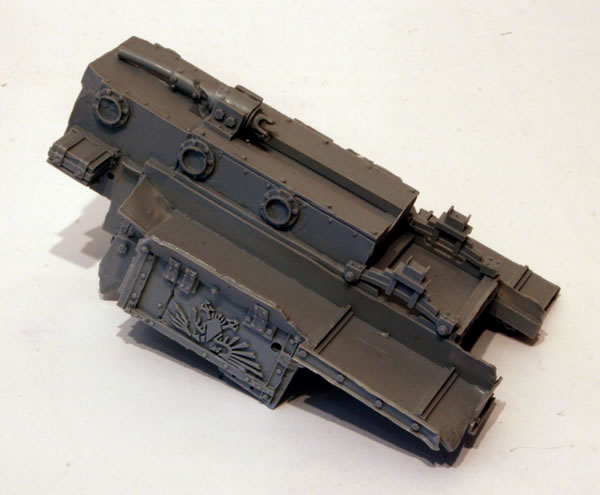
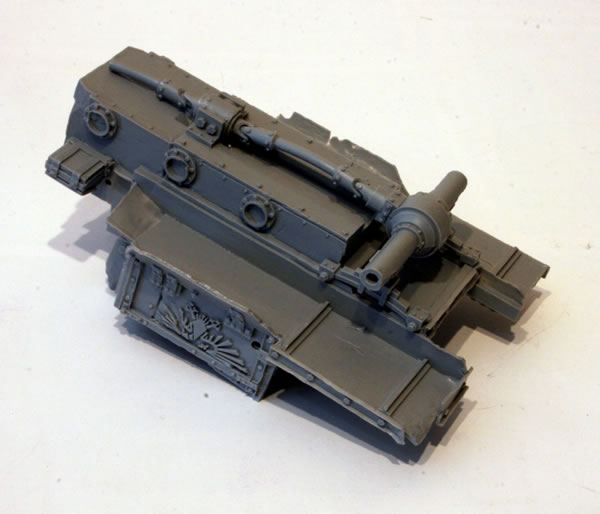
The left side was added the main flatbed of the superstructure.

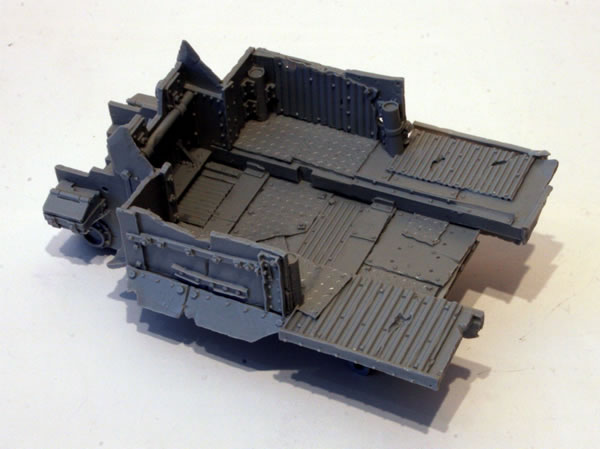
The driving axle was fixed to the driving shaft, this was then attached to the suspension.

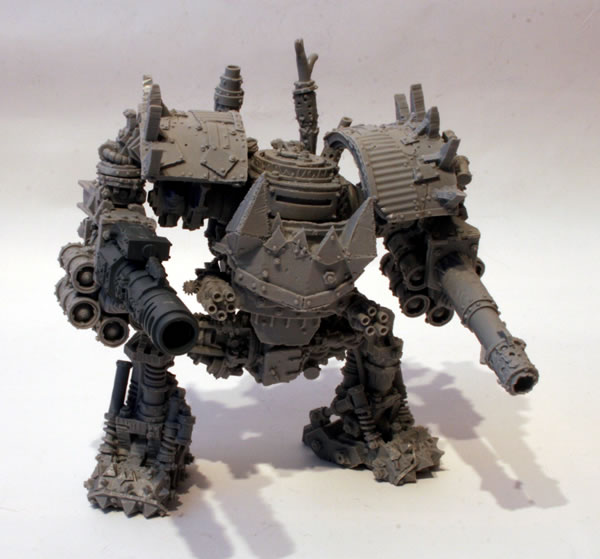
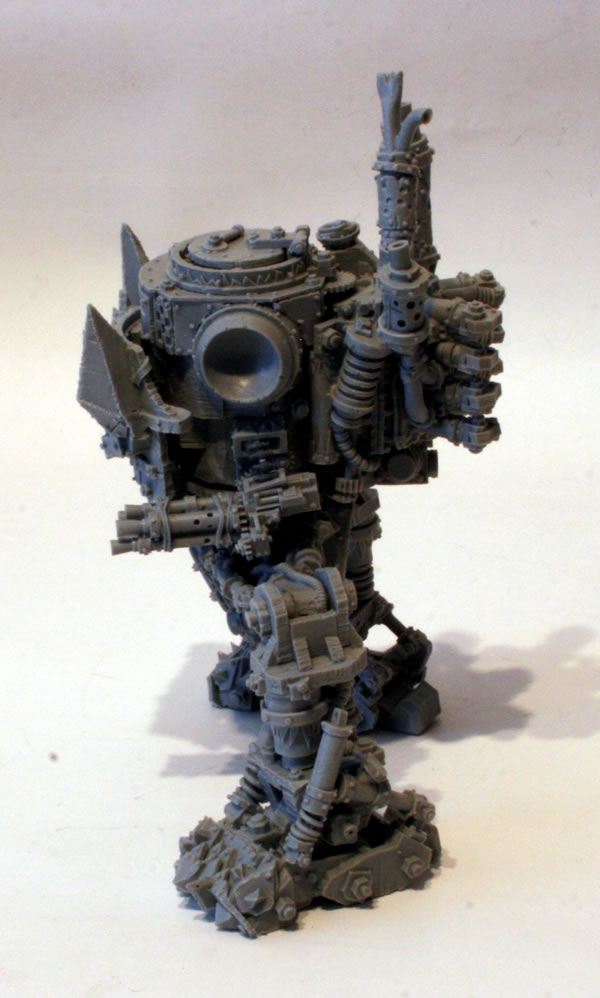
Hopefully my workbench feature will help anyone else putting one of these kits together.

Gallery of photographs of the Big Trakk.

Starting the Ork Big Trakk

Ork Big Trakk

Originally this was to be a conversion of the Ork Trukk kit, however in the end it was decided to make it a full resin kit.

Ork Big Trakk

I really like this model, which combined with Trukks and Halftrakks gives the Orks a variety of vehicles that you would expect to find in their force.

Main issue is that it comes with no instructions and it isn’t the easiest kit to put together.

So this is what you get in the box, quite a bit of resin.

Ork Big Trakk

This is not a simple kit, and it is furtherly complicated by a lack of instructions. Hopefully my workbench feature will help anyone else putting one of these wonderful and well detailed models together.

Gallery of photographs of the Big Trakk.

Adding the main weaponry

So after getting all the parts together the next stage was finishing the model off. Sticking the arms on, the frontal armour and the exhausts.

As you can see from this rear view, there is a lot of detail on this model.

I aim to bring out this detail using a combination of washes and drybrushing.

My converted KilKannon, it used the plastic KilKannon from the Battlewagon upgrade sprue.

I did consider having the guns pointing at the same target, but in the end decided to have them slightly off kilter.

See the full workbench feature on my Ork Mega Dread.

Mega-Dread main weaponry

I bought the Mega Dread with two KilKannon arms. The reason for getting two KilKannons was that I was not that impressed with the close combat weapon that was available at the time, the claw arm looked very flimsy and as a result I felt the model looked unbalanced (from the photographs). Since I bought mine, Forge World have bought out a buzzsaw weapon arm for the Mega-Dread that is much better in my opinion and looks “heavier” and more deadly. If I was to buy a second Mega-Dread I would seriously think about getting the buzzsaw.

These are nice castings that go together really easily.

Mega-Dread main weaponry

Though using one on the left and the right means taking a little extra care to ensure that you don’t end up with two left arms!

For one of the arms I used the plastic KilKannon from the Ork Battlewagon Upgrade Sprue. My reason for this was to make the Mega-Dread look too well constructed, I wanted the Mega-Dread to look like (as it does with the main part of the model) as though it was thrown together by a Mek from lots of rubbish and parts in his workshop. The plastic weapon needed minimal filing to fit and adds variety to the model.

Mega-Dread main weaponry

One left arm and one right arm… Of course the model as a result has two spiked shoulder pads.

Mega-Dread main weaponry

See the full workbench feature on my Ork Mega Dread.

Inking the fort

Having gone back to my Ork Fort I decided to give the roof floor a wash of brown ink.

Now I have done this, I will drybrush the floor of the roof of the fort to highlight the detail. I will then add further washes and use some Forge World weathering powders to show a more used and worn look.

As for the walls of the fort, these I will wash, drybrush and weather, but not as heavy as the roof floor.

Still lots to do.

Attaching the Mega Dread legs

Next stage on my Ork Mega Dread was attaching the legs having attached the thighs to the main body.

One of the challenges was to ensure that having positioned the legs that the model not only could stand, but was also stable so wouldn’t fall over during a game. I didn’t really want to have to base the model if I could help it. This is so I could use it in various games and not have a grassy scenic base whilst playing Cityfight style games.

Though… of course if you do use a base, you could convert the model to make it look like it was walking rather than standing.

See the full workbench feature on my Ork Mega Dread.

Weirdboy Warbike

Just under a year ago, Games Workshop released some new plastic Skaven kits.

It wasn’t just me, but a lot of other Ork players looked at the new plastic Skaven Doomwheel and thinking, “now that could be an interesting Ork vehicle or bike!” I am thinking a Weird Boy transport option. Of course being plastic means that conversion should be easier than the previous metal version.

In the box there are three plastic sprues.

As you might expect, a fair number of the parts have Skaven style insignia and icons on them. I am thinking that carving these off the plastic parts shouldn’t be too hard. The other thing I could do is cover them up with Ork icons. I have the new brass ones form Forge World and a fair few plastic ones from the various Ork kits I have.

The engine will be a key conversion for this model, it’s at times like this that I wish Forge World would make more conversion bitz for the Orks. I think I will need to use some plastic tubing for this. I am intending to add to the conversion using parts from the Ork Trukk kit, though I am also thinking that I may need to get some Ork Bikes as well.

Undercoating the Kil Kannon

Having put the Kil Kannon together I gave the model a white undercoat.

Like my Big Zzappa, I am thinking rather than a black basecoat (which is what I have used in the past on other similar weapons) I will use a basecoat of Boltgun Metal and then use washes and weathering powders.

See the workbench feature on the Forgeworld Ork KilKannon.