Tallarn Missile Launcher Team

As well as my other Daemonhunters Inquisitorial Stormtroopers which are based on the Cadian Kasrkin I have also decided to add a unit based on the Tallarn or I may just use them as inducted Imperial Guard. I have had these models for a fair while.

I did look at my original painting scheme that I was using for the blister pack of Tallarn Imperial Guard. I had used a basecoat of Desert Yellow followed by a wash consisting of Chestnut Ink and Scorched Brown paint.

However I did think about doing something slightly different now that Contrast paints were available. I had painted some Star Wars Legion Rebel Troopers with Citadel Snakebite Leather Contrast paint and had been impressed with the results.

I painted the models with Snakebite Leather Contrast paint, after giving them another spray with Citadel Corax White to improve the effect of the contrast paint.

The next step was a drybrush. The other Tallarn models I painted I had  drybushed the three models with Snakebite Leather and Bleached Bone. Neither of these paints were available any more. So using this chart I used Layer Balor Brown instead of Snakebite Leather and used Layer Ushabti Bone instead of Bleached Bone.

These are the two crew for the missile launcher team.

Unlike highlighting and glazes and the suchlike, drybrushing does not give as neat as a finish as those methods. However I quite like the dusty look for these desert based models and these are going to be gaming models, not Golden Demon entries!

See the workbench journey for this Tallarn Imperial Guard boxed set and the workbench feature on the Tallarn Imperial Guard blister.

Reflecting on the Ork Looted Rhino

There are Orks who have looted Imperial weaponry. Not only can they use Space Marine weapons they can also borrow the transport.

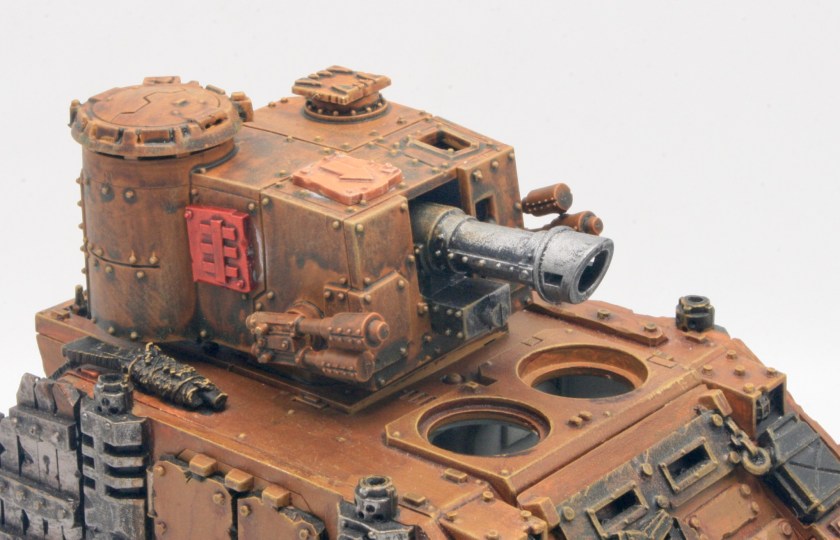
A Looted Rhino is an Imperial Rhino armoured personnel carrier that has been looted from a previous battlefield by Ork Lootas and is now used as a transport for their WAAAGH!. These machines are “upgraded” with Ork technology and are capable of loading a group of Ork Boyz. While in battle, Looted Rhinos are fast, and are usually outfitted with a gunner. Looted Rhinos have been used as weapons during many past Ork invasions. However, Looted Rhinos are more prone to breakdowns and often possess inferior armoured protection and do less damage than their Imperial counterparts because of the Orks’ lack of maintenance and care for their stolen vehicles.

I started my Ork Looted Rhino many years ago, and the process I used is outlined on my workbench feature on the Looted Rhino.

Though I hadn’t used it as a transport in games, I have used it as scenery in a few games.

I was painting the tracks for my Repressor and Razorback when I realised I had three sets of tracks. It took me a while, before I realised that the tracks were for my Ork Looted Rhino. I actually thought I had affixed them, but obviously I hadn’t.

So, I went through some boxes and I got the Looted Rhino and reflected on progress. Yes the base coat was done and there was quite a bit of weathering.

I still needed to do the iconography, some of the attached baggage. I also needed to do the front hatches. Though I had done most of the interior and was pleased with that.

Looking over the model I realised I still needed to do a fair amount of work to get it done.

Ah well, back it goes on the workbench.

Highway Patrol

As well as picked up the Implements of Carnage plastic sprues I also bought a blister of metal models for Gaslands. I bough the Highway Patrol figures.

You get five 20mm metal figures that are just the right size for Matchbox (Hot Wheels) size cars.

They are nice clean castings. I will be basing them and then undercoating with white paint. I am thinking I will use a blue contrast paint for their uniforms.

Making progress on the Repressor

The Repressor tank is often used by Sisters of Battle as transport, and by the Adeptus Arbites in an anti insurgency role. I said  in a blog post back in 2004.

“I do like this model and I am intending to get one to use with my Daemonhunters army as a transport for the Storm Troopers”.

I did get one that Christmas as a present. Though I actually started building and painting this model back in 2007, I recently retrieved it from storage and decided that I would try and finish painting it. I realised I had made quite significant progress.

Having sprayed the model with Citadel Zandri Dust. I started the detailing, using Leadbelcher on the weapons and the exhausts. The next step was painting the iconography and purity seals.

Here is the Repressor with the dozer blade and turret.

I had used shades on the blade and the turret. I still have some work to do on the iconography before I shade the rest of the vehicle.

Painting the Grot Bomb Launcha Mk II

The Forgeworld Grot Bomb Launcha is probably one of my all time favourite models. I already have a workbench feature on that Grot Bomb Launcha however I did get another model of one at GamesDay 2005.

I found the chassis of this one in of the boxes with my Land Raiders. Having painted the chassis with a spray of Citadel Zandri Dust, I used some other brown paints to paint the boxes on the chassis. I painted the exhausts and the rear deck with Leadbelcher.

I then gave the model a wash using Citadel Shade Agrax Earthshade.

The next stage will be a drybrush.

Basecoating and shading the other Ruined Factorum

Having picked up the Ruined Factorum sprue that came with Warhammer 40000 Imperium 31 a couple of weeks back, I also purchased issue 34 for the second sprue .

The ruins are from the The Battlezone: Manufactorum – Sub-cloister and Storage Fane kit which did cost £37.50 at Games Workshop and contains two similar sprues. So at £8.99 you would be making a saving of £9.76.

You get two corner ruins, all coming on a single sprue. They go together really easily. There are two corners, whereas with the other sprue you got a large corner and a smaller corner. This one is similar, but the smaller ruined corner is larger and the larger corner is smaller (if that makes sense).

I used Humbrol Tank Grey 67 spray to give the underfloor a darker feel before giving the model a coat of  Mechanicus Standard Grey Spray.

I gave the models a wash of Nuln Oil Shade.

Land Raider Iconography

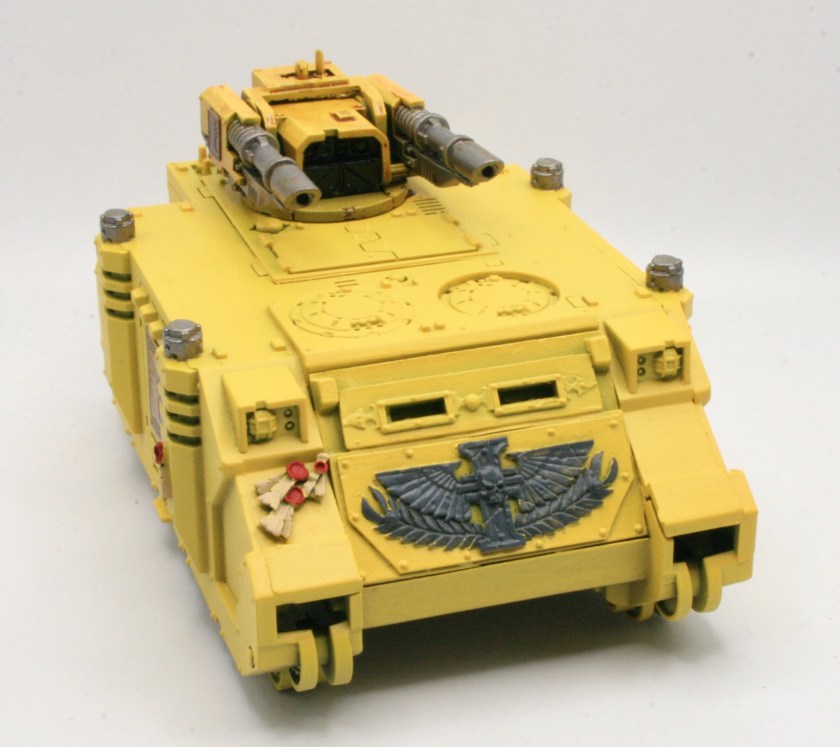
I have on my workbench a standard Land Raider. For the basecoat I used Tausept Ochre. I lost interest in the model, so, it got put into storage. However having liked the paint scheme I was using on my Deimos-pattern Rhino, I decided that I would find the model and paint this Land Raider in the same scheme. The first thing I did was spray the underneath of the model with Citadel Zandri Dust. I gave the model a couple of light sprays of Army Painter Daemonic Yellow. I also painted the weapon sub-assemblies.

I started detailing and painting the iconography.

For the skull and the paper on the purity seals I used Ushabti Bone. For the wax seals I used Mephiston Red.

Shading the corner

I got a couple of Ruined Factorum sprues that came with Warhammer 40000 Imperium 34. The ruins are from the The Battlezone: Manufactorum – Sub-cloister and Storage Fane kit. One I decided I was going to paint in the same manner as the first Ruined Factorum, for the second I chose to follow the (white and red) paint scheme as outlined in Warhammer 40000 Imperium.

Having shaded the larger ruined corner, I had used Nuln Oil for the main shade then I went about using  some Agrax Earthshade Shade and Seraphim Sepia Shade.

Purity Seals on the Repressor

The Repressor tank is often used by Sisters of Battle as transport, and by the Adeptus Arbites in an anti insurgency role. I said  in a blog post back in 2004.

“I do like this model and I am intending to get one to use with my Daemonhunters army as a transport for the Storm Troopers”.

I did get one that Christmas as a present. Though I actually started building and painting this model back in 2007, I recently retrieved it from storage and decided that I would try and finish painting it. I realised I had made quite significant progress.

Having sprayed the model with Citadel Zandri Dust. I started the detailing, using Leadbelcher on the weapons and the exhausts. The next step was painting the iconography and purity seals. For the skull I used Ushabti Bone.

I painted the purity seals using Ushabti Bone for the paper and for the wax seals I used Mephiston Red.

Undercoating the converted ruins

Back in April I got a Ruined Factorum sprue in  Warhammer 40000 Imperium issue 31. You get two corner ruins, all coming on a single sprue. Following that I got a couple of Ruined Factorum sprues that came with Warhammer 40000 Imperium issue 34.  You get another two corner ruins, all coming on a single sprue.

I did manage to pick up a second magazine and decided that I would convert them. It was a relatively simple conversion swapping over the corners. With the larger sides I needed to cut them down.

In issue 48 of Warhammer 40000 Imperium there was a re-release of the sprue from issue 31. With this repeat release of the sprue in issue 48, I decided I would use them for a conversion again. Unlike the other sprue from issue 34, this, one really isn’t suited to swapping corners. This is down to the differences in height. So, what I decided to do was to use the two different sprues from issues 34 and 48 and swap the corners. This would result in four different corner ruins from what I had already.

Having constructed the ruins I gave them a white undercoat, using a Corax White spray.

The first conversion I did took the largest pieces from each sprue. They fitted with no need to trim any of the ruins. I then used the larger floor pieces, which actually worked well together.

The other sides of these ruins go together as well.

This left the smaller corners.

The final corner ruin is quite small, using the smaller corner pieces.

The next stage will be a basecoat of grey paint.