Painting the base of the Forge World Grey Knights Dreadnought

I have had a Mark IV Forge World Grey Knights Dreadnought on my workbench for a while. After getting some weapon arms for the model. I gave the main model a black undercoat and started base coating with a metallic paint. The weapons I had given a white undercoat. Getting it out from storage, I decided to almost start again and gave the model a base spray of Leadbelcher. I gave the model a wash of Nuln Oil Shade. For the next stage I used some Citadel Leadbelcher. I took a large brush and gave the model, what I would call, a heavy drybrush. I then did a lighter drybrush of various silver paints.

I did intend to paint the base for the model next, but upon checking the workbench feature for my Grey Knights, I realised that I needed a paint I didn’t have. For my Grey Knights I painted the flocked (well sanded) bases with Bestial Brown and then drybrushed with Bleached Bone. After that I went over the edge of the slottabase again with Bestial Brown.

I don’t have a pot of Bestial Brown, and Citadel no longer manufacture that colour. According to the Dakka Dakka paint compatibility chart the best option is Mournfang Brown. So, the next time I was out and about I bought a pot of Mournfang Brown. I used this to paint the base of the Dreadnought.

Forge World Grey Knights Dreadnought

Next step will be drybrushing the base.

See the workbench feature on the Grey Knights Dreadnought.

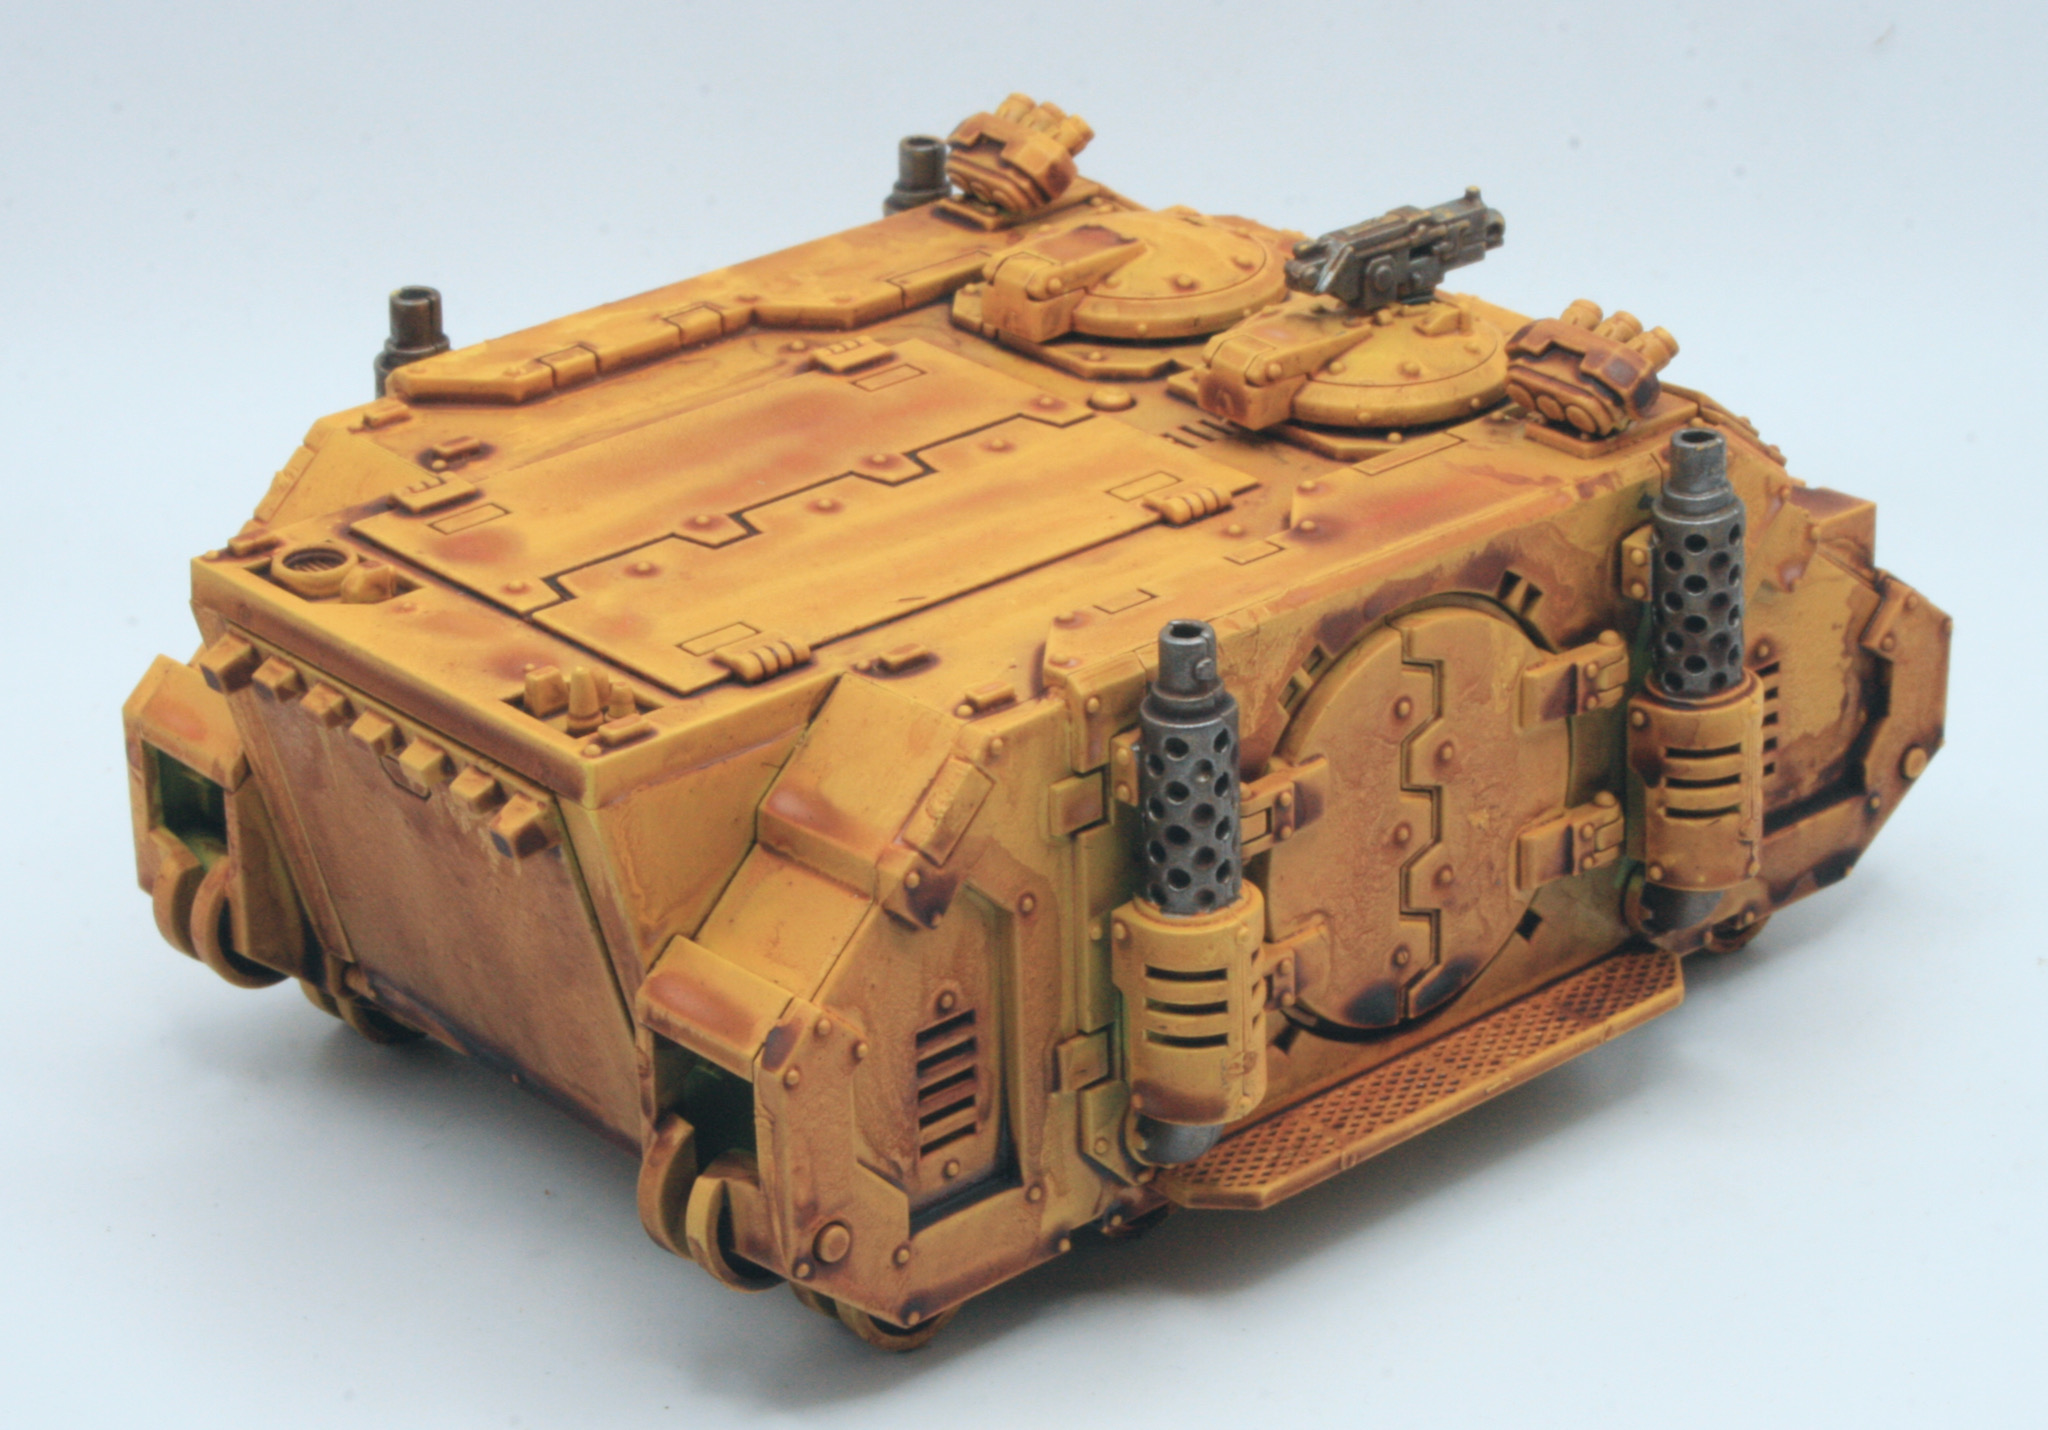
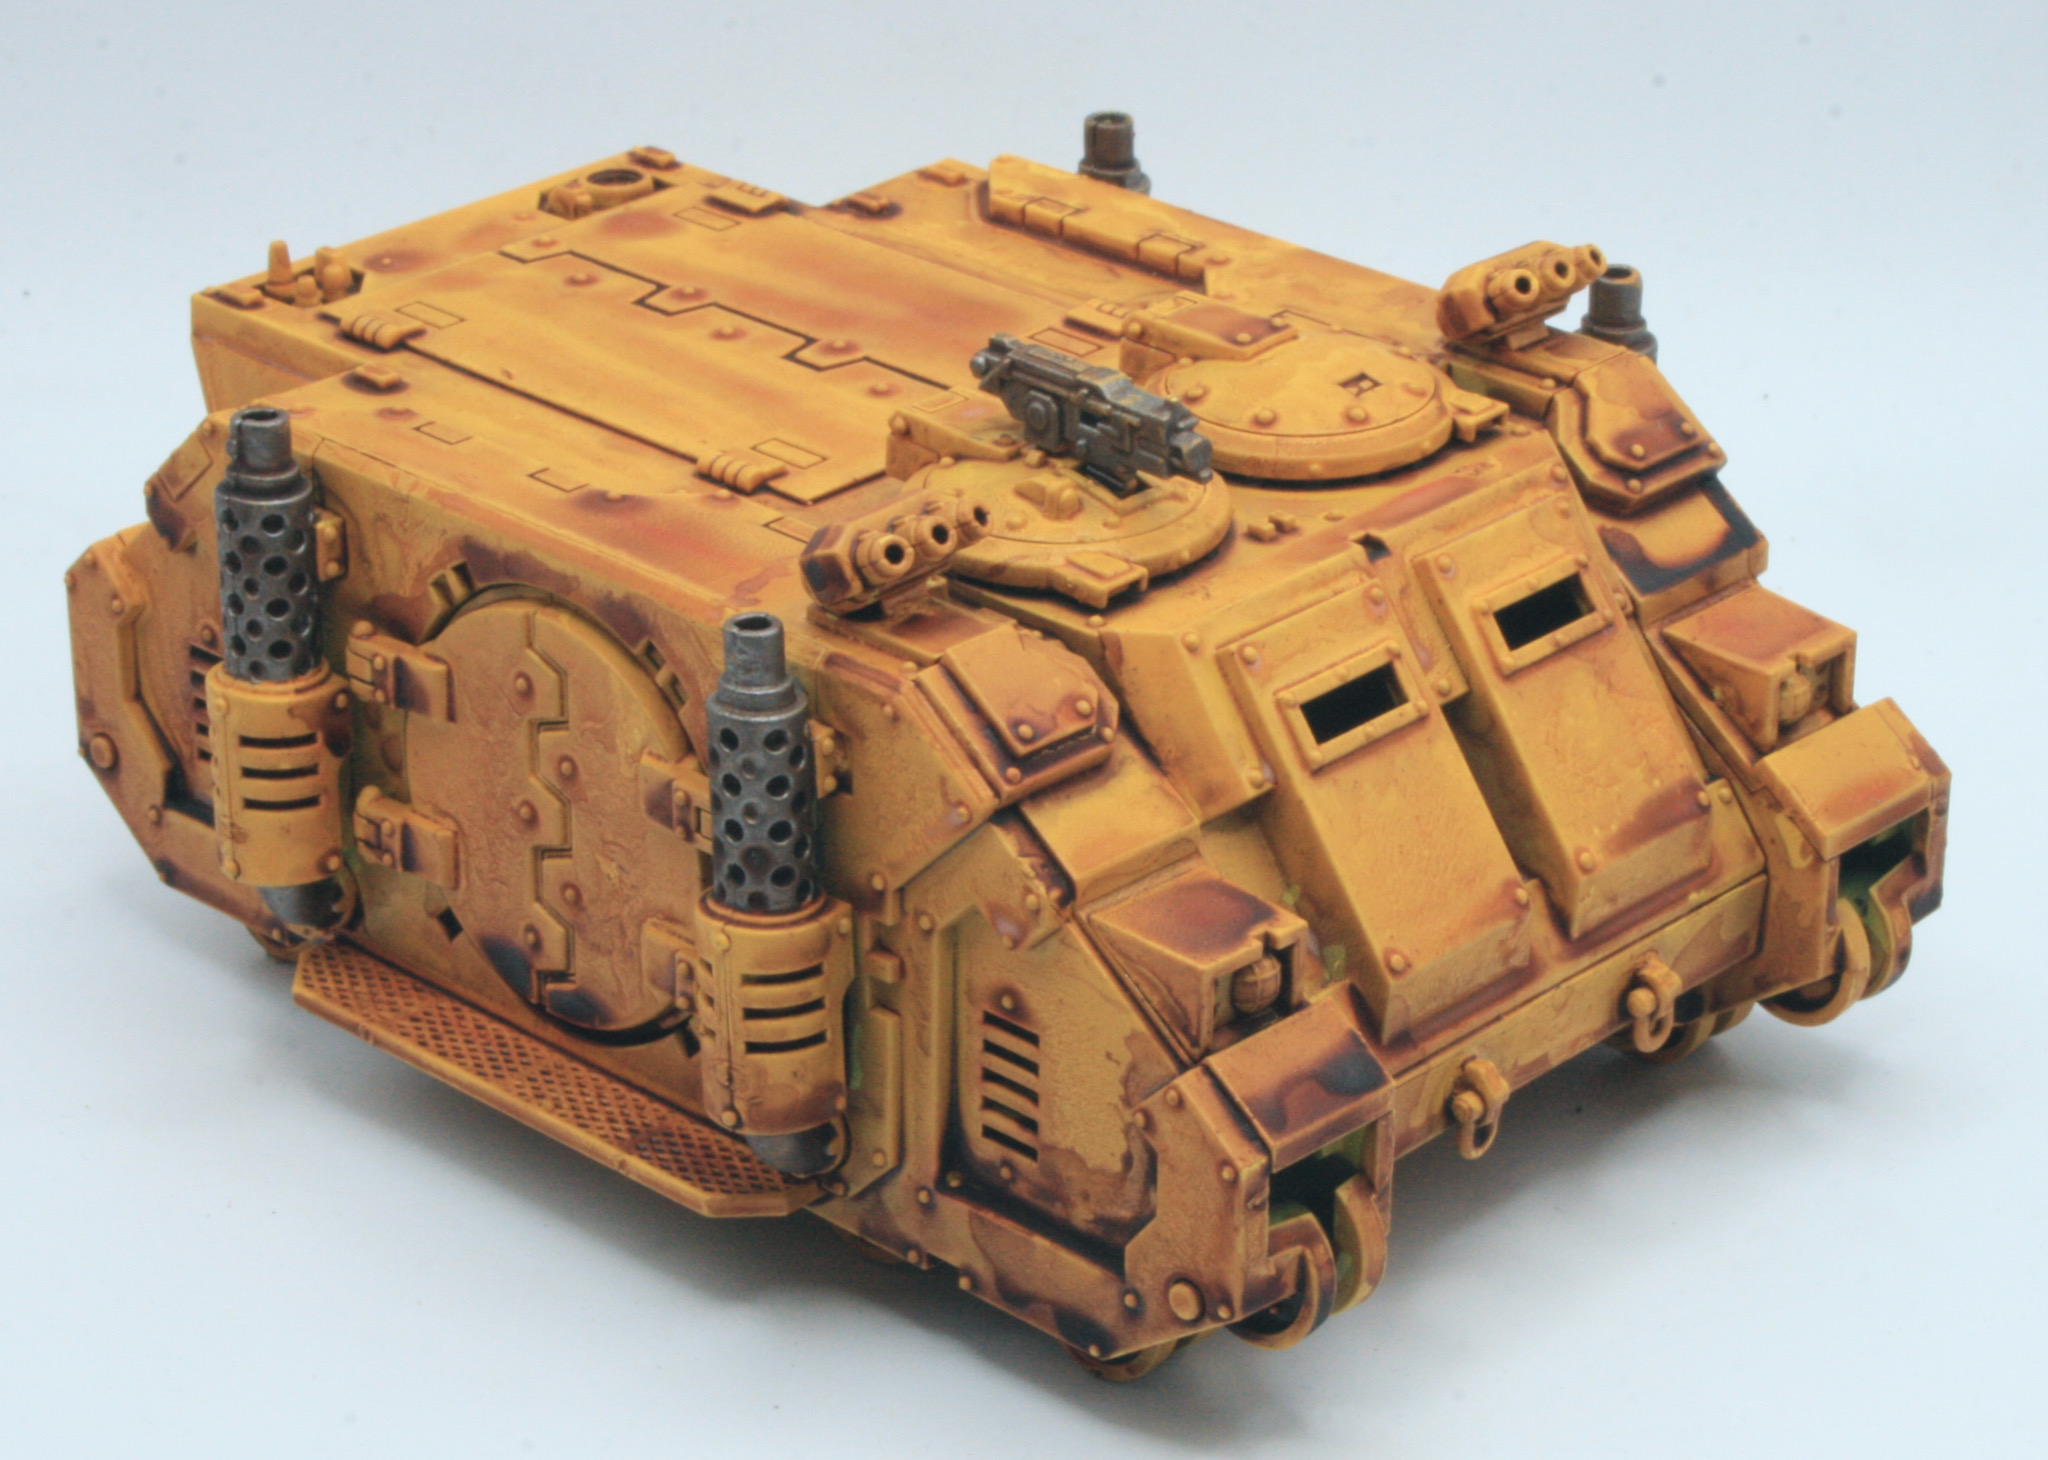
Painting the Deimos Pattern Rhino

The Rhino is the most widely used armoured personnel carrier in the Imperium. Based on ancient STC technology, the fundamental design is robust, reliable, and easy to maintain, with an adaptive power plant that can run off a wide variety of fuels.

I bought the plastic Deimos Pattern Rhino when it came out in the summer, you can see the workbench for that Rhino here.  I was lucky enough to get a second Rhino for a Christmas present. The model has many more parts and is a more detailed kit than the original plastic Rhino kit that came out in the 1980s. I constructed the model to the instructions, though I left the tracks off to paint separately. I gave the model an undercoat of Citadel White Scar. I gave the model a couple of light coats of Daemonic Yellow. I also painted the bolter and exhausts with Leadbelcher. I then shaded the model.

For the next stage I used some Citadel Layer Yriel Yellow. I took a large brush and gave the model, what I would call, a heavy drybrush. I put paint on the brush, and then used some kitchen towel to remove most of the paint, and then using a heavy stippling process added paint to the model.

The plan was that this would take the flat surfaces of the model back to a flatter base colour.

Some of the areas where the shade pooled will probably need some more work.

See the workbench feature on the Deimos Pattern Rhino II.

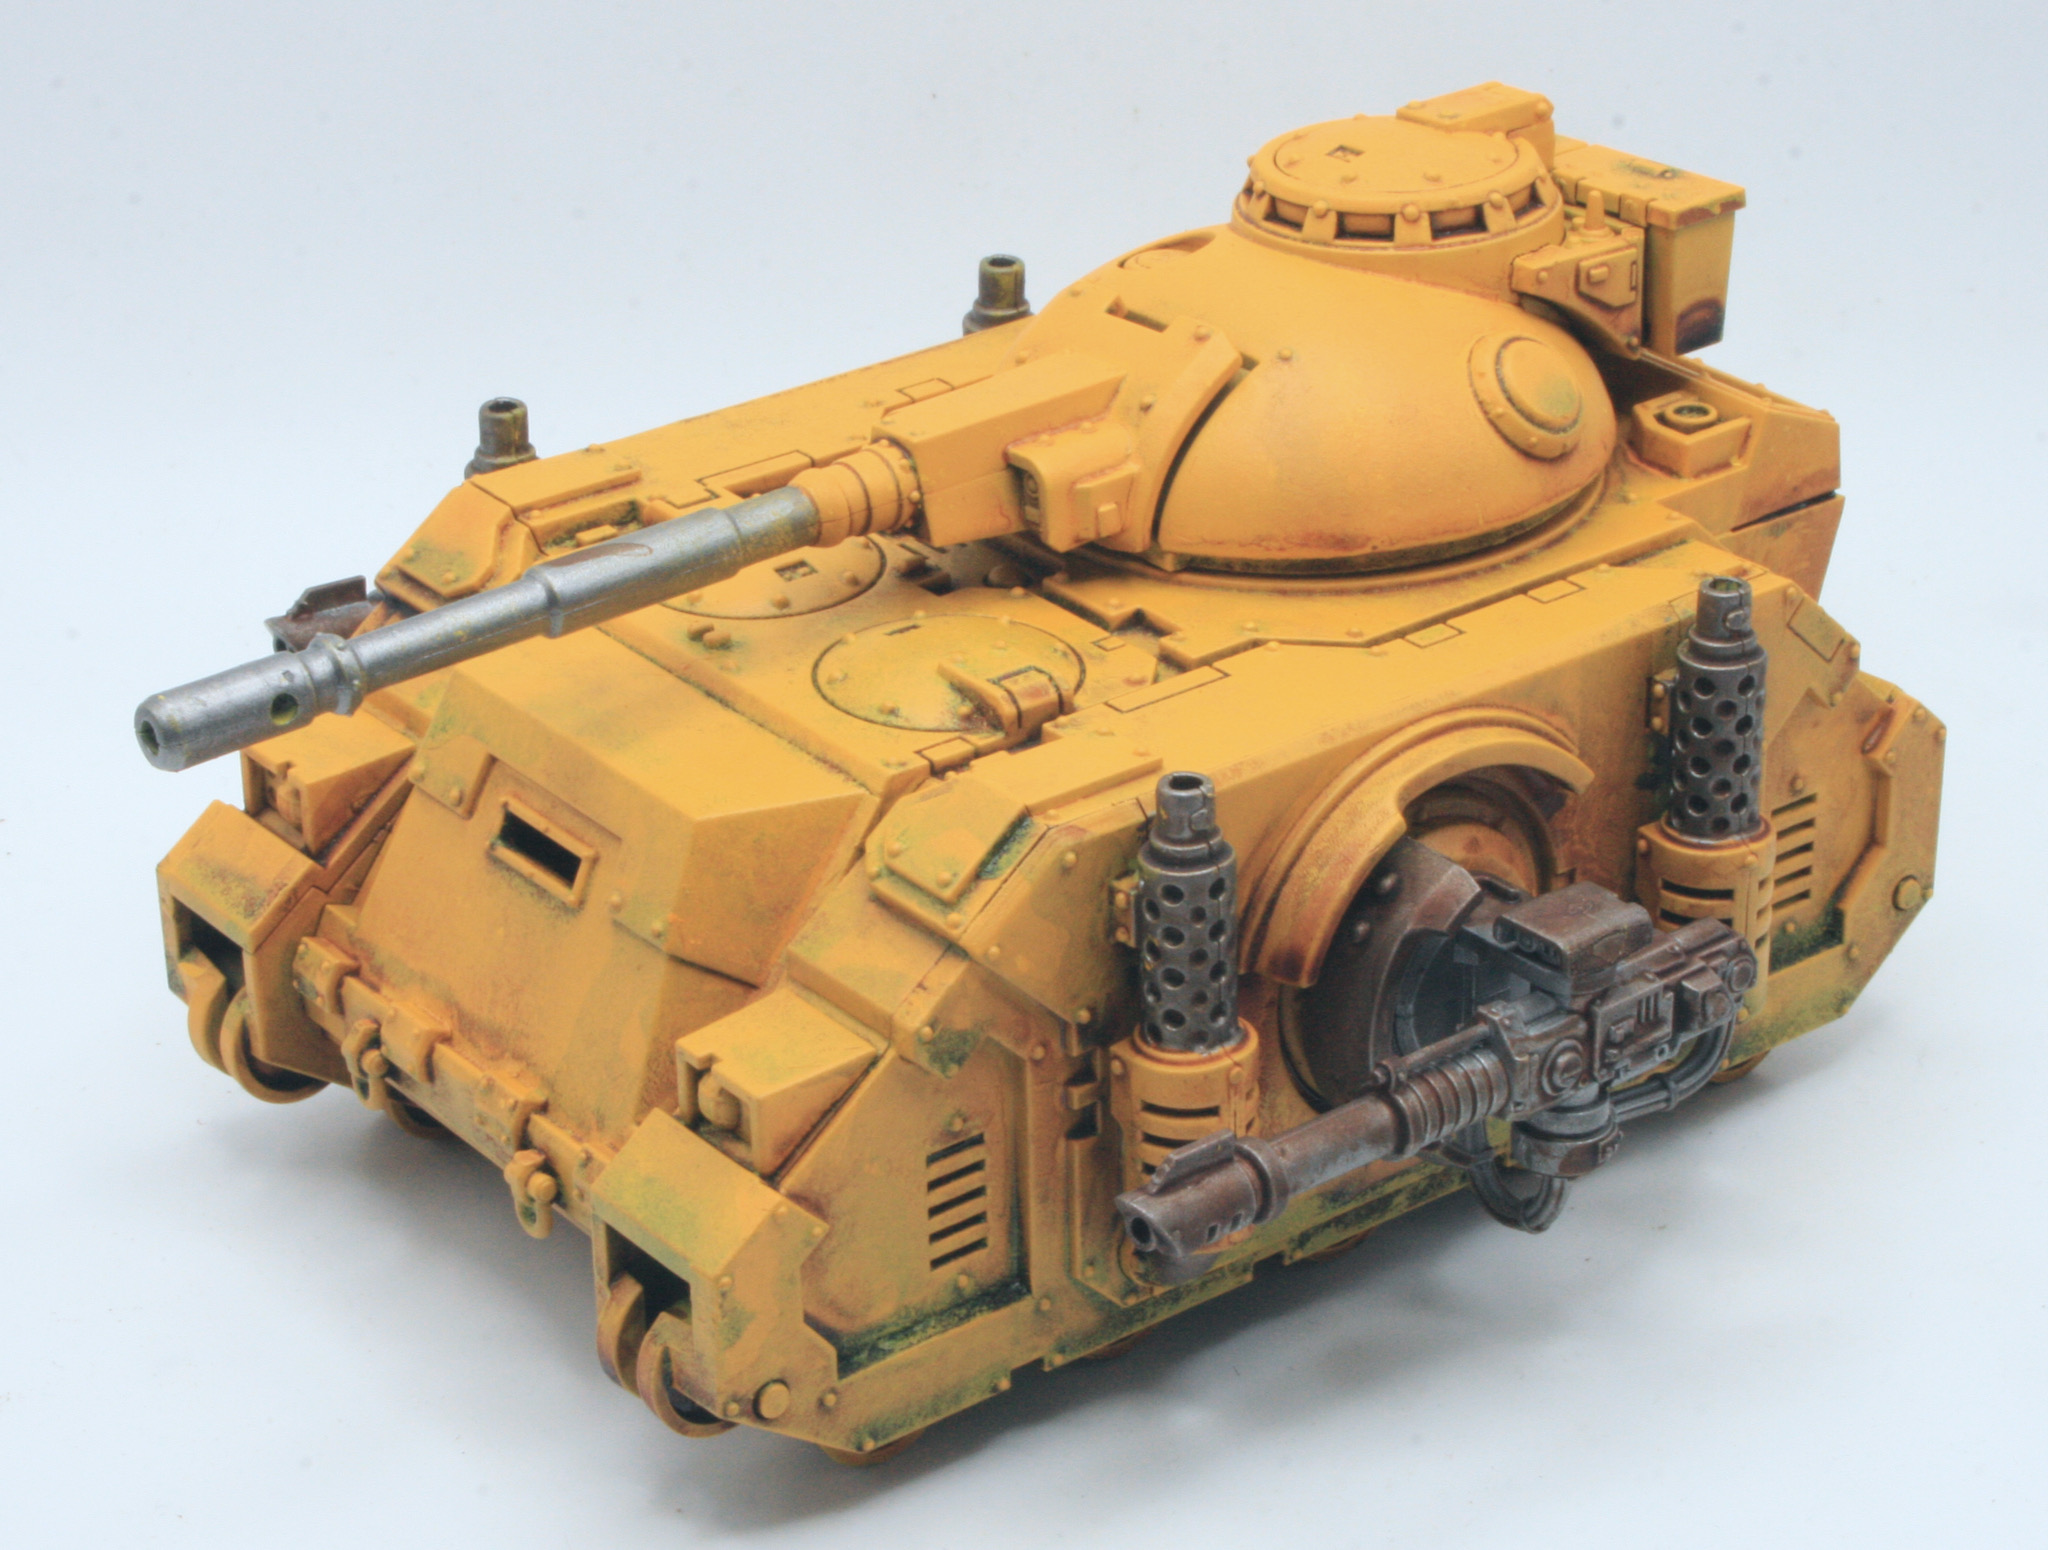
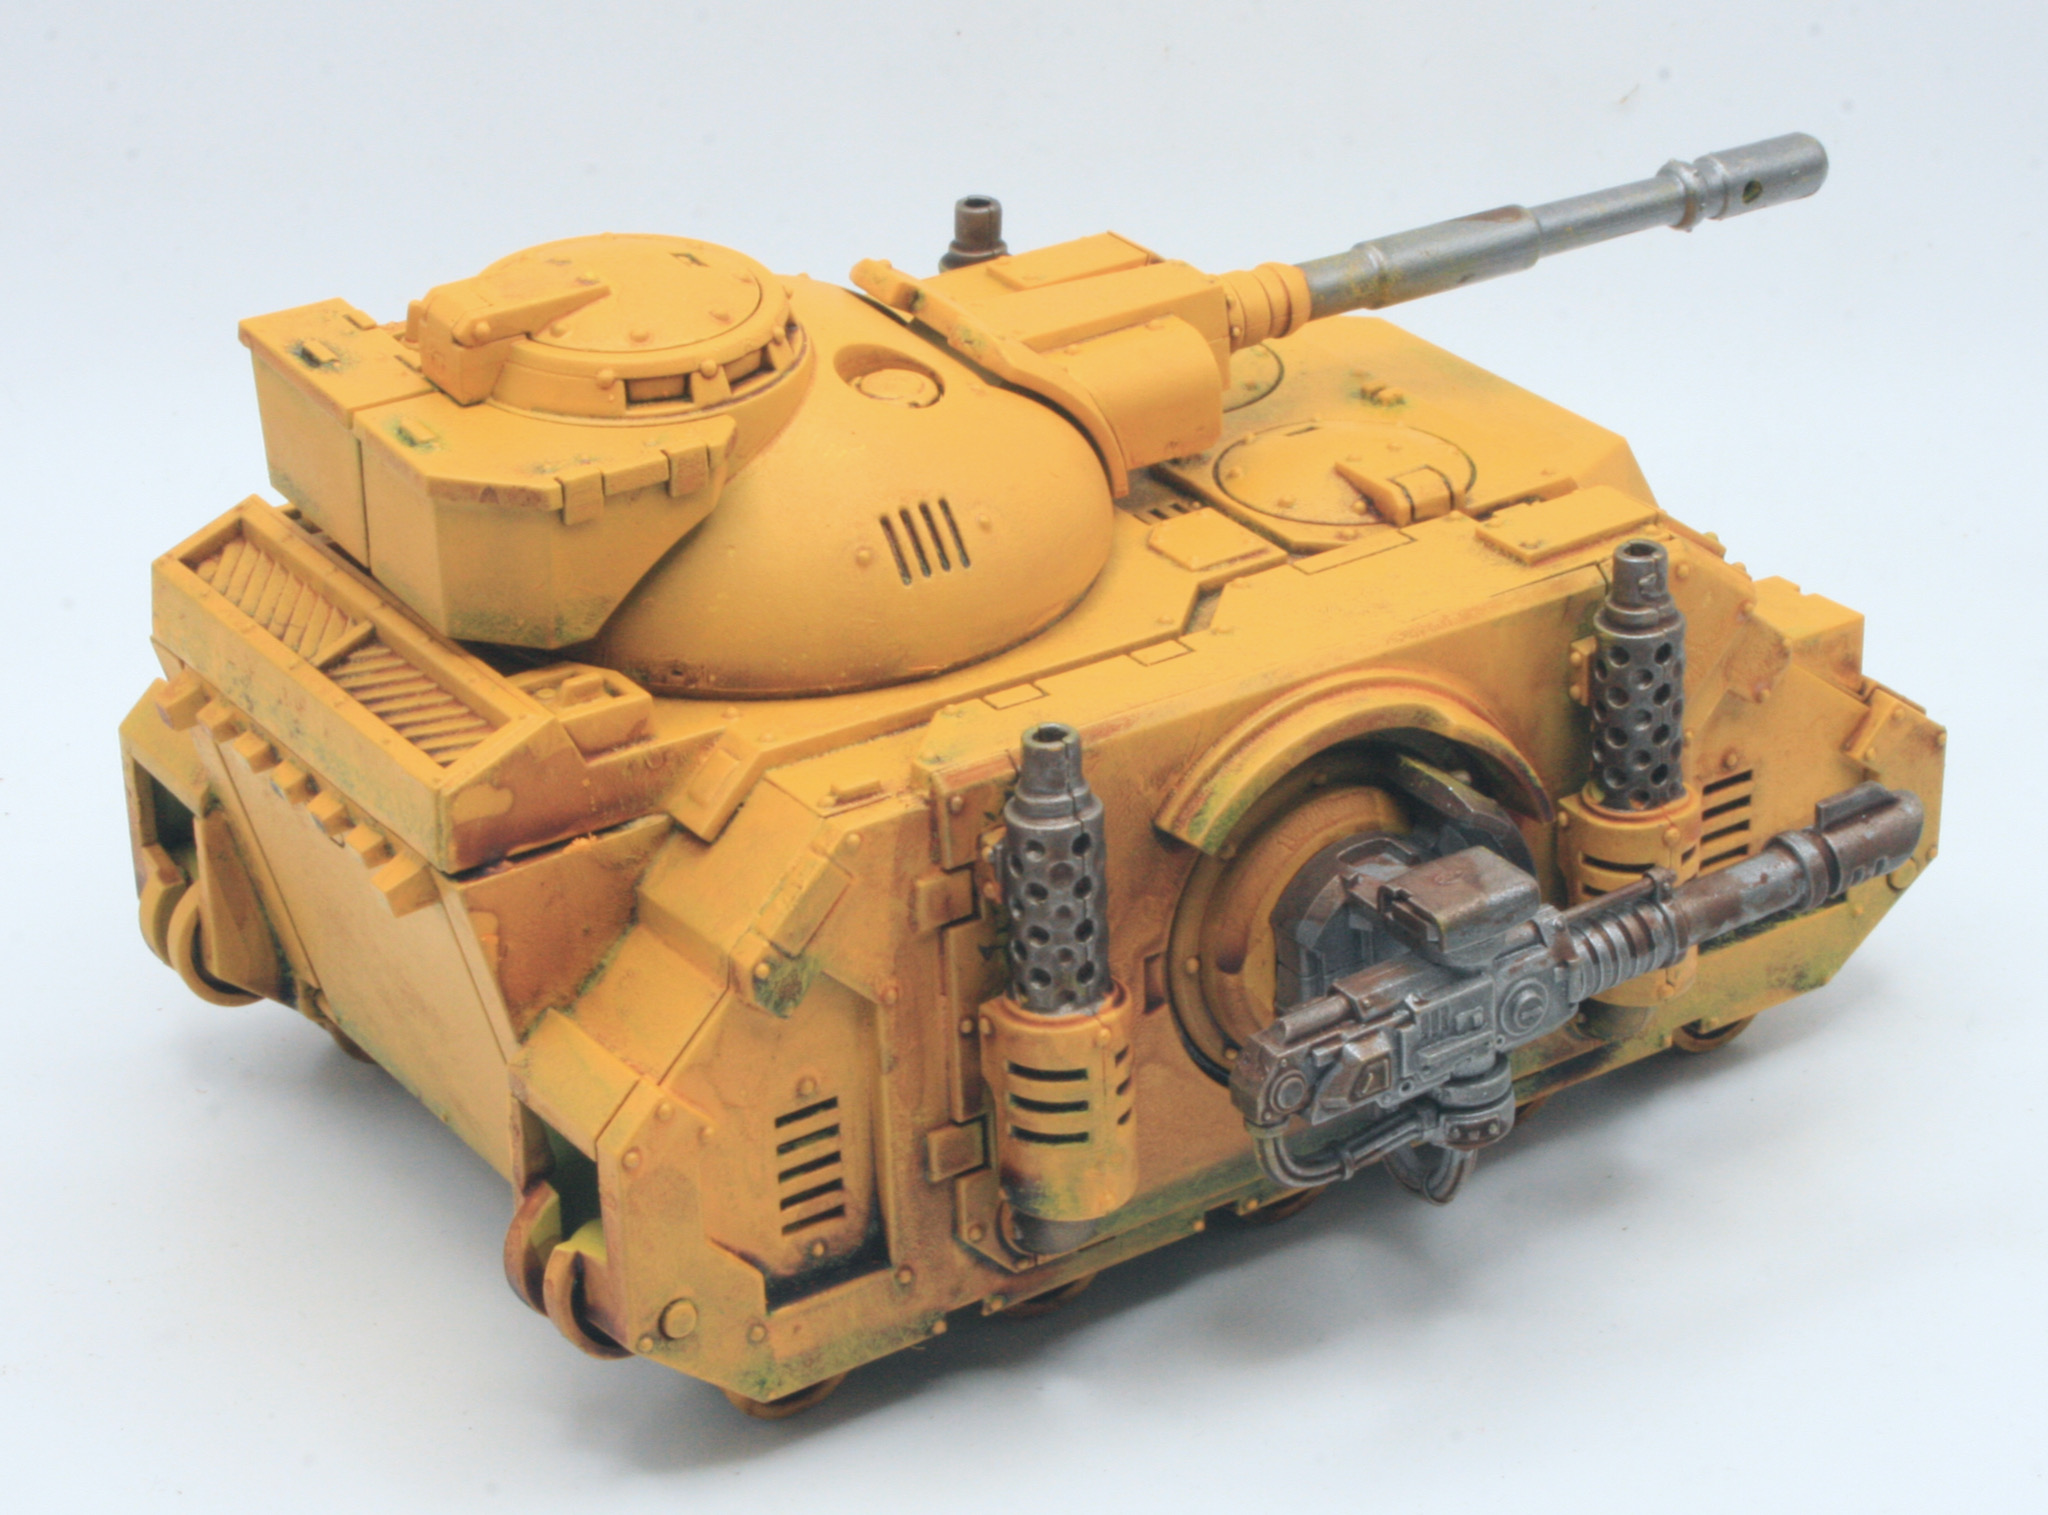
Painting the Predator

The Predator is perhaps the best known and most widespread variant of the basic Rhino chassis. Augmented with superior armour and firepower, it entirely sacrifices the Rhino’s troop transport capacity in favour of ammunition and generators for its formidable weapon systems. 

Having got this kit for Christmas, I started putting the model together. For painting I kept the sponsons separate and I can easily remove the turret as well. I gave the model an undercoat of Citadel White Scar. I gave the model a couple of light coats of Daemonic Yellow. I  painted the main weapon, and the exhausts, with Leadbelcher. It was then onto shading the model.

For the next stage I used some Citadel Layer Yriel Yellow. I took a large brush and gave the model, what I would call, a heavy drybrush. I put paint on the brush, and then used some kitchen towel to remove most of the paint, and then using a heavy stippling process added paint to the model.

The plan was that this would take the flat surfaces of the model back to a flatter base colour.

Some of the areas where the shade pooled will probably need some more work.

See the workbench feature on the Deimos Pattern Predator Battle Tank.

Making progress on the Forge World MkIIb Land Raider

The Land Raider is an Imperial main battle tank and troop transport which serves as the “armoured fist of the Space Marines.” The Mark IIb Land Raider Phobos is one of the earliest marks of the standard pattern of Land Raider. The Mark IIb Land Raider Phobos is the only pattern of the standard Land Raider Phobos that uses the older armoured sponsons, as they do not allow the weapons they hold to fully rotate.

I got a Forge World MkIIb Land Raider and was originally painting it up as a Grey Knights Land Raider in desert camouflage. I wrote up some reflections on my MkIIB Land Raider, on the current state of the painting and what I needed to do next. I had a few issues fixing the bolter guard on the top of the superstructure. I eventually managed to glue in the armoured shell. I then touched up the damaged areas with a brush and some fresh paint.

I am still painting up the icongraphy. The front ramp is being painted as stone.

Once that is done I will be shading the model to add depth (and weathering).

See the full Mark IIb Land Raider workbench.

Shading the Predator

The Predator is perhaps the best known and most widespread variant of the basic Rhino chassis. Augmented with superior armour and firepower, it entirely sacrifices the Rhino’s troop transport capacity in favour of ammunition and generators for its formidable weapon systems. 

Having got this kit for Christmas, I started putting the model together. For painting I kept the sponsons separate and I can easily remove the turret as well. I gave the model an undercoat of Citadel White Scar. I gave the model a couple of light coats of Daemonic Yellow. I  painted the main weapon, and the exhausts, with Leadbelcher.

It was then onto shading the model. I am using the same process I used with my first Deimos Pattern Rhino. I used some Citadel Reikland Fleshshade Shade.

I did a heavier wash than the first Rhino I painted.

This did mean the Shade pooled in certain areas. I am hoping that this will be covered up when I do the deeper drybrushing next.

I also shaded the tracks, this I did with Agrax Earthshade Shade. Once this was dry I drybrushed them with some Leadbelcher.

See the workbench feature on the Deimos Pattern Predator Battle Tank.

Shading the Deimos Pattern Rhino

The Rhino is the most widely used armoured personnel carrier in the Imperium. Based on ancient STC technology, the fundamental design is robust, reliable, and easy to maintain, with an adaptive power plant that can run off a wide variety of fuels.

I bought the plastic Deimos Pattern Rhino when it came out in the summer, you can see the workbench for that Rhino here.  I was lucky enough to get a second Rhino for a Christmas present. The model has many more parts and is a more detailed kit than the original plastic Rhino kit that came out in the 1980s. I constructed the model to the instructions, though I left the tracks off to paint separately. I gave the model an undercoat of Citadel White Scar. I gave the model a couple of light coats of Daemonic Yellow. I also painted the bolter and exhausts with Leadbelcher.

It was then onto shading the model. I am using the same process I used with my other Deimos Pattern Rhino. I used some Citadel Reikland Fleshshade Shade.

I did a heavier wash than the previous Rhino.

This did mean the Shade pooled in certain areas. I am hoping that this will be covered up when I do the deeper drybrushing next.

I also shaded the tracks, this I did with Agrax Earthshade Shade. Once this was dry I drybrushed them with some Leadbelcher.

See the workbench feature on the Deimos Pattern Rhino II.

Buying some paint

I was shading my new Predator (and Rhino). I used some Citadel Reikland Fleshshade Shade, however after shading most of the models I ran out of paint.

I was in town, so went to MT Games and they were charging £5.00 for a pot of Citadel Reikland Fleshshade Shade.

Now in the Games Workshop stores (or is it Warhammer Stores) in Bristol the cost is £4.75.

My usual place to buy paint is The Games Bunker who sell the same paint pots at the discounted price of £4.05.

In the end I did buy the paint from MT Games, if I was buying a few pots then I probably would have made a special trip  to The Games Bunker and saved myself a few pennies.

Fixing the missing part

The Land Raider is an Imperial main battle tank and troop transport which serves as the “armoured fist of the Space Marines.”The Land Raider’s heritage predates even the founding of the Imperium of Man, yet it remains the single most destructive weapon in the Adeptus Astartes’ arsenal. The Mark IIb Land Raider Phobos is one of the earliest marks of the standard pattern of Land Raider. The Mark IIb Land Raider Phobos is the only pattern of the standard Land Raider Phobos that uses the older armoured sponsons, as they do not allow the weapons they hold to fully rotate.

I got a Forge World MkIIB Land Raider and was originally painting it up as a Grey Knights Land Raider in desert camouflage.

I wrote up some reflections recently on my MkIIB Land Raider, on the current state of the painting and what I needed to do next.

I also noticed that there is a part missing the, the hull top front bolters. I will have to find where I put that piece. Well I was pleased to find the missing parts and these have now been reunited with the Land Raider. They were a set of twin bolters and a armoured shell for the bolters.

At the point though of repainting I didn’t glue in the armoured shell, as I knew I would need to paint the bolters first before affixing the shell.

The model was given a white undercoat and then a new basecoat of Daemonic Yellow spray from Army Painter.

I then painted the twin bolters with Leadbelcher.

When it came to fixing the shell in, I had a bit of trouble fitting it into place. It was a bit of a tight fit.

So much so trying to fit the piece I damaged the paintwork on the armoured shell.

I eventually managed to glue in the armoured shell. I then touched up the damaged areas with a brush and some fresh paint.

Reflecting on the Rukkatrukk Squigbuggy

On one of my recent posts I got a comment from Katie (@Lawgirl04) about another of my  workbench models, the Ork Rukkatrukk Squigbuggy.

Sorry to comment here — but I found your Rukkatrukk Squigbuggy posts, and I’m dying to know if you finished it? Also, I appreciate your tip on how you painted the buggy without gluing down the roll bar. I am just starting this project (and I’m VERY new to warhammer), and it’s nearly impossible to find tips/tricks for painting this squigbuggy. If you post more on this item, any tips are appreciated!! Thanks for the great content!

As the comment wasn’t relevant to the model in the blog post, I thought I would post the comment in the blog in a new posting.

I did look over the workbench feature of the Rukkatrukk Squigbuggy to see how far I got with the model.

Well not very far at all to be honest.

Not sure what I would do next. I think I will use some Contrast paint on the main chassis, and then use different colours for the bodywork. I will also be using Leadbelcher as the primary colour on the metallic areas, such as the buzzsaw.

Toning down the purity seals

One model I got many years ago, well in 2006, was a Forgeworld Razorback the one with the much bigger turret, which I much prefer over the plastic kit version that you could get in the shops back then. I recently retrieved it from storage and decided that I would try and finish painting it. I was using Tausept Ochre as the base coat, however having liked the paint scheme I was using on my Deimos-pattern Rhino, I decided that I would paint the Razorback in the same scheme. Having sprayed the underneath of the model with Citadel Zandri Dust. I gave the model a basecoat of Army Painter Daemonic Yellow. This was followed with Leadbelcher for painting the exhausts and weaponry. The next step was painting the iconography and purity seals. I then slightly messed up the shading on the model, but think I managed to get the effect I was looking for. For the next stage I used some Citadel Layer Yriel Yellow. I took a large brush and gave the model, what I would call, a heavy drybrush. The next step was to paint and highlight the iconography. I then glued the tracks to the Razorback using superglue.

I also took the time to brighten up the purity seals and other iconography after it was dulled down by the shades and washes. I also highlighted the purity seals with some White Scar paint.

However, as with my Repressor, I think I overdid this, they are too bright for the model. I decided to dull these down a bit with some Citadel Seraphim Sepia Shade.

I think that this works better than bright white purity seals.

See the workbench feature on the Razorback.