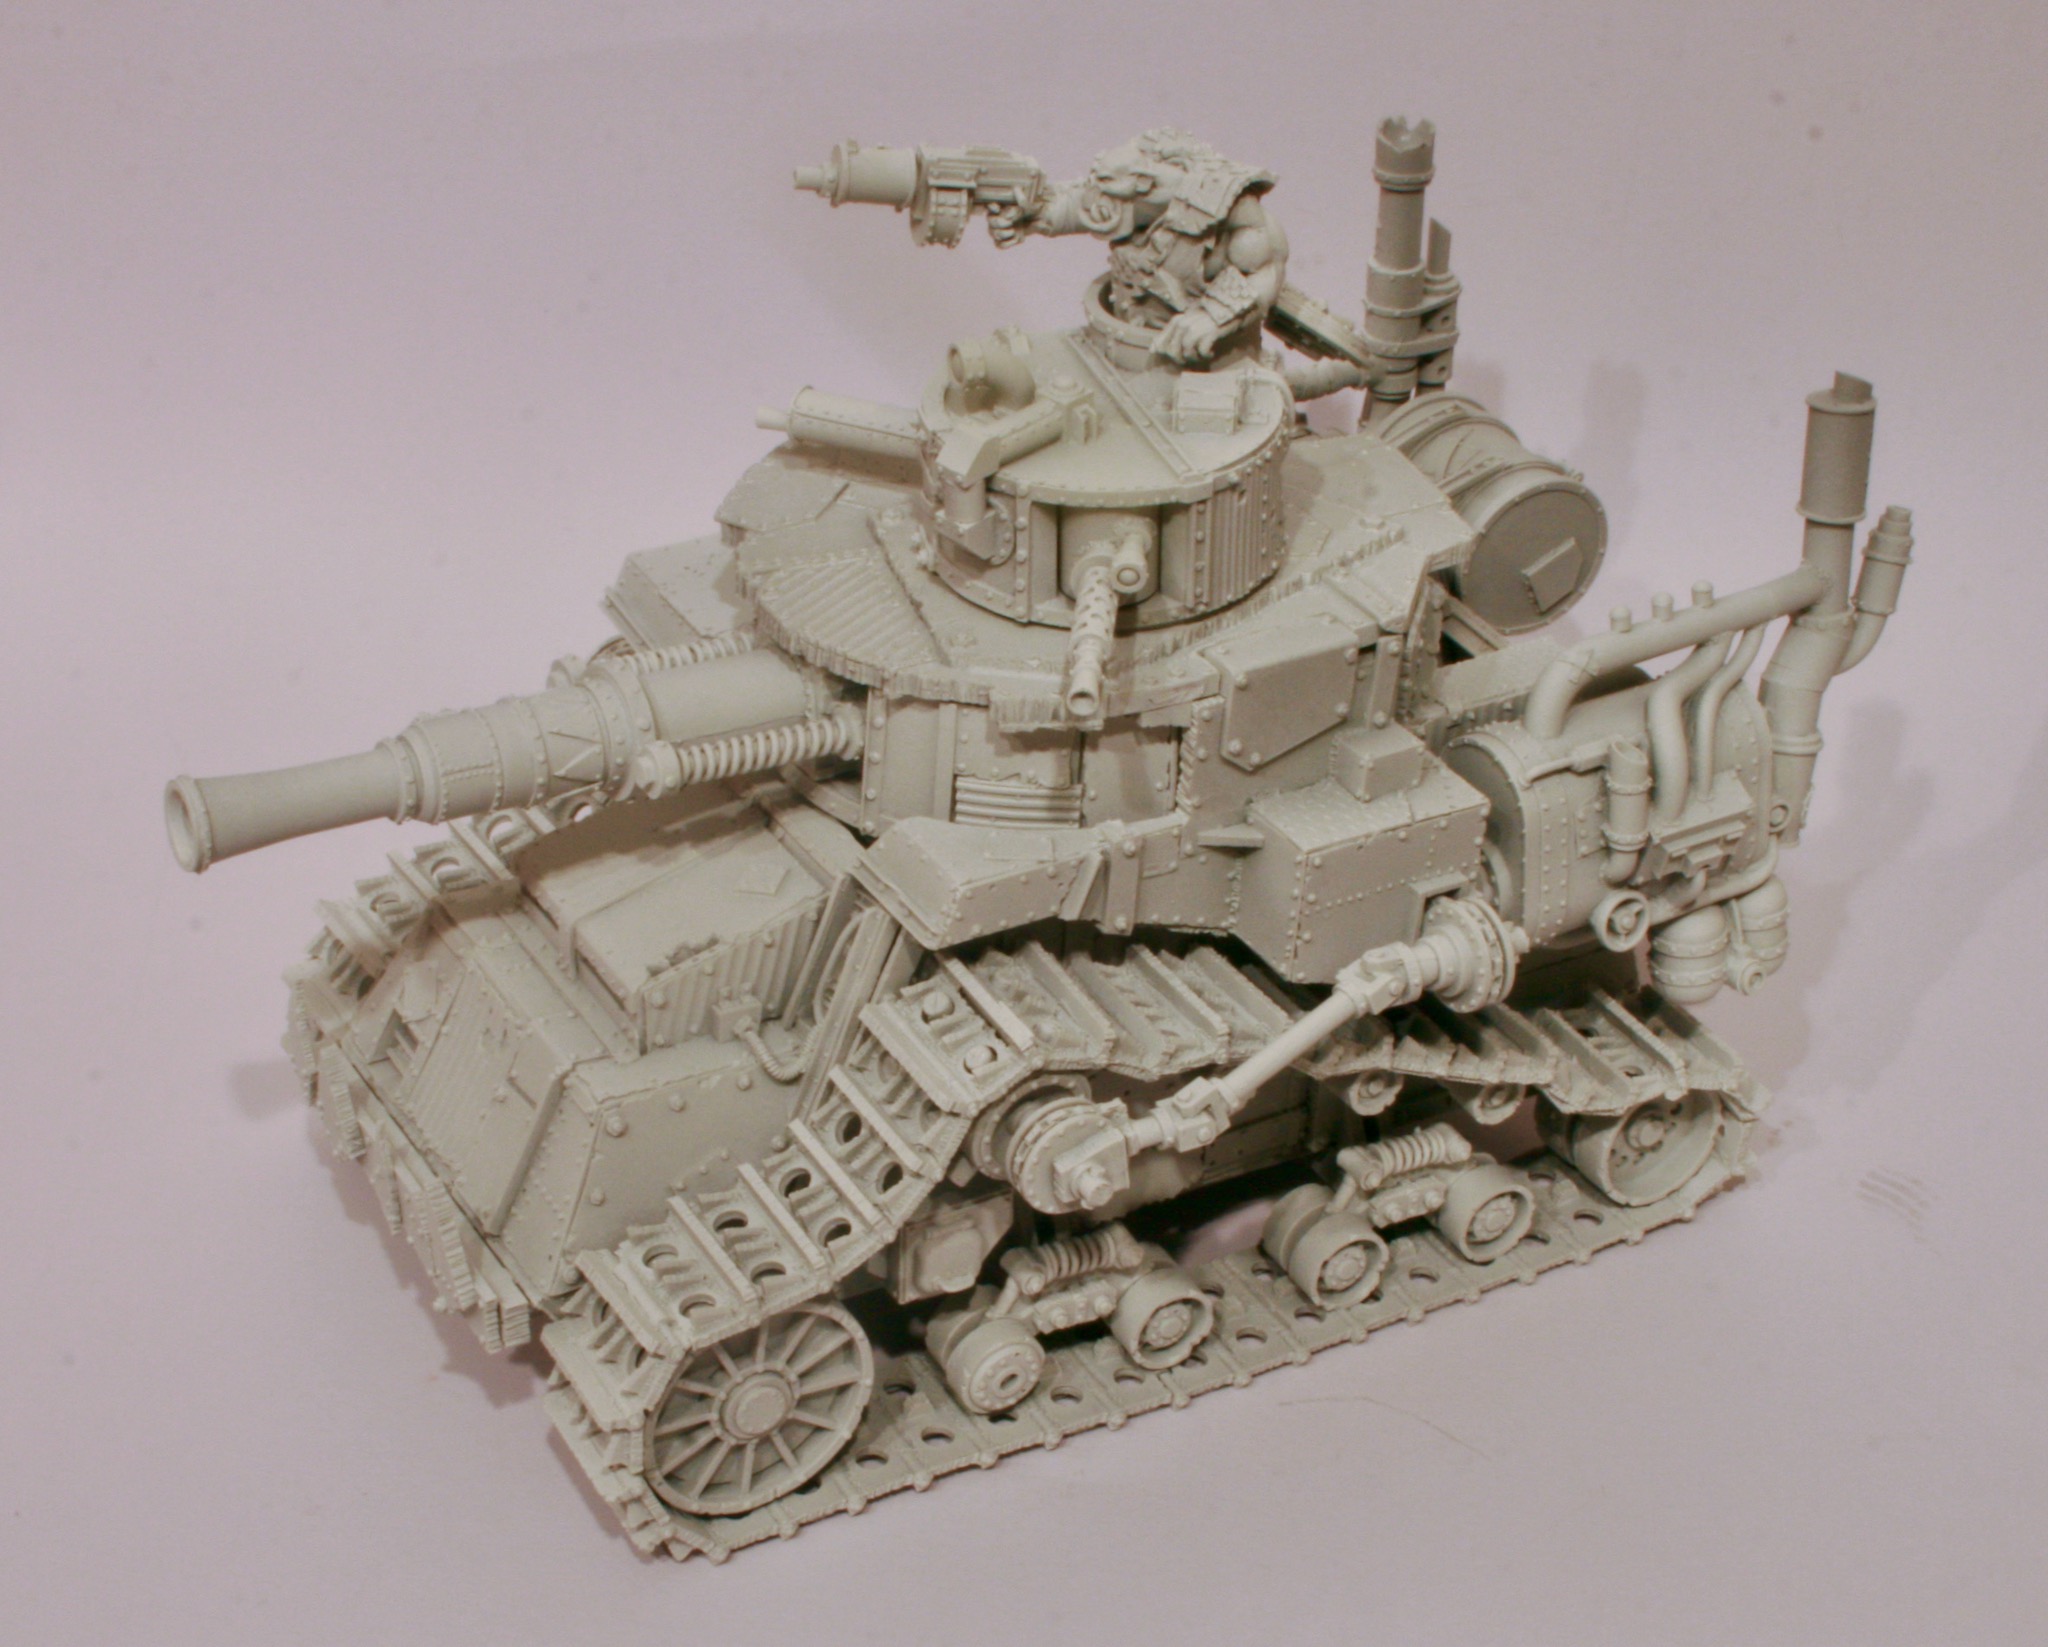
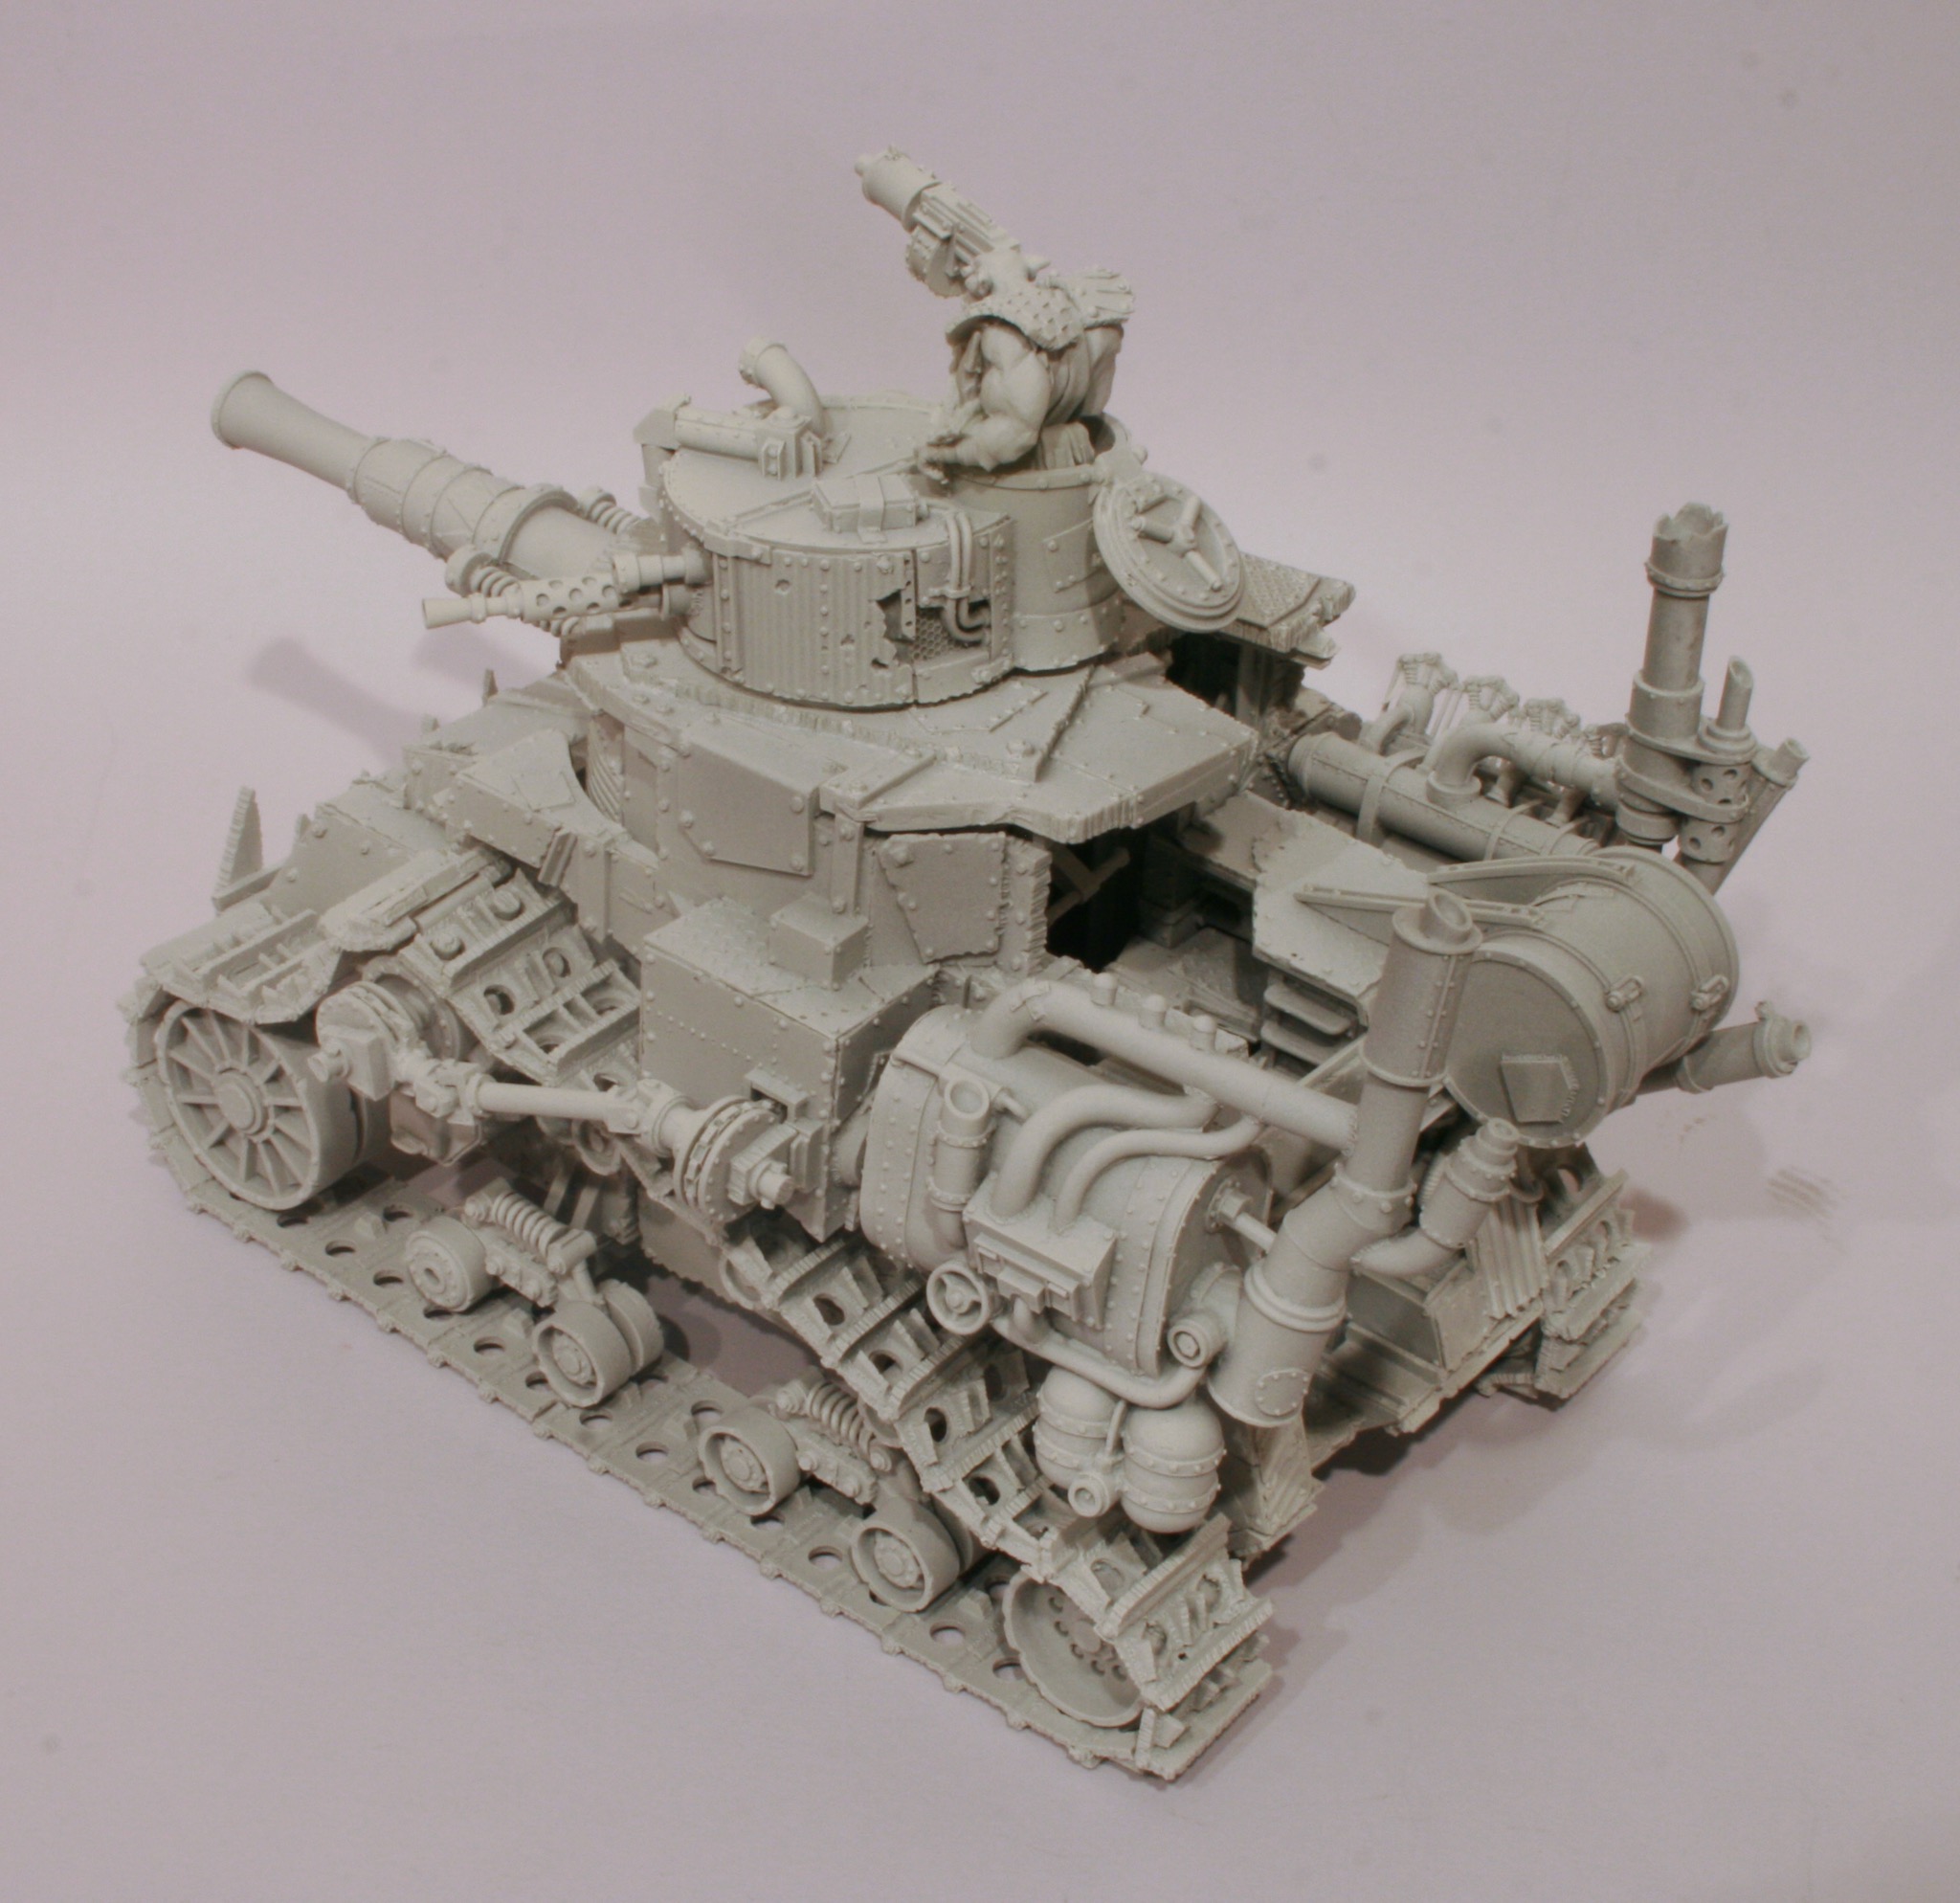
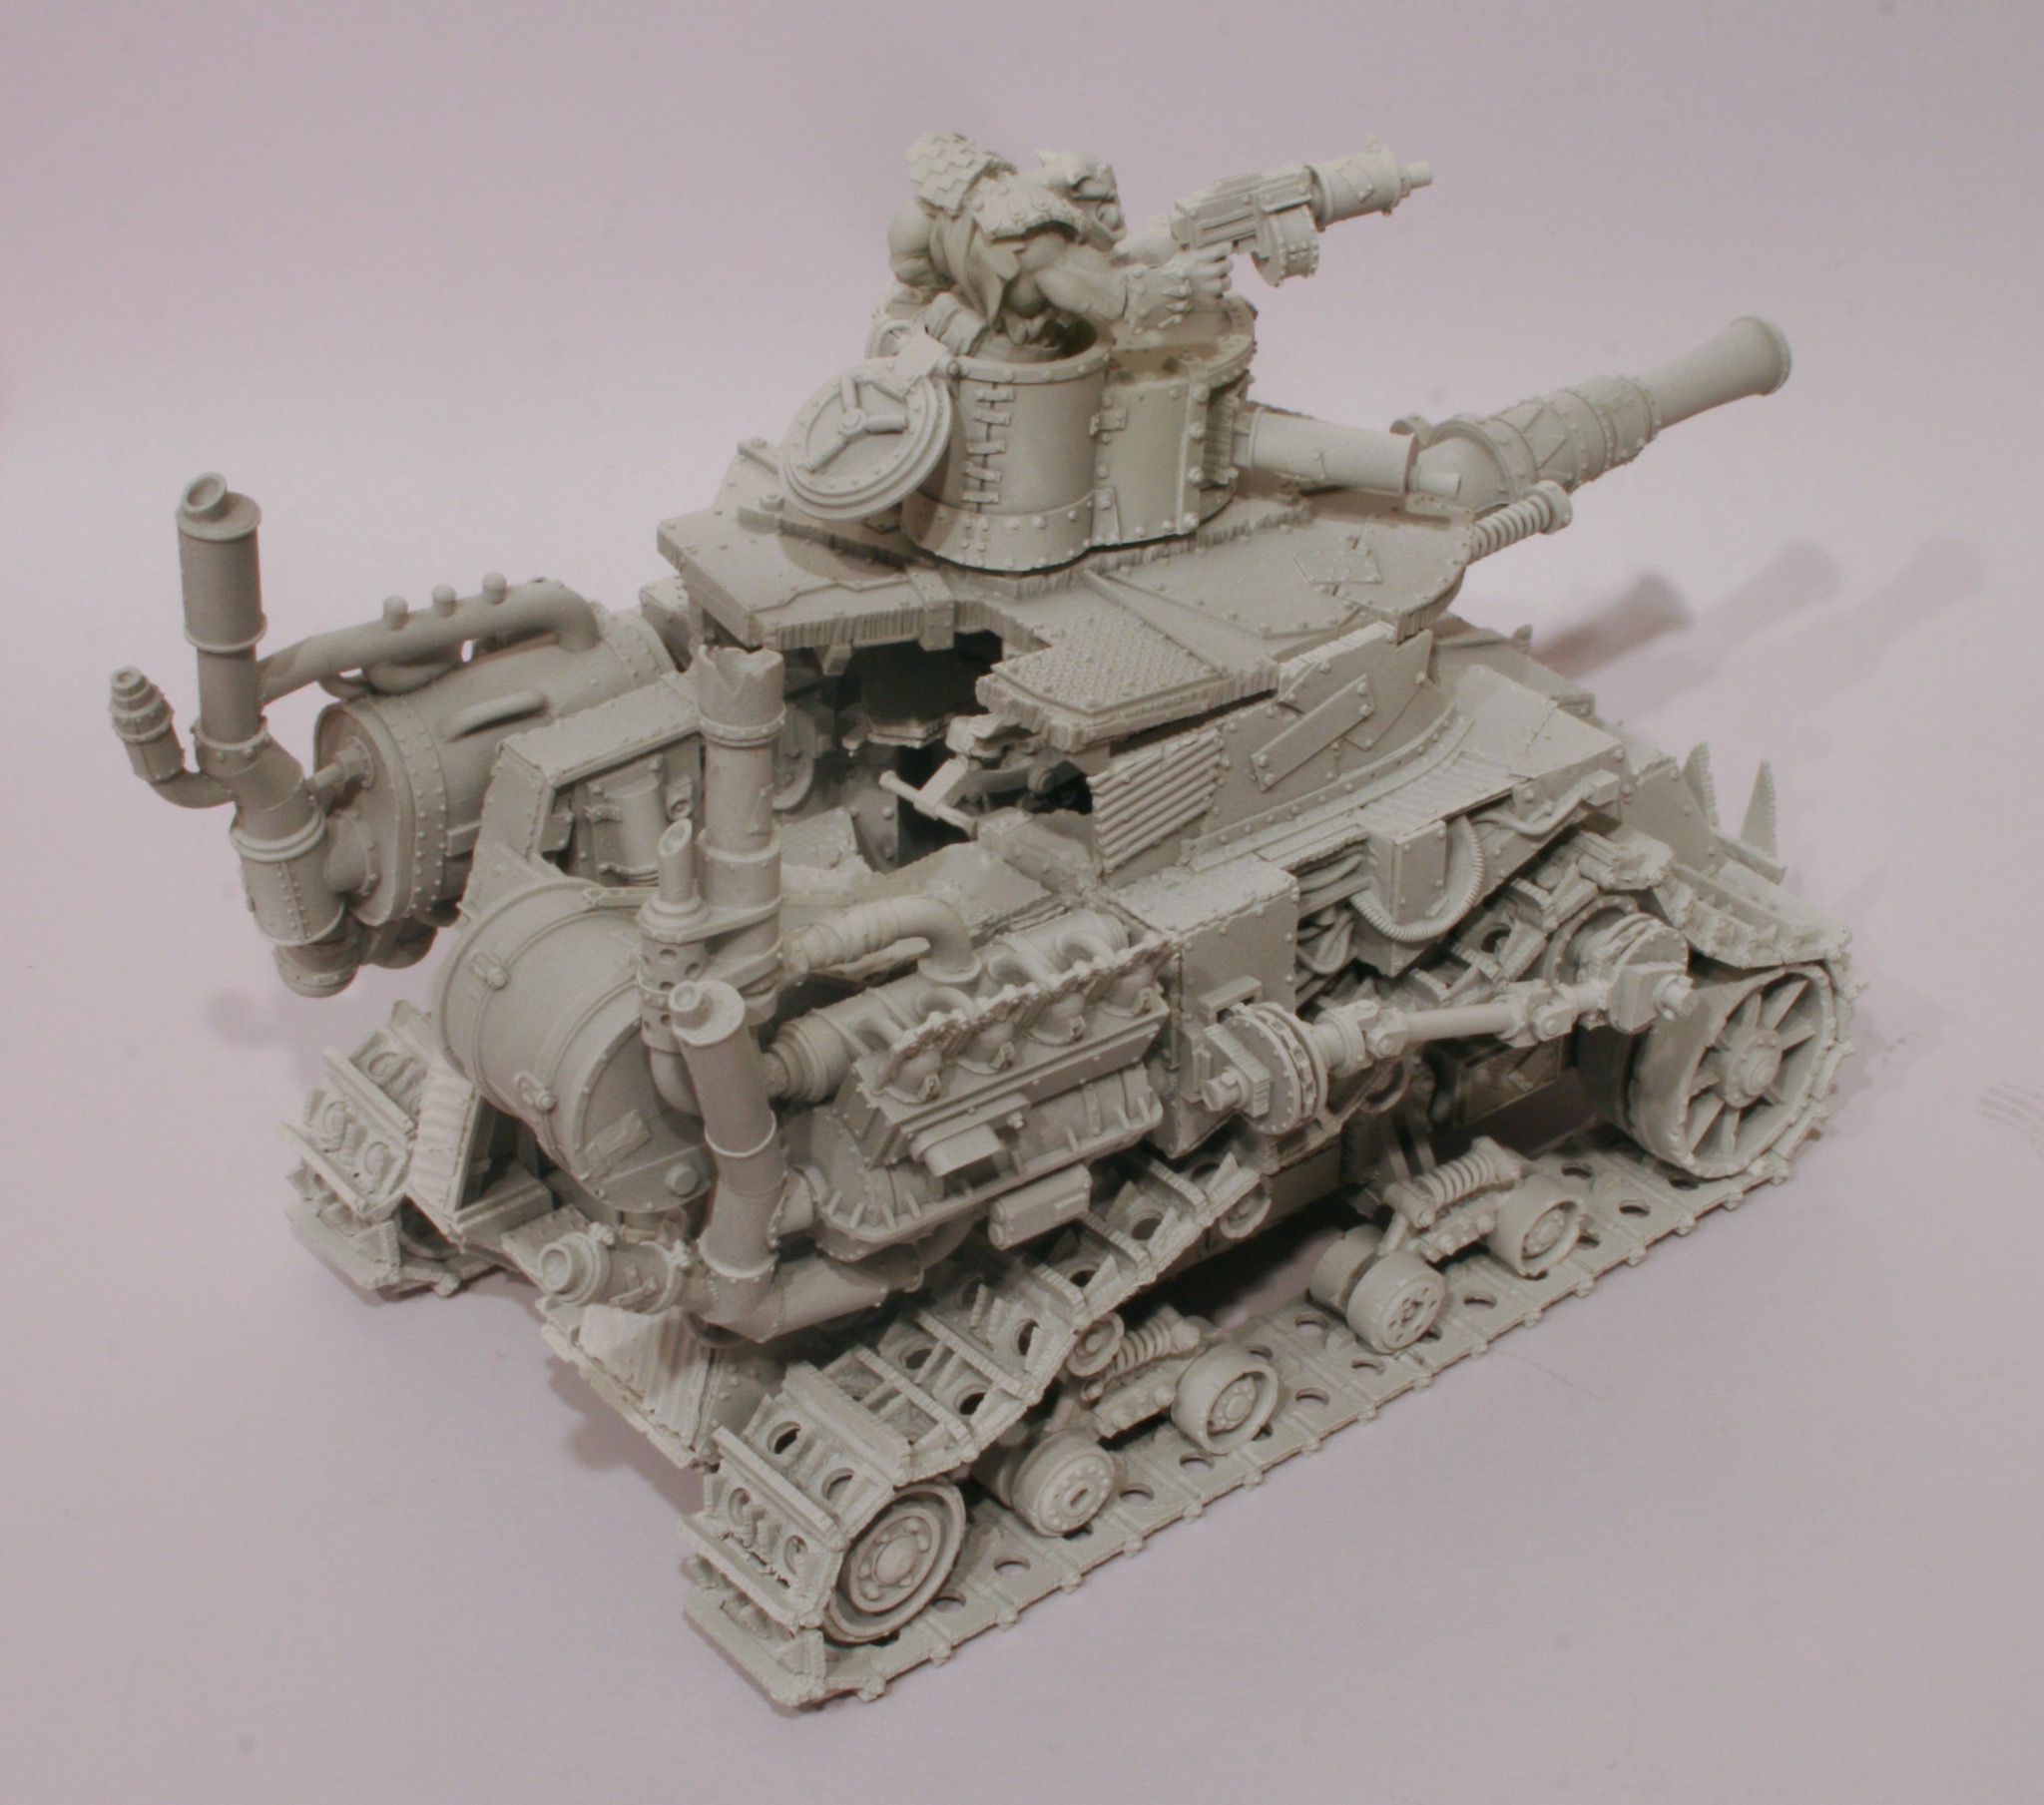
The Ork Kil Krusha Tank from Forge World was released back in 2009. This was of the first Forge World ork models when I went “wow”. It was released a fair few years ago and sadly is no longer available.

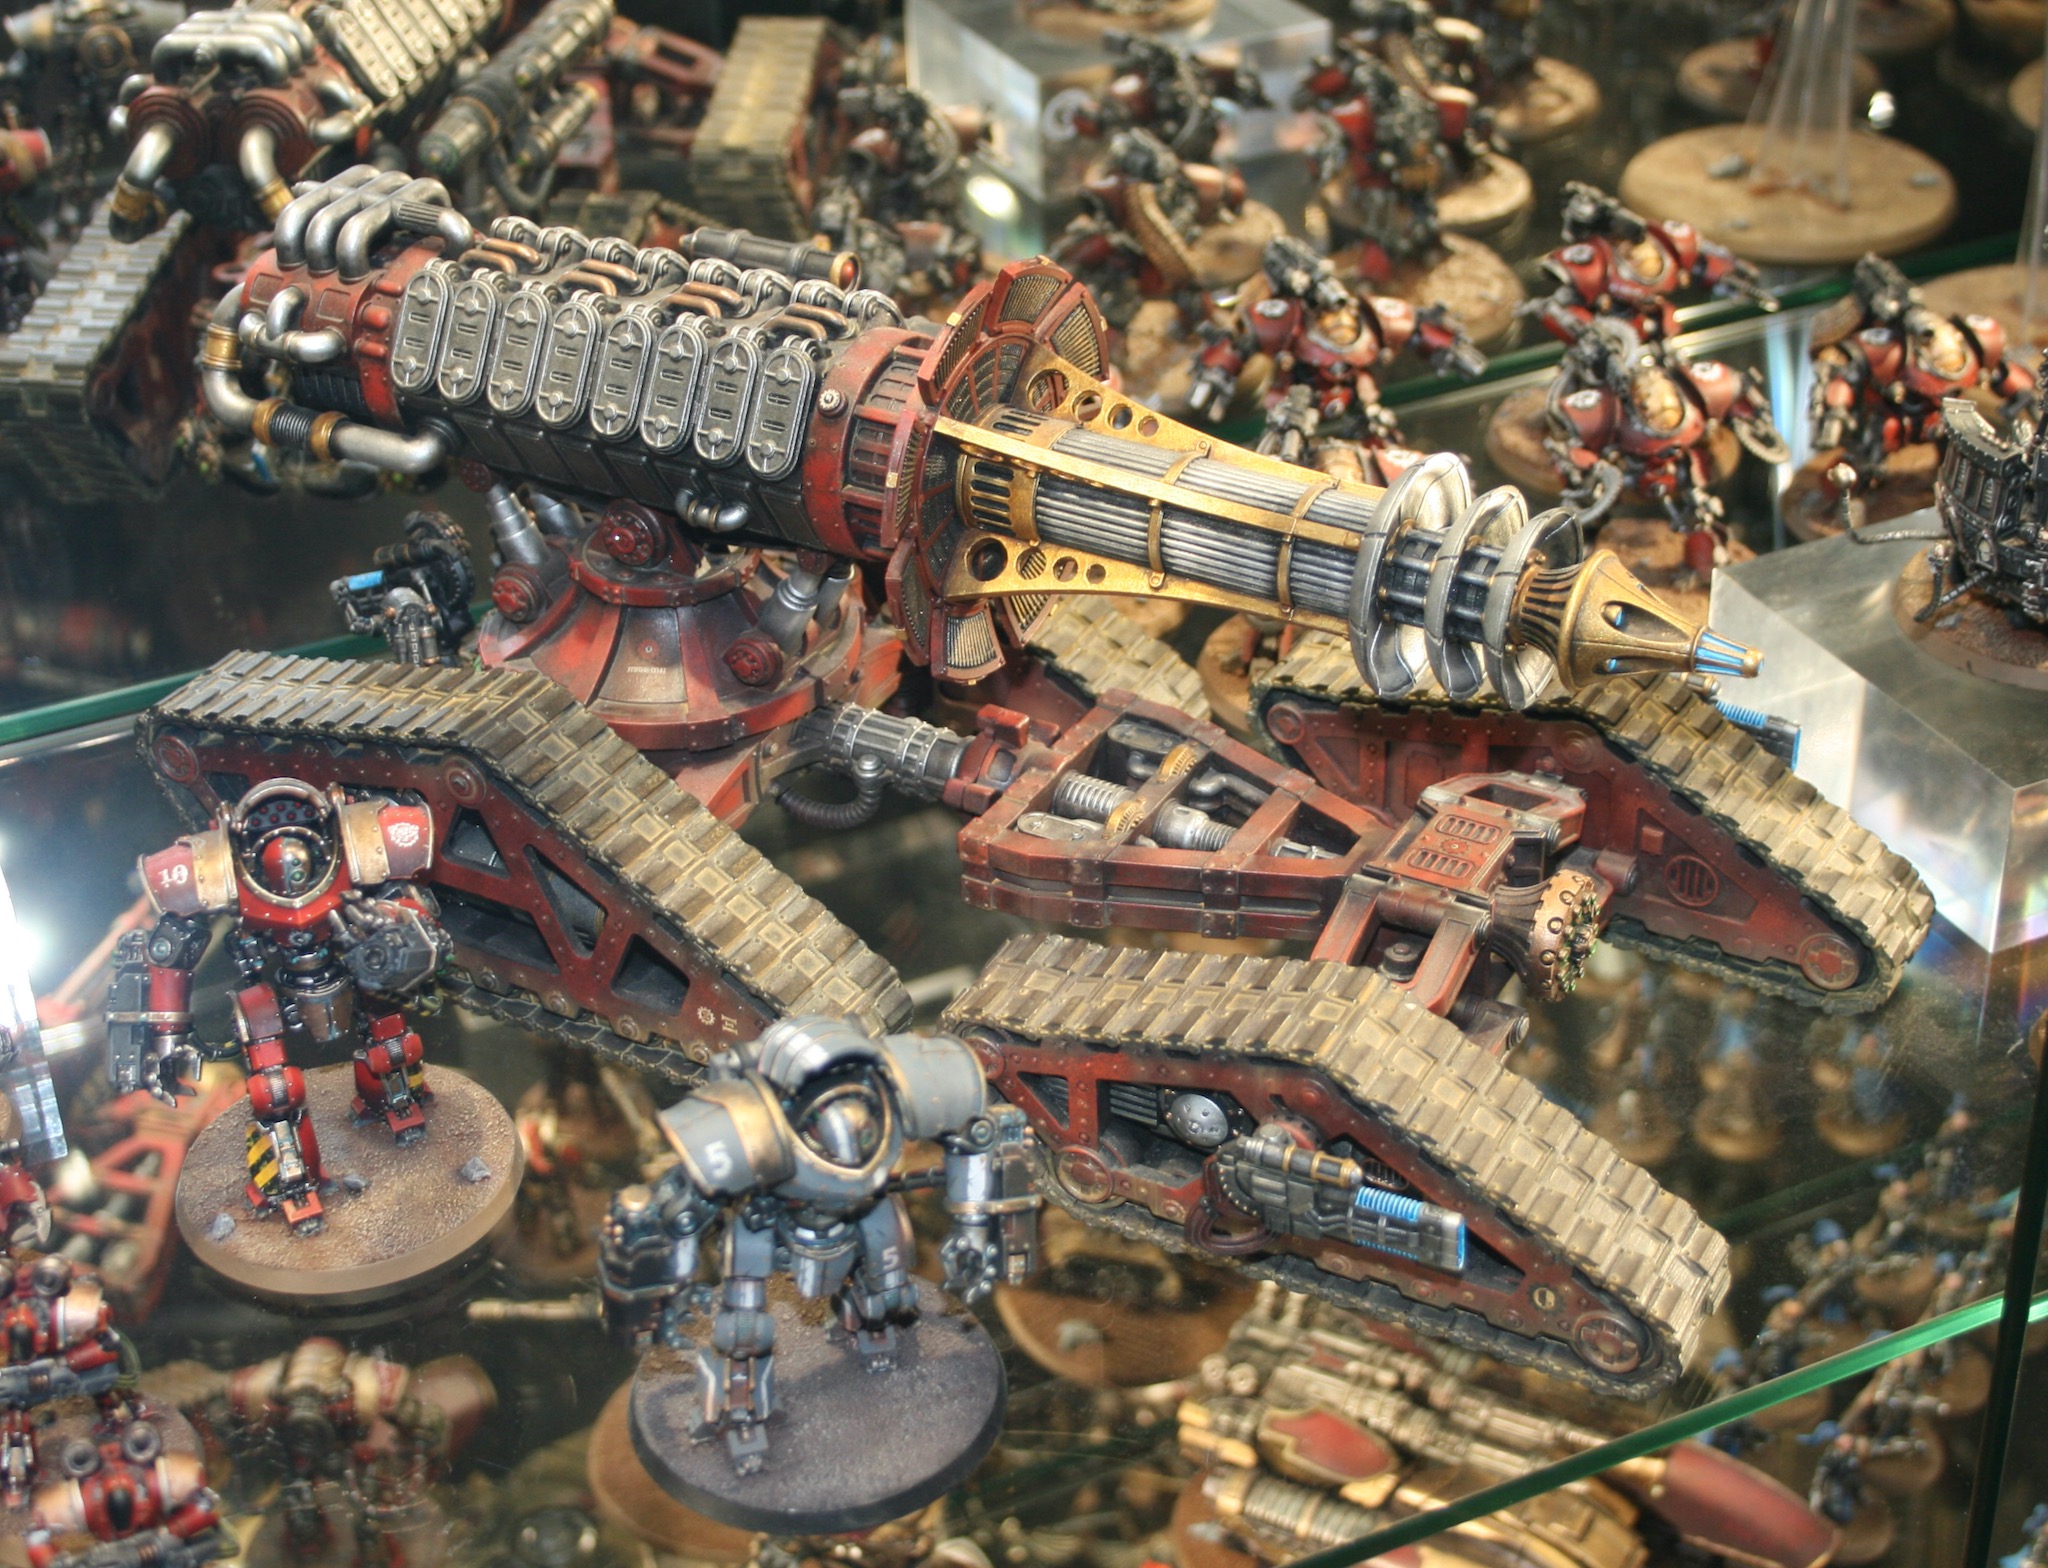
Kill Krushas are a heavy Ork tank design, based around the twin Ork loves of speed and extreme violence. These ‘mirakles’ of Orkish mekboy fabrication are alarmingly complex creations, high-sided and heavily armoured, whose internal spaces are filled with a mass of hydraulics, pistons, mechanised loader-gubbins and a very large and extremely temperamental engines. These are all tended by the frantic ministrations of numerous Grots who keep the rattling monster tank going with constant hammer blows, polishing and judicious application of oiler squigs. The tank’s main gun is its Krusha Kannon; a heavy bore, high velocity weapon capable of firing a variety of different shells. As well as standard explosive rounds, the Krusha Kannon can use armour-piecing ‘Tankhammas,’ shrapnel-filled ‘Scrap Kanisters’ able to rip open swathes of enemy infantry and incendiary ‘Blast Burnas’ which can drench fortifications with burning chemicals to roast alive anyone caught inside.
The model is a realisation of the many different concept images that Forge World produced for Ork tanks at the time.

I got one of them back in 2010 or thereabouts. I did construct it and undercoat it. I realised recently that since I undercoated it, it has spent way too long on the workbench… well in storage and I really should start thinking about getting it painted and finished. They key for me is to not only give it a paintjob worthy of the model, but also one that isn’t going to take all my time and forever to get done.

I am thinking if I should deconstruct the model to make it easier to paint the hull and the tracks.
Well better find it, I know it’s in a box somewhere.
Workbench feature on my Kil Krusha.