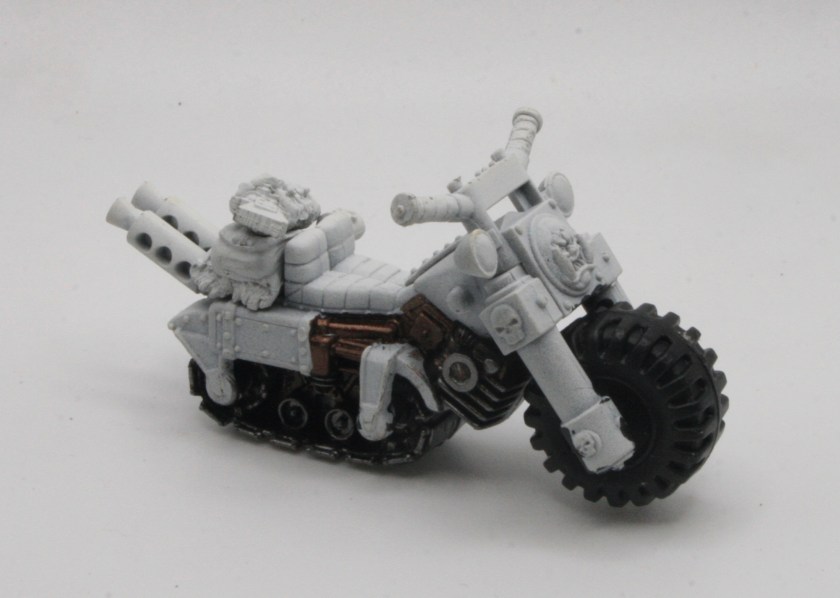
Sagitaur ATV

Well looked what was revealed today over on the Warhammer Community site, a new vehicle for the Squats, sorry The Leagues of Votann.

Designed for surveying inhospitable alien terrain, the Sagitaur is a rapid-response ATV suited to scouting operations and lightning-fast armoured offensives alongside Hernkyn Pioneers. Its armoured carapace is durable enough to shrug off everything from rockslides to plasma blasts, making it an ideal spearhead for any League-sponsored colonisation effort.

I really like this vehicle, it certainly has character and looks the part. It certainly has a very hard SF feel to the design, I can even see it being used for other games, as well as Warhammer 40K.

We’ve also been told that the Sagitaur isn’t the only vehicle in the Leagues of Votann’s garage. I wonder what else is in that garage?

More shading

I got a couple of Ruined Factorum sprues that came with Warhammer 40000 Imperium 34. The ruins are from the The Battlezone: Manufactorum – Sub-cloister and Storage Fane kit. One I decided I was going to paint in the same manner as the first Ruined Factorum, for the second I chose to follow the (white and red) paint scheme as outlined in Warhammer 40000 Imperium.

Having constructed the models I gave them a white undercoat. I sprayed the model a few more times with the Corax White spray. I then, following the instructions painted the doors and window frames with Mephiston Red base paint. The next step was to wash the models with Nuln Oil Shade.

I hadn’t quite got the look I was hoping for, so I decided to do some more shading, using Agrax Earthshade Shade and Seraphim Sepia Shade.

I think the floor looks a lot better as well.

This was much better and, much more the effect I was trying to achieve.

Washing the white ruins

I got a couple of Ruined Factorum sprues that came with Warhammer 40000 Imperium 34. The ruins are from the The Battlezone: Manufactorum – Sub-cloister and Storage Fane kit. One I decided I was going to paint in the same manner as the first Ruined Factorum, for the second I chose to follow the (white and red) paint scheme as outlined in Warhammer 40000 Imperium.

Having constructed the models I gave them a white undercoat. I sprayed the model a few more times with the Corax White spray. I then, following the instructions painted the doors and window frames with Mephiston Red base paint.

According to the instructions in Warhammer 40000 Imperium the next step was to wash the models with Nuln Oil Shade.

I did this, but realised I wanted a slightly dirtier look as with the GW version. So I used some Agrax Earthshade Shade as well.

I haven’t quite got the look I was hoping for, so I might do some more shading.

Basecoating the Thermic Plasma Conduits

I picked up a copy of Warhammer Imperium Issue 37 which comes with some Thermic Plasma Conduits.

This kit is no longer available from Games Workshop and you get one sprue which allows you to build a series of conduits.

The kit goes together quite easily. I made mine into three large conduits. The models were then given a white undercoat.

I gave the models a basecoat of Leadbelcher.

The next step will be adding a shade.

Undercoating the Thermic Plasma Conduits

I picked up a copy of Warhammer Imperium Issue 37 which comes with some Thermic Plasma Conduits.

This kit is no longer available from Games Workshop and you get one sprue which allows you to build a series of conduits.

The kit goes together quite easily. I made mine into three large conduits.

The models were then given a white undercoat.

Next step will be the basecoat.

Drybrushing the Converted Factorum Ruins

Having converted and constructed the Ruined Factorum into two different ruins, the next stage was giving them a white undercoat. Then it was onto painting them and giving them a wash. 

I had got a couple of Ruined Factorum sprues that came with Warhammer 40000 Imperium 34. The ruins are from the The Battlezone: Manufactorum – Sub-cloister and Storage Fane kit.  You get two more corner ruins, all coming on a single sprue. I did manage to pick up a second magazine and decided that I would convert them. It was a relatively simple conversion swapping over the corners. 

I then drybrushed them using Citadel Dry paints. I first used some Dawnstone Dry Paint and then a lighter drybrush of Terminatus Stone.

Drybrushing the Ruined Factorum

I got the Ruined Factorum sprue from the Warhammer Imperium part work, issue #31. I constructed the model, undercoated it, and after giving the model a basecoat of Mechanicus Standard Grey Spray I gave the model a wash of Nuln Oil Shade.

Once the model was dry I drybrushed the model. I first used some Dawnstone Dry Paint and then a lighter drybrush of Terminatus Stone.

These photographs don’t really show the finished model, so I think I will need to retake them. This one taken with a phone does show off the drybrushing much better.

White Ruined Factorum

I got a couple of Ruined Factorum sprues that came with Warhammer 40000 Imperium 34. The ruins are from the The Battlezone: Manufactorum – Sub-cloister and Storage Fane kit. There are going to be further releases of these ruin sprues in later issues of Warhammer 40000 Imperium.

Having constructed the models I gave them a white undercoat.

One I am going to paint in the same manner as the first Ruined Factorum I got, the second I am intending to follow the (white and red) paint scheme as outlined in Warhammer 40000 Imperium.

I sprayed the model a few more times with the Corax White spray. I then, following the instructions painted the doors and window frames with Mephiston Red base paint.

The model has two pieces, a larger ruined building and a smaller ruined corner.

The next step will be to wash the model with Nuln Oil Shade.

Painting and Washing the Converted Factorum Ruins

Having converted and constructed the Ruined Factorum into two different ruins, the next stage was giving them a white undercoat. The next step was painting them and giving them a wash. 

I had got a couple of Ruined Factorum sprues that came with Warhammer 40000 Imperium 34. The ruins are from the The Battlezone: Manufactorum – Sub-cloister and Storage Fane kit.  You get two more corner ruins, all coming on a single sprue. I did manage to pick up a second magazine and decided that I would convert them. It was a relatively simple conversion swapping over the corners. 

I gave the ruins a base coat of Mechanicus Standard Grey Spray. The ruins were then given a wash of Nuln Oil Shade.

Constructing the Thermic Plasma Conduits

I picked up a copy of Warhammer Imperium Issue 37 which comes with some Thermic Plasma Conduits.

This kit is no longer available from Games Workshop and you get one sprue which allows you to build a series of conduits.

The kit goes together quite easily. I made mine into three large conduits.

The next stage will be a white undercoat.