15mm Ruined Cafe

I already have two of the ruined buildings from the Total Battle Miniatures range of Western Europe 15mm buildings. I was lucky enough to get two more for my birthday from Simon, thank you. He gave me the ruined cafe and ruined shop with passage.

The ruined cafe is a really nice building and comes complete with some “pavement” out the front that would have been used with tables and chairs.

15mm Ruined Cafe

It’s a nice casting with clean detail and looks very effective. I will probably use a similar method to the one I used with the other ruins. After washing the resin I will give the model a white undercoat and then use a combination of washing and drybrushing to bring out the detail.

15mm Ruined Houses

I have the ruined row of three houses and the ruined row of four houses, from Total Battle Miniatures. Having cleaned the models, I gave the inside of the models a black undercoat and then masked the inside of the windows (with masking tape) before I give the model a white undercoat on the outer side of the model.

I then started on the basecoat of the various parts of the building starting with the stonework.

15mm Ruined Houses

I have the ruined row of three houses and the ruined row of four houses, from Total Battle Miniatures.

Having cleaned the models, I gave the inside of the models a black undercoat and then masked the inside of the windows (with masking tape) before I give the model a white undercoat on the outer side of the model.

The models were then given a white undercoat.

15mm Ruined Houses

One of my Christmas presents was a couple of ruins from Total Battle Miniatures.

I got the ruined row of three houses and the ruined row of four houses.

What you get , if you go for the unpainted version is a nice resin casting.

The first stage was to wash the resin to remove the mould lubricant and then clean the flash from the casting, especially the windows and the doors.

Hovels Ruins

I bought these ruins quite a few years ago. These ruins are in fact 1/200th scale ruins, though they seem to work well with 15mm Flames of War. I had painted these with a black undercoat and then drybrushed them. I also glued some name signs onto them, though I have partly removed them, not very well mind you. As a result I have decided to paint them again. I sprayed them with a Humbrol Dark Grey.

Hovels Ruins

Hovels Ruins

Hovels Ruins

Hovels Ruins

Hovels Ruins

I bought these ruins quite a few years ago. These ruins are in fact 1/200th scale ruins, though they seem to work well with 15mm Flames of War.

Hovels Ruins

Hovels Ruins

Hovels Ruins

Hovels Ruins

I had painted these with a black undercoat and then drybrushed them. I also glued some name signs onto them, though I have partly removed them, not very well mind you. As a result I have decided to paint them again.

"Ork Buildings" – Airfix Preview 2012

So there I was looking through the Airfix preview for 2012 when I saw two models of desert buildings and immediately thought they would make for really nice scenery for Warhammer 40K.

As they are 1/48th scale they would fit very well with the 25/28mm size of models for Warhammer 40K.

Of course with some ramshackle additions they would make for some really nice Ork buildings, though I think they would also work as Tallarn style desert buildings.

Knowing Airfix, we probably won’t see these in the flesh until the latter part of 2012, but they do have potential.

"Flames of War Bridge" – Airfix Preview 2012

So there I was looking through the Airfix preview for 2012 when I saw two models and immediately thought they would work for Flames of War.

They are two bridge models.

They are 1/76th scale and therefore designed for 20mm high miniatures. However I am sure that it would also work for Flames of War miniatures which are 1/100th with 15mm high figures.

Knowing Airfix, we probably won’t see these in the flesh until the latter part of 2012, but they do have potential. They will be resin and unpainted.

Mordheim Turf

I was in my local GW store buying some flesh coloured paint (for my Old West cowboys) when I noticed they had the turf packs in stock. I looked at both the Mordheim Turf and the Middlenland Tufts, but in the end decided I liked the look of the Mordheim Turf better and bought a pack.

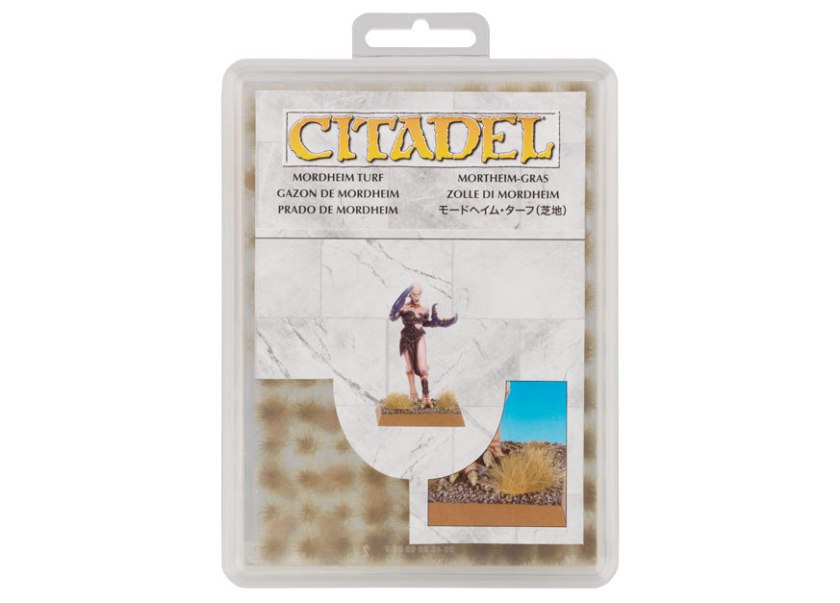
Mordheim Turf is a pallid yellow colour, and when your Warhammer armies march across it, a few choice tufts on their bases will really help to set the scene. Each sheet is 210 x 148 mm in size (or 8.3 x 5.8 inches if you prefer Imperial measurements), and holds 200 individual grass tufts of varying sizes, ranging from large patches of foliage to small clumps. They’ve also been specifically designed to stand up straight, adding a little extra height to the bases of your models. Once you’ve finished painting your miniatures, simply peel off the tufts you want to use and stick them to your bases using a dab of Citadel PVA Glue.

I have seen similar products before and in the olden days I use to cut tufts of sisal (string) for tufts of grass. These tufts however appear to be much finer and less coarse than sisal is. I am intending to use them mainly with my Flames of War  bases and possibly my Old West miniatures rather than my Orks.

They’re not cheap at £8.00 per pack but compared to the Army Painter range seem to be of similar value.  Will be interesting to see the results.