Ork Bommer from GamesDay 2010.

How I painted my version of this model.
warhammer, wh40k, flames of war, bolt action, aeronautica imperialis, star wars, models, news, views and stuff
Ork Bommer from GamesDay 2010.
How I painted my version of this model.
The Kill Blasta mounts an insane array of Shootas, Gatlers and rapid-firing Kannons, collectively called a Giga-Shoota.


I much prefer the Kill Bursta to this model.
From the Forge World display cabinets at GamesDay 2010.
The lunatic product of the deranged imaginations of grot riggers and scavs that have spent far too long basking in the insane genius of the Big Meks, Grots Tanks are diminutive armoured vehicles made to imitate the far larger Ork Wagons and Tanks.
The set contains four different variant chassis, tracks, exhausts and turrets as well as four fantastic Grot Tank Kommandaz and 5 different, incredibly shooty, weapon options.
I picked up a set of Grot Tanks on a recent visit to Warhammer World. After washing the resin, I then looked at the four main bodies and tracks deciding which was going to go with which.
This combination, especially the tracks had a very Renault FT17 look to it. I decided to arm it with a Rokkit Launcha.

The workbench feature on the Grot Tanks is broken down into four separate features, one for each of the Grot Tanks.
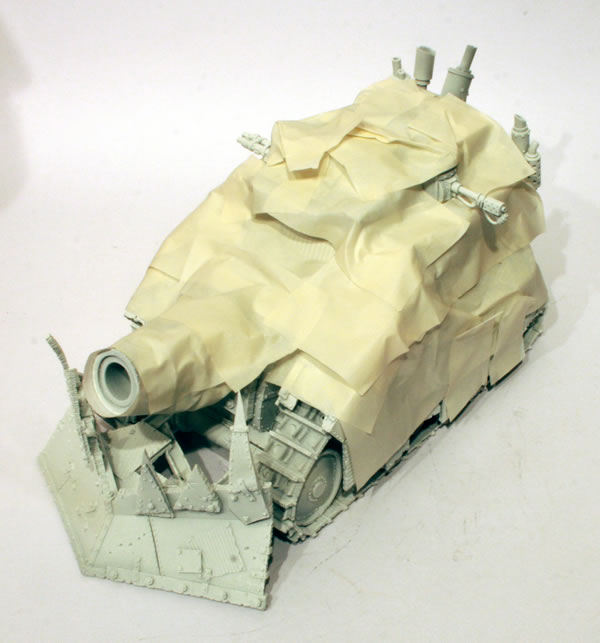
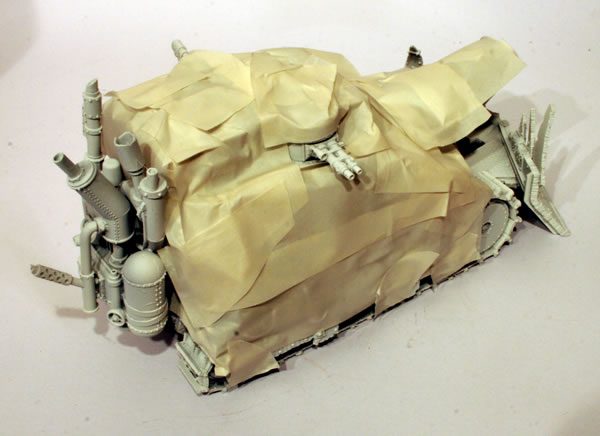
Having given the Kil Bursta a white undercoat, the next stage was to mask the model before giving the track sections a black undercoat.
See the full workbench feature on the Kil Bursta.
Imperial Navy Vulture Gunship from the Forge World displays at GamesDay 2007.

I do wonder if we would ever see a plastic Vulture, but though I thought we would never see a plastic Valkyrie, I do think it unlikely that we will see a plastic Vulture.
The current Forge World kit, which use to be 100% resin, now combines resin parts with sprues from the plastic Valkyrie kit.
See more photographs of the Imperial Navy Vulture Gunship.
Having glued the model together the next stage for the Kill Bursta was a white undercoat.
See the full workbench feature on the Kil Bursta.
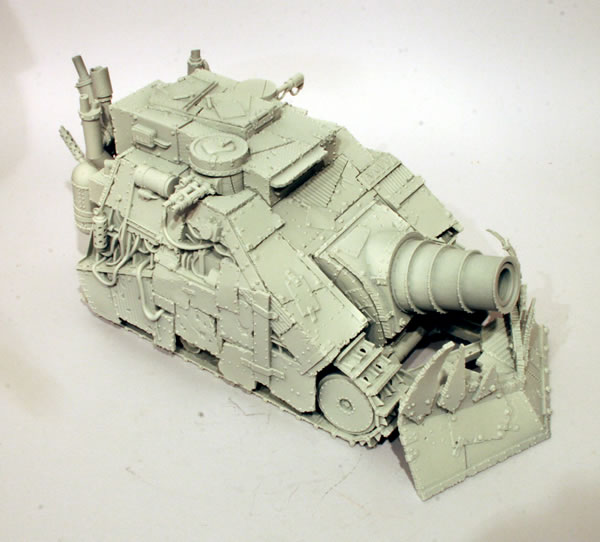
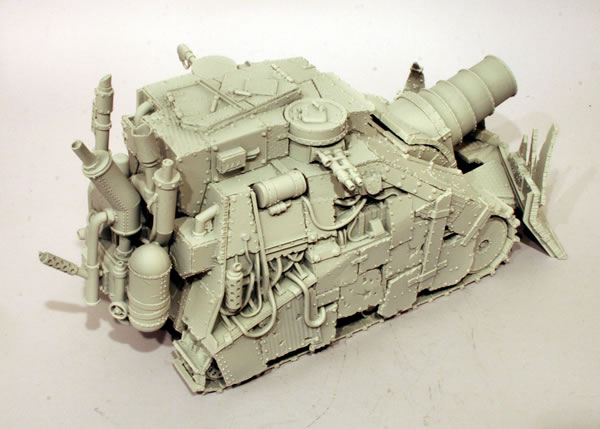
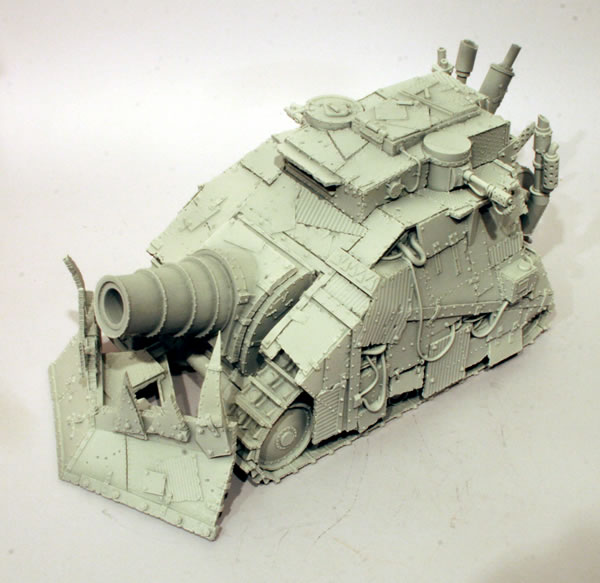
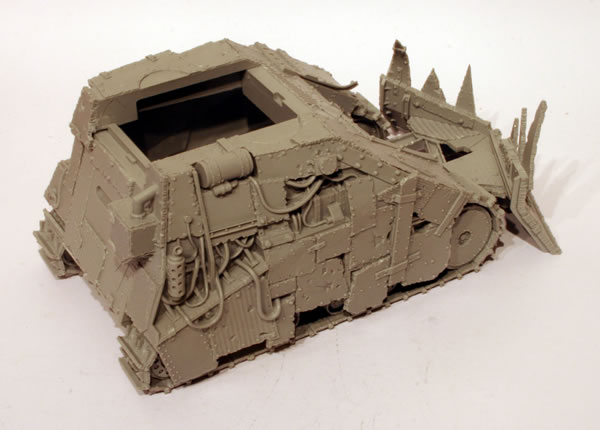
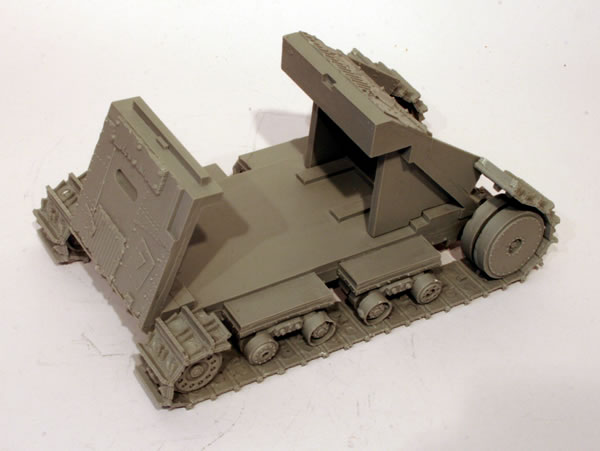
Forge World’s big Ork tank mounts a huge gun ready to take on any Imperial BaneBlade or even Titan.
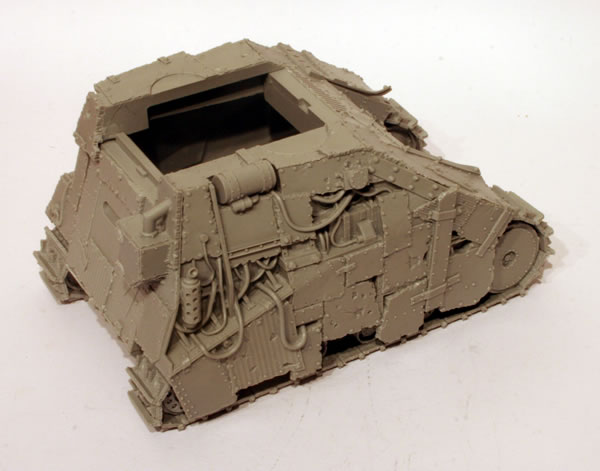
Having fixed the sides, the next stage was the top of the superstructure and the turrets.
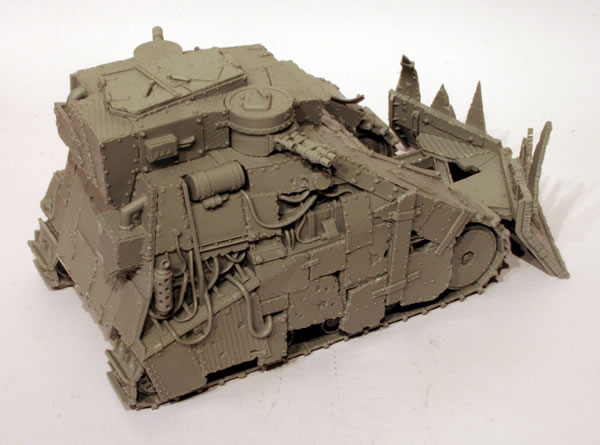
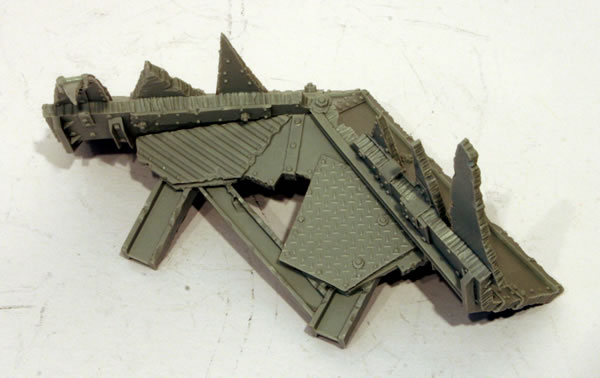
The engine was added to the rear.
The main armament was added to the front. This was another piece that I thought didn’t fit too well.
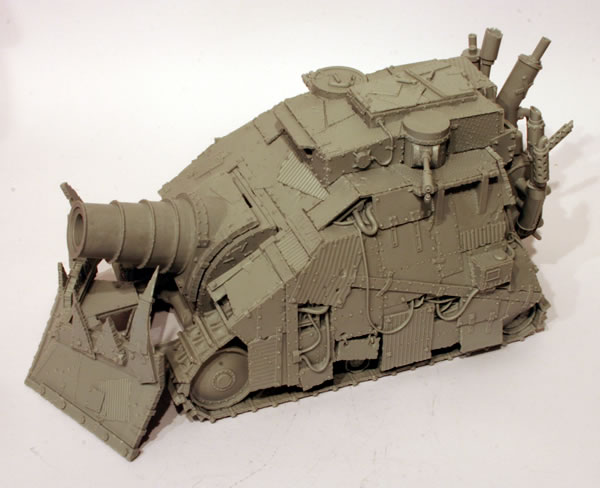
Still one mean looking Ork warmachine.
See the full workbench feature on the Kil Bursta.
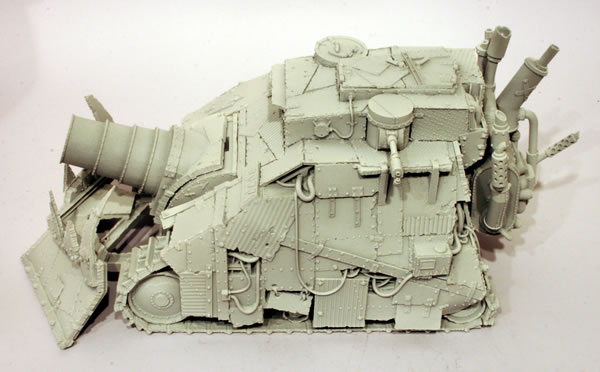
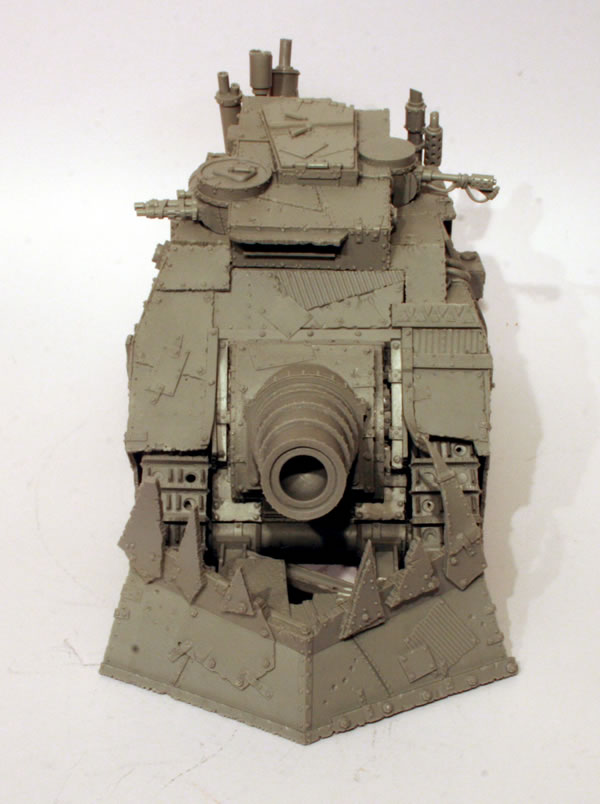
Forge World’s big Ork tank mounts a huge gun ready to take on any Imperial BaneBlade or even Titan.
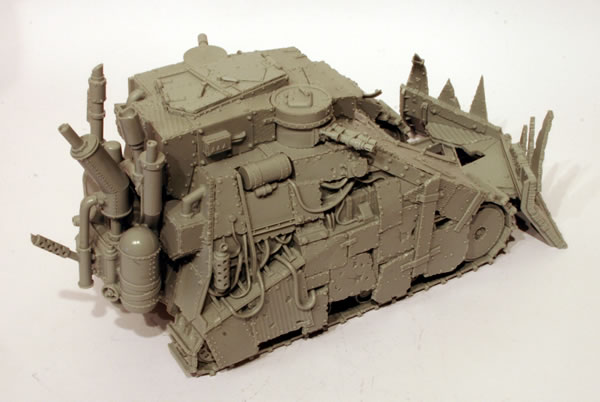
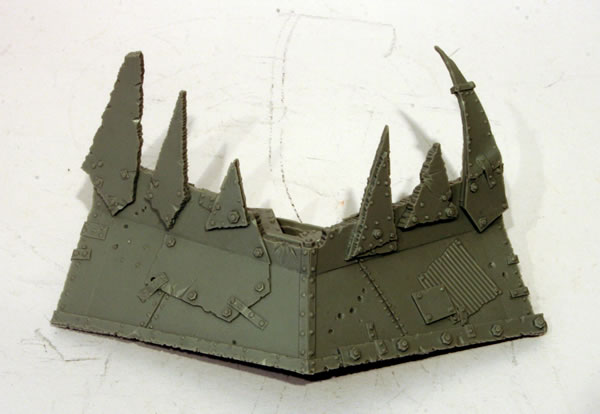
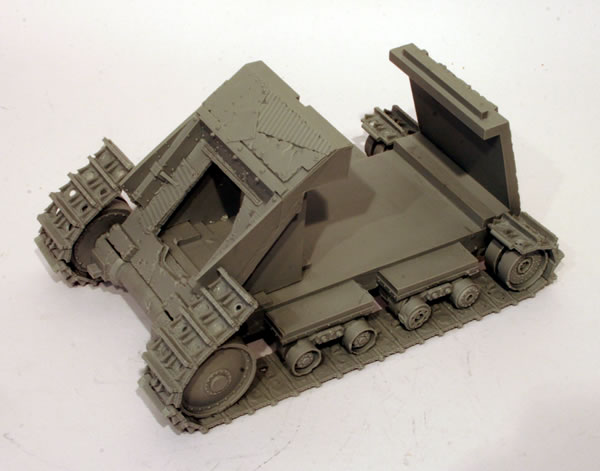
Having built the chassis, the next stage was the superstructure. This didn’t quite fit as well as I thought it should.
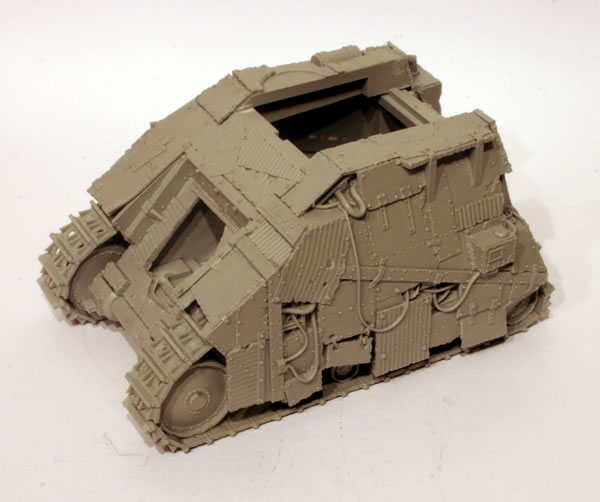
There were a fair few gaps. However with a model such as this, the gaps were less obvious than would be on an Imperial model.
After fitting the sides, the Doza Blade was added.
This is one big tank.
See the full workbench feature on the Kil Bursta.
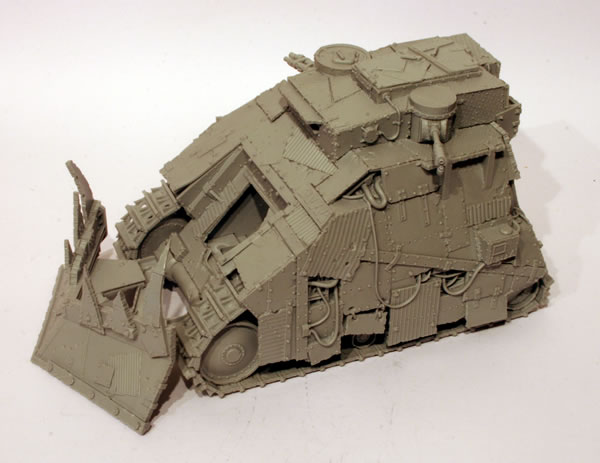
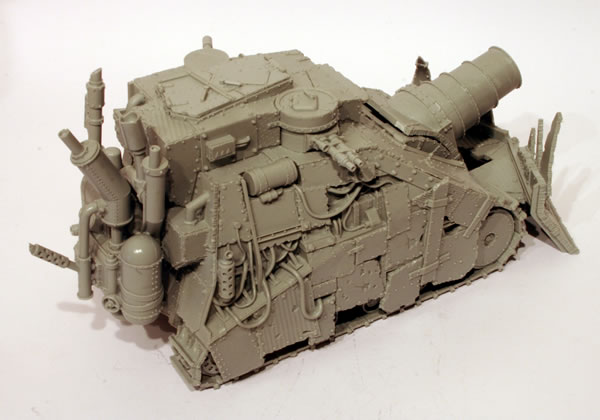
Forge World’s big Ork tank mounts a huge gun ready to take on any Imperial BaneBlade or even Titan.
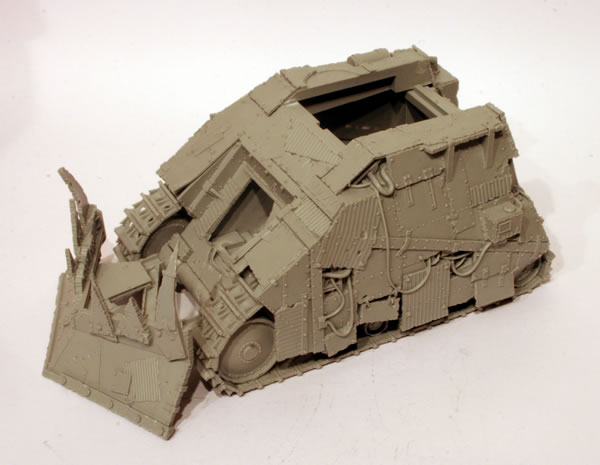
This is quite an easy model to put together.
The tracks were quite warped, however by immersing them in hot water it was straightforward to fix them to the suspension.
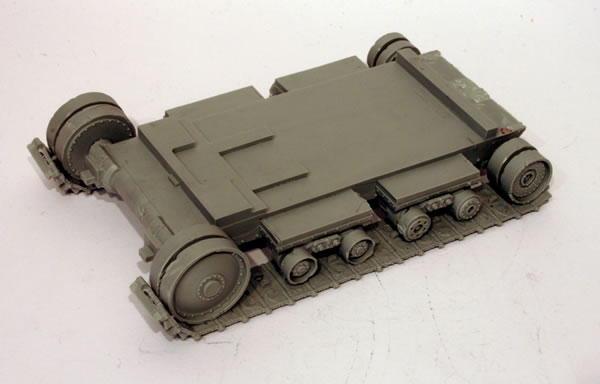
Unlike the Kil Krusha or the Big Trakk the tracks for the Kil Bursta were much easier to fit.
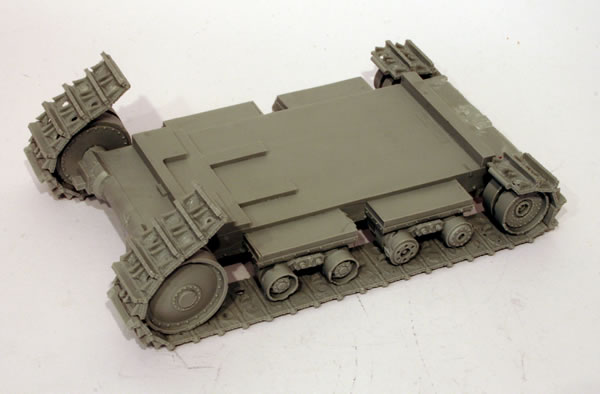
I do like the look of this model, the ramshackle thrown together look.
It does go well together.
The main engine is suitably Orky.

The front and rear hull was added to the model.
The parts fitted quite well.
This is one big tank.
See the full workbench feature on the Kil Bursta.
This beautifully painted Tyranid Barbed Hierodule was in the Forge World display cabinets back at GamesDay 2005.
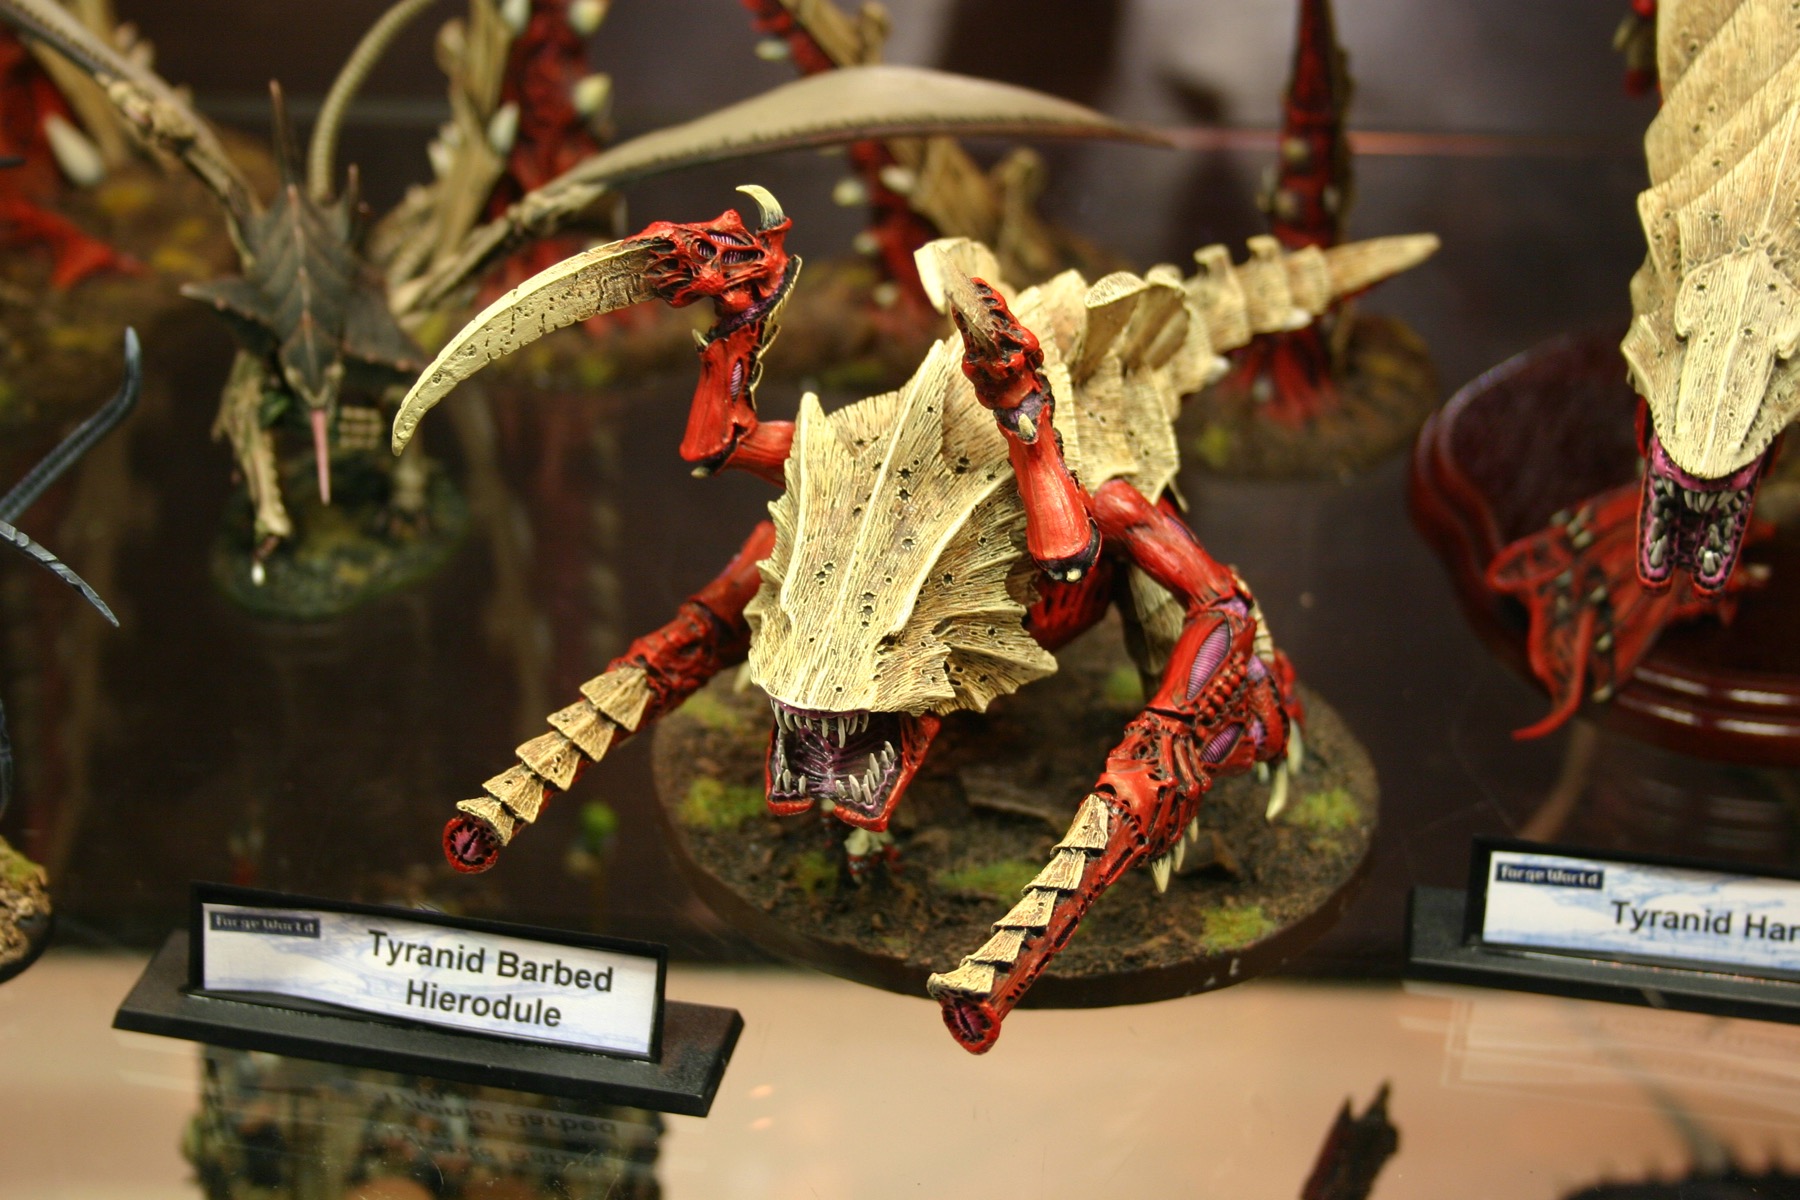
I really do like this model and the paint job is excellent.
Here is it next to the huge Harridan, but even though it looks small here it still towers over normal sized Tyranids.

More photographs of Tyranids.