This is the finished model.

Here is the guide on how it was painted.
I picked up a set of Grot Tanks on a recent visit to Warhammer World.

The lunatic product of the deranged imaginations of grot riggers and scavs that have spent far too long basking in the insane genius of the Big Meks, Grots Tanks are diminutive armoured vehicles made to imitate the far larger Ork Wagons and Tanks.
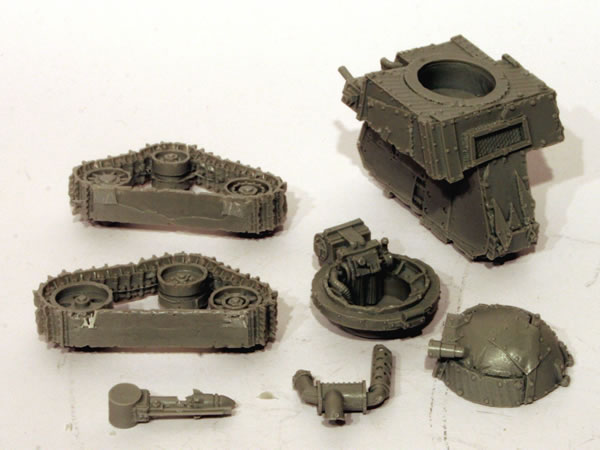
The set contains four different variant chassis, tracks, exhausts and turrets as well as four fantastic Grot Tank Kommandaz and 5 different, incredibly shooty, weapon options.
Before making them up I had a good look at the pictures on the Forge World website.

There are many variations, but before I got started, I washed all the resin pieces. There is a fair bit of resin for the four tanks.

I then looked at the four main bodies and tracks deciding which was going to go with which and then cleaned up the resin.

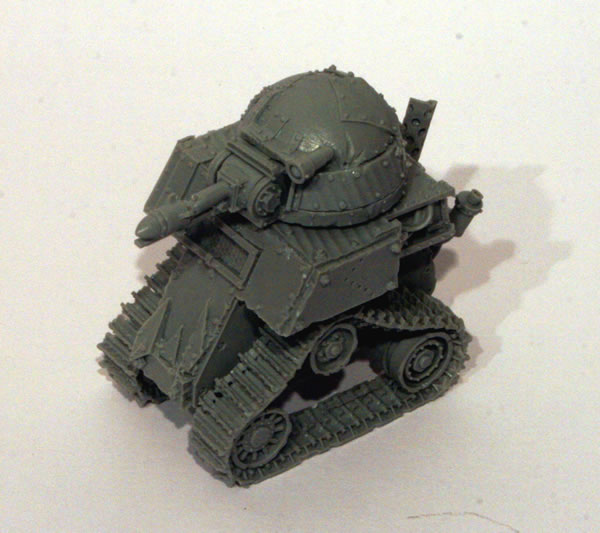
This combination, probably combine my least favourite pieces of the entire set and as a result I put them altogether in one tank. If I was to get a second set, I would probably use this for conversion using parts from the Ork plastic kits. The hull for me is too “tall” whilst the tracks aren’t that bad, they are my least favourite fo the four as they look rather lightweight. I really don’t like the turret which is too Dalek like for me.
One of the problems you can have with Forge World models is that the resin is more brittle than plastic. The sprue lugs are also much “bigger” so as a result is possible to damage the model. As you can see from this close-up of the track, I did manage to snarl up the track.
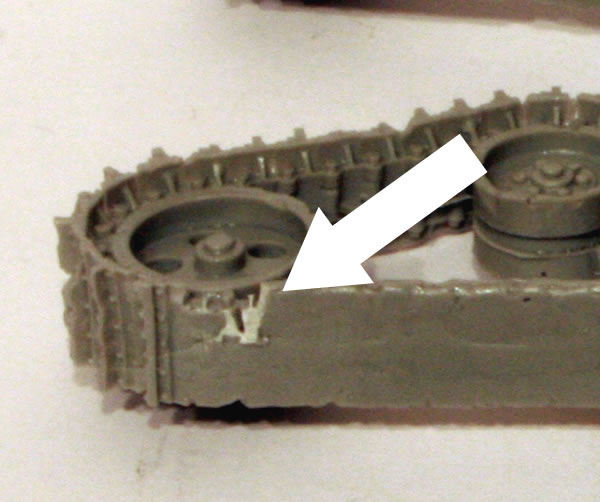
I don’t think it will show too much, but shows you do need to be careful.
One of the problems you can have with Forge World models is that the resin is more brittle than plastic. The sprue lugs are also much “bigger” so as a result is possible to damage the model. As you can see from this view of the track, I did manage to snarl up the track.

Here are all four in a row.


Another view of the four, all in a row.

The next stage was a white undercoat.


All four of the tanks are now undercoated.

Having not really looked at them for a while, having been stuck at the undercoated stage, I thought I might try and finish them.
I gave it a base coat of Karak Stone.

I did realise that I hadn’t undercoated the bottom of the tanks, as the paint didn’t stick to the resin on the bottom. So I took the others out to the garage and gave them a white undercoat on the underneath of their hulls.
I then started painting the tracks with Gorthor Brown. When I did this I actually noted I had used Dryad Bark, which is much darker. It was only when painted the other Grot Tanks that I realised I hadn’t used Dryad Bark and must have used Gorthor Brown. The whole point of these guides is they should help me paint! Anyway I was pleased with the way the Gorthor Brown tracks now look.

I would have normally painted the tracks black and then drybrushed with Boltgun Metal. However revisiting the Forge World images of their Grot Tanks, the tracks were brown and rusty.
So I think I will try that effect. I do have some Forge World weathering powders for rust in one of my boxes somewhere…
Having done both tracks, I was reminded one was damaged when I cut the sprue off.

I am thinking I might now try and fix it by creating a fix with some modelling putty.

I painted the rokkit with Mephiston Red.

I then gave the model various washes of mainly Citadel Shades, Seraphim Sepia, though for some parts of the model I used Agrax Earthshade. Initially I had a problem with not mixing the shade so it came out initially quite glossy! Also some areas pooled slightly.


So I gave the model a second wash of Seraphim Sepia Shade, though for some parts of the model I used Agrax Earthshade, especially on the tracks.


I then gave the model a drybrush first of Karak Stone and then Ushabti Bone.

