Camouflaging the Ork Bommer

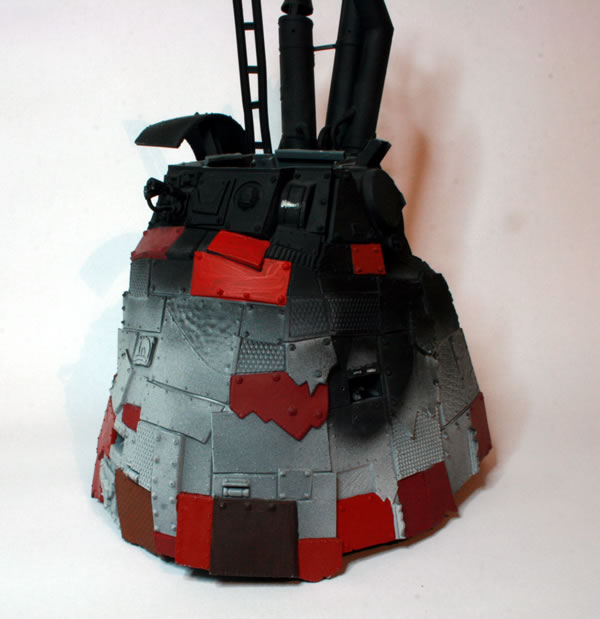
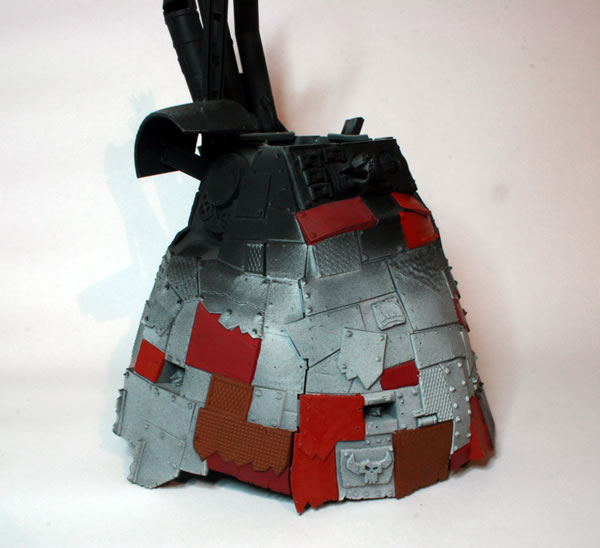
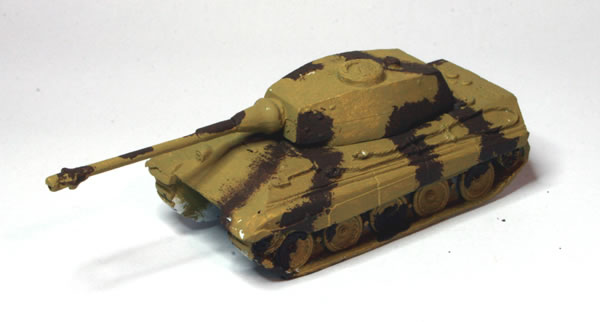
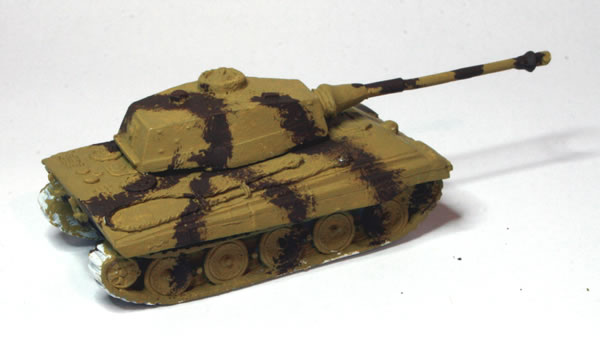
I decided after basecoating the Ork Bommer that I might do an experiment with this model and apply some camouflage. I decided to add a second spray, after masking off some of the basecoat, of a different contrasting colour. Looking through the cupboard I realised that I only had a dark green, whereas I did think a darker brown would have worked well. Ah well, I had time to paint, not much time though to go out and buy some new paint!

In terms of masking I had three options, use some masking fluid, masking tape or blu-tac. I decided not to use the masking fluid, as I had not used it before, though I will probably have a go with it for the glass canopies. I did consider using masking tape, but I wanted curved lines not straight. So in the end went with the blu-tac.

This I stuck on the model and then gave the model a spray of British Armour Green.

As this was an Ork scheme, I didn’t use any kind of regular pattern with the camouflage.

After letting the paint fully dry, I removed the blu-tac.

I was very pleased with the end result.

Next stage will be the detailing, painting the engines and guns, as well as the crew and cockpit.

Constructing the Ork Bommer

As is the case with most of the new kits from Games Workshop, this model comes with a range of choices on how you fit the kit together. You can build a fighter version, a ground attack variant or a dive-bomber.

The most popular configurations of the Ork Bommer are the Dakkajet, the Burna-Bommer and the Blitza-Bommer.

I decided that I would build mine as per the Burna-Bommer, as I liked the rear turret, but would arm mine with the weaponry from the Blitza-Bommer and a couple of extra forward firing big shootaz!

The model went together quite easily. Though I do feel that the CAD style of the instructions makes them more difficult to follow than the traditional line art that I remember from making Airfix kits in the 1970s and 1980s.

The main issue I had was with the rear horizontal fins. The way they are connected means it is not a strong joint and initially the fin drooped. I therefore had to prop it up whilst the glue cured.

With the way I am going to paint the model I kept the cockpit, pilot and turret assembly separate, and the bombs as well.

The next stage will be a white undercoat followed by a base coat of German Armour Yellow (well that’s what I had in the cupboard).

Honoured Imperium Statue and Ruins

These have been in storage for a while now, it was back in 2011 that I gave the models a basecoat of Humbrol Sea Grey spray paint. I had earlier, drybrushed the Broken Aquila, and then used the same technique on the Space Marine Statue and ruins.

Honoured Imperium Ruins

Honoured Imperium Ruins

These are the ruins.

Honoured Imperium Ruins

As I mentioned in my previous post on the Broken Aquila, I was originally going to keep the whole model grey, but I am now thinking I might add more scenic and foliage and rather than have it as a recentl ruin, have it as one that was left some time ago and nature has over time grown around it. The Imperium has been around for ages and so it still fits the fluff. The statue certainly looks like it is aged rather than damaged as part of a recent battle.

Pitching the Roof

I had mentioned in a previous blog post that I was thinking about painting my Sarissa Precision buildings for the Old West. I took the plunge and painted the flat roof of the store.

I used a Citadel grey to paint the roof to represent that it had been pitched with tar and then faded in the sun. Black paint would have been too dark.

You can see in this image how it looked before I painted the roof.

The downside of this kind of painting I think will be that it will obscure the laser etching of the roof tiles on my other Sarissa Precision building.

Painting more Old West Gunfighters

I have been painting more of my Foundry gunfighters to get more of them finished for a future game of Old West. In the main I have been using Citdeal and Vallejo paints, using browns and the odd green. I need to get some blue for jeans though.

So far I have only finished Emmet Gates, but hope to get most of them finished soon.

Camouflaging the 15mm German Tiger II – Königstiger

After painting the basecoat on my old SDD 15mm German Tiger II (Königstiger) I started to paint the camouflage.

I used Chocolate Brown (872) from the Flames of War German Armour Paint Set.

Though following the painting guidelines from the German Armour paint set, I think the brown is too brown and needs to be more red.