After cleaning the Crimean War British Infantry, I glued them to two pence pieces and the covered this with PVA glue and Citadel Sand.
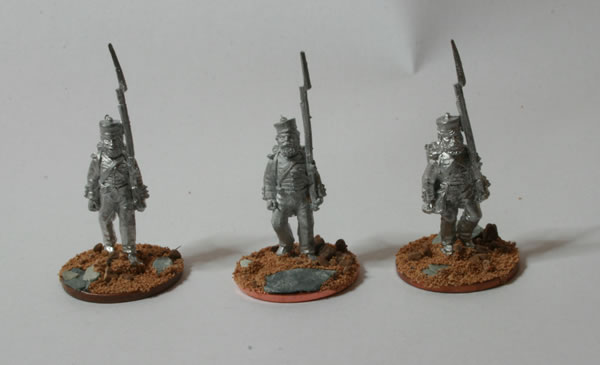
I also used some slate pieces from a Citadel terrain pack to represent rock.
warhammer, wh40k, flames of war, bolt action, aeronautica imperialis, star wars, models, news, views and stuff
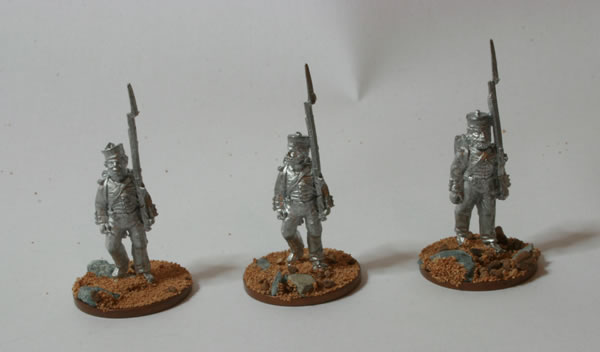
After cleaning the Crimean War British Infantry, I glued them to two pence pieces and the covered this with PVA glue and Citadel Sand.
I also used some slate pieces from a Citadel terrain pack to represent rock.
After thinking about Bolt Action for a while and reflecting on the rules I finally decided on which force I was going to build. My regular opponent Simon was going Italian, so I actually had quite a wide choice of potential foes, from Early War French, British Desert Rats, Anzio which would mean regular British Infantry and US forces, Russians and even Germans towards the end of the war. I did initially think about Greek, they used regular British equipment so would be quite easy to model. I did consider Late War Germans, so I could get a JagdTiger in 28mm…. but in the end I decided that I would go totally irregular and go with Partisans, so just infantry, or maybe a car or truck or two.
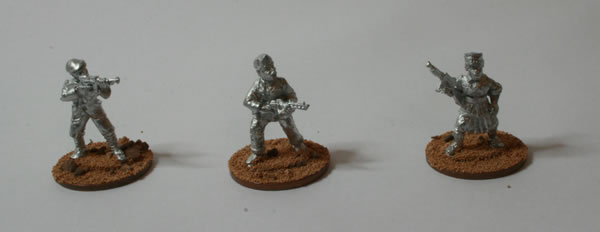
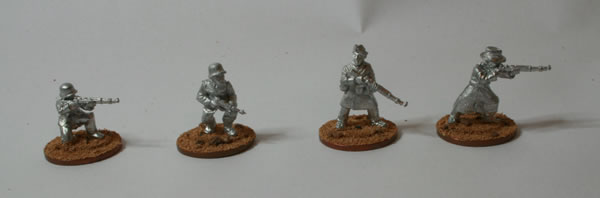
Through mail-order I bought from Warlord Games their Partisan Band, which in theory contains eight figures, quite pleased to find that my parcel contained ten figures.
After cleaning the castings, I stuck them to two pence pieces using super glue, after that was dry, using PVA and Citadel Sand I covered the bases.
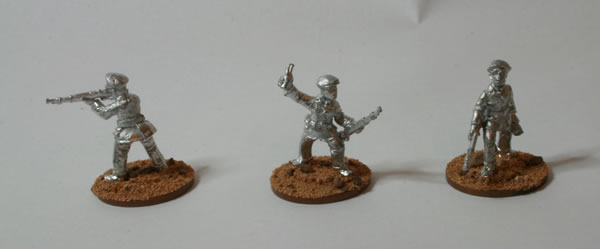
The next stage will be a white undercoat.
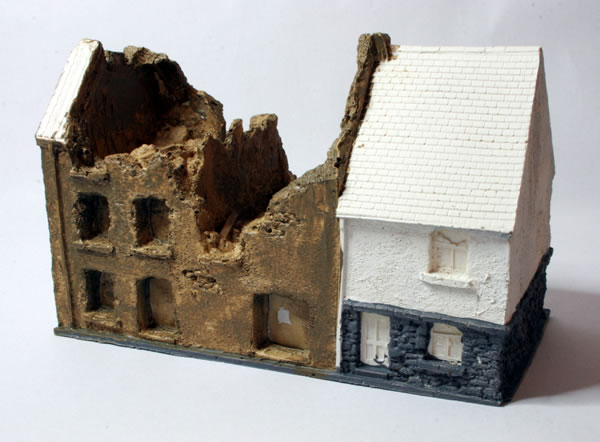
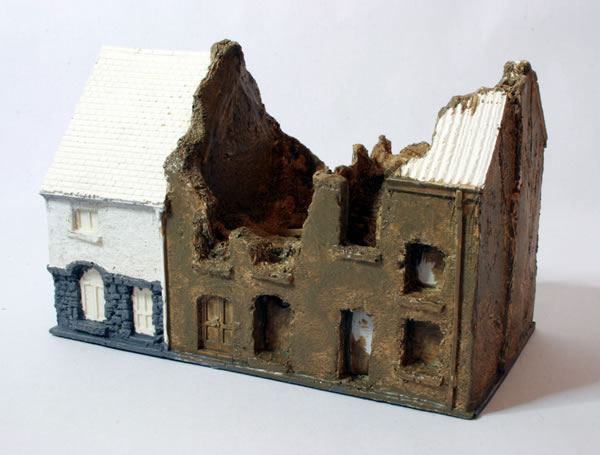
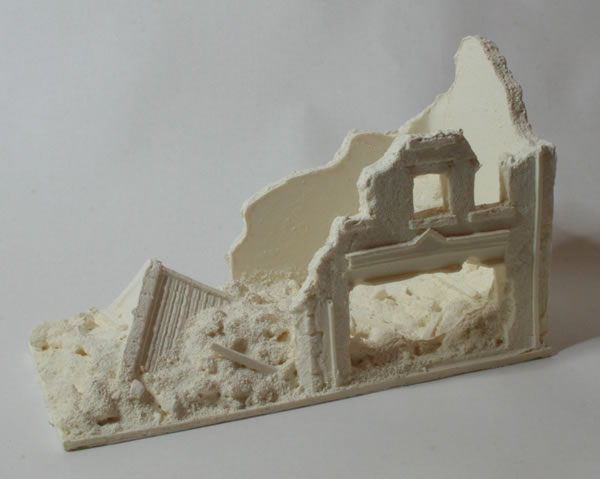
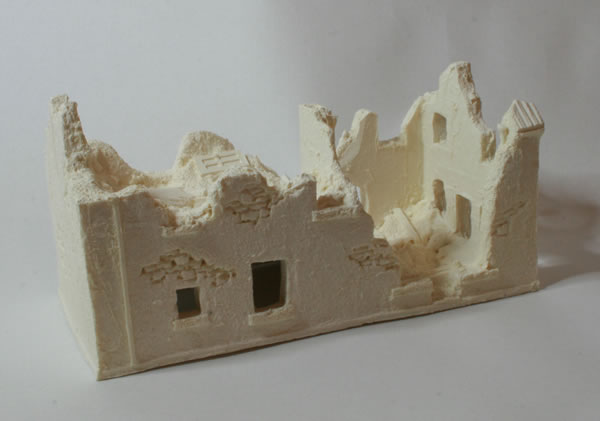
I have the ruined row of three houses and the ruined row of four houses, from Total Battle Miniatures. Having previously posted about the ruined row of three houses, here is the ruined row of four houses.
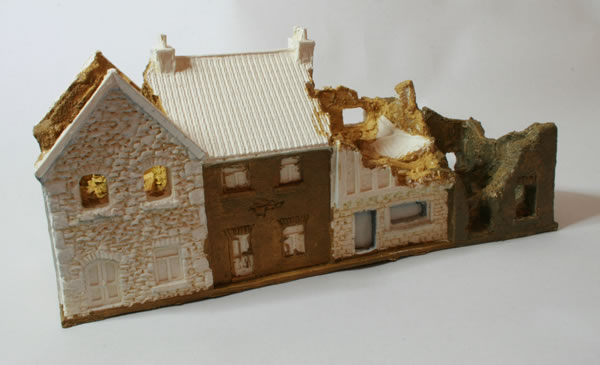
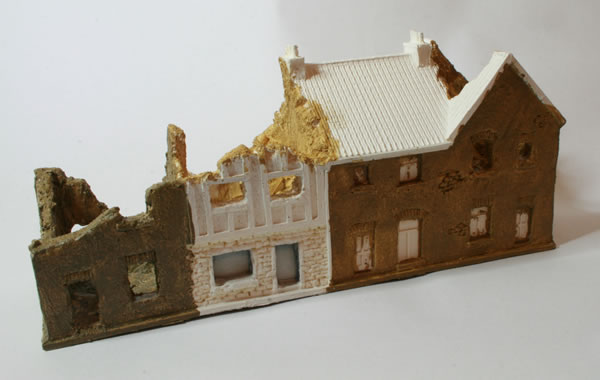
Still some work to do on the stonework and half-timbered building.
I have the ruined row of three houses and the ruined row of four houses, from Total Battle Miniatures.
Having given most of the model a basecoat, I am now painting in the details of the ruins, using Citadel Scorched Brown.
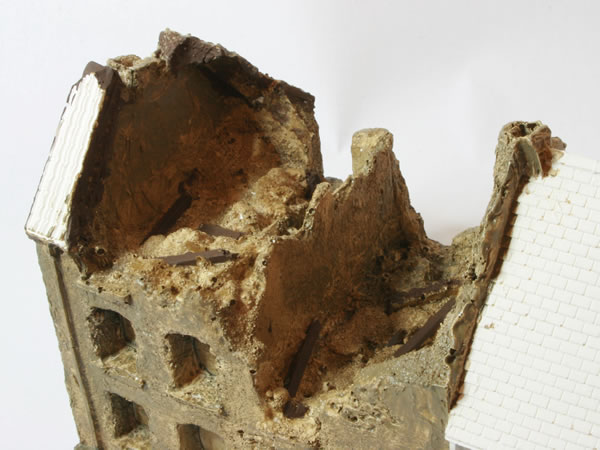
Once I have finished painted the ruins, I think I will add some additional detrius, broken beams and so on to add a little more detail.
In the process of sorting some old gaming stuff out I found a bundle of old SDD models. These are 15mm metal castings that I bought back in the 1990s. It makes me think that the other metal models that I have been painting are also SDD.
This box was mainly late war stuff and included a King Tiger. Having constructed the model, I gave it a white undercoat.

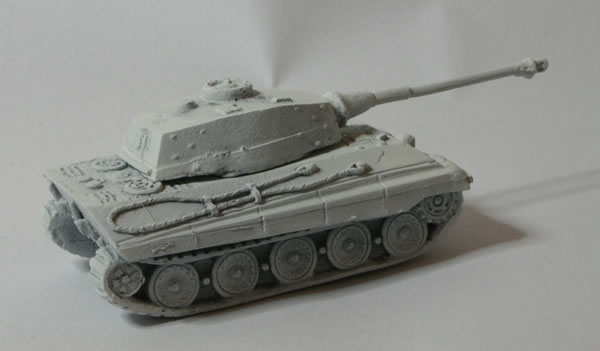
The undercoat has shown that the quite severe casting lines, something you don’t always get with a resin casting.
The Ironclad Miniatures Steam Tank was given a white undercoat.
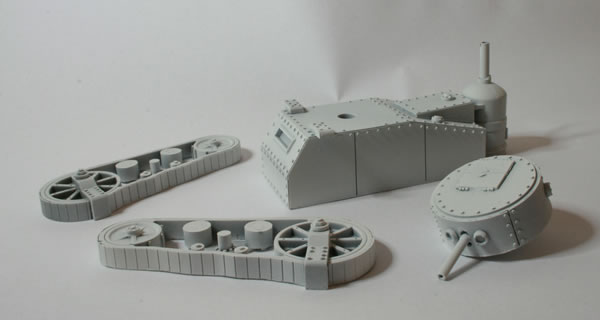
The resin pieces of the Ironclad Miniatures Tunnelling Machine were very clean and needed minimal work to get them sorted. The pieces went together very easily. I then gave the model a white undercoat.


I do like this model and think it will be very useful as the core of different kinds of Victorian SF scenarios, even if it actually doesn’t get used itself. It could even just be scenery in the background.

The next stage will be applying the basecoat to the various parts of the model.
Having washed and cleaned the castings of two of the ruined buildings from the Total Battle Miniatures range of Western Europe 15mm buildings. They are the ruined café and ruined shop with passage. I gave both models a light white undercoat.
After trying out a non-airbrush method on an old metal SDD SdKfz 251 and been happy with the end result, I decided that I would start to paint my German big cats using a similar method.
Having given the model a basecoat of Warpaint German Armour the next stage was to add the disruptive camouflage. What I did was take an old paintbrush and cut off the bristles leaving a quarter inch. This brush is then used to stipple on the camouflage pattern. I used initially Chocolate Brown (872) and will use Reflective Green (890) later.

I was quite pleased with the initial effect on my SdKfz 251, however I think I may have made the pattern too wide on the Tiger. What I will do is tidy up the camo pattern with some Middlestone (882).
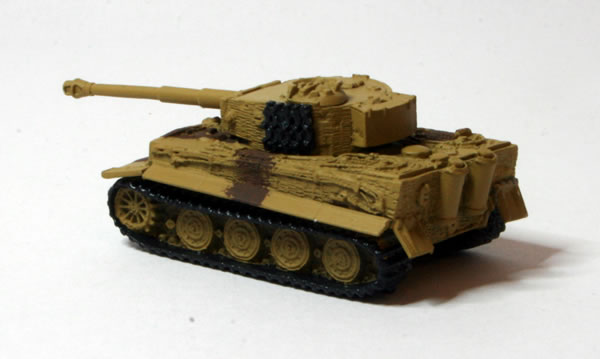
Though the official German manual during the war told how the camo pattern was to be applied, it said the raw paint mixture was to be mixed with petrol and sprayed onto the vehicles. Reality and short supplies of petrol meant that more often the camo pattern was “painted” onto the vehicles, sometimes with brushes and sometimes with rags.
I have some of the 15mm ruins from Ironclad Miniatures.
At this time I am using a few of them to check how certain paints of mine are working out, as well as testing out different colour combinations before I try them on the (more expensive) bigger models.

One of the conclusions I have come to is I do need to replace many of the paints in my collection.