Another one of the Wargames Foundry Old West figures I found. This is one of the Pinkerton Men from the OW9/1 Shootists set.

I will use the same technique on this model as I have used with my other Old West figures.
warhammer, wh40k, flames of war, bolt action, aeronautica imperialis, star wars, models, news, views and stuff
Another one of the Wargames Foundry Old West figures I found. This is one of the Pinkerton Men from the OW9/1 Shootists set.
I will use the same technique on this model as I have used with my other Old West figures.
The next stage with the Ork Bommer was starting to add the details to the model. I have already given the model a two colour base coat, a base spray of German Armour Yellow, this was then followed by a second spray of British Armour Green. The base yellow was masked with blu-tac in an haphazard manner as would be befitting Orks.

In the past I would have painted the details Chaos Black and then dry brushed the details with Tin Bitz and Boltgun Metal. This process has fallen out of favour with me, and with this model I am going to use a technique that I originally tried on my Victorian Science Fiction Tunneller.

This underside view shows the engine in more detail.

The process is to first put down a base of Boltgun metal and then using shades and inks to add washes to bring out the detail.

I am also intending to use some of the Forge World weathering powders I purchased a few years ago, which I have never got around to using.

Here is the bommer with the turret and cockpit in place.

…and a close-up.

I was looking for some other stuff when I found some more Wargames Foundry Old West figures. This is one of the Pinkerton Men from the OW9/1 Shootists set.

You can originally see that I had based them on a penny, but I couldn’t work out how to get it off the coin easily without damaging the model.
I think my models were packaged differently when I bought them. Currently this model is available in the following pack.

There are four metal models from this range on the workbench. I gave the models a white undercoat. Here is one of the models, an infantryman firing.


I will give the models a base coat of khaki next.
Here are two further components of my Ork Bommer, the cockpit and the rear turret assemblies. Initially they had a white sprayed undercoat.


The interiors were painted Chaos Black and drybrushed with Boltgun Metal. I then using Vallejo Middlestone for the exterior parts that will be showing. This (in theory) is the same colour as the original sprayed basecoat. The next stage
I was looking for some other stuff when I found some more Wargames Foundry Old West figures. This is Cemetery Sam.
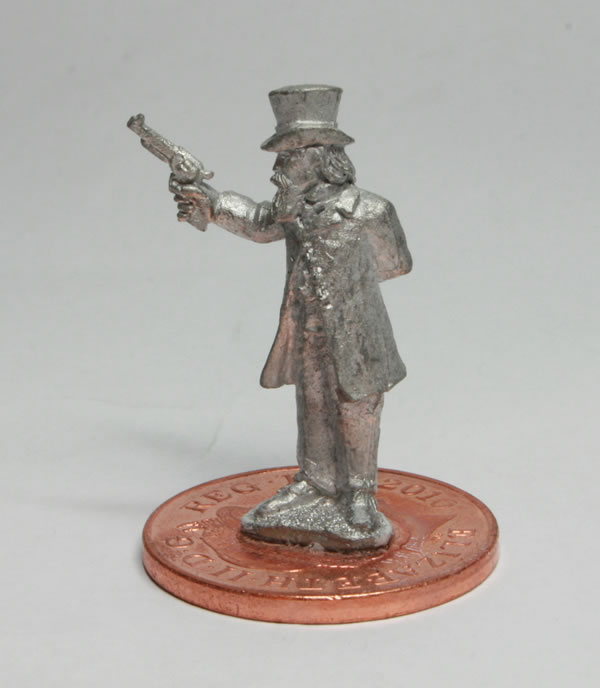
He is from the Old West Townsfolk – The Town Vigilance Committee – OW117 set.
I was thinking of buying some Victorian models to go alongside my Victorian Science Fiction vehicles, but here I had some all the time. My intention after painting them is to use them with the Old West rules.
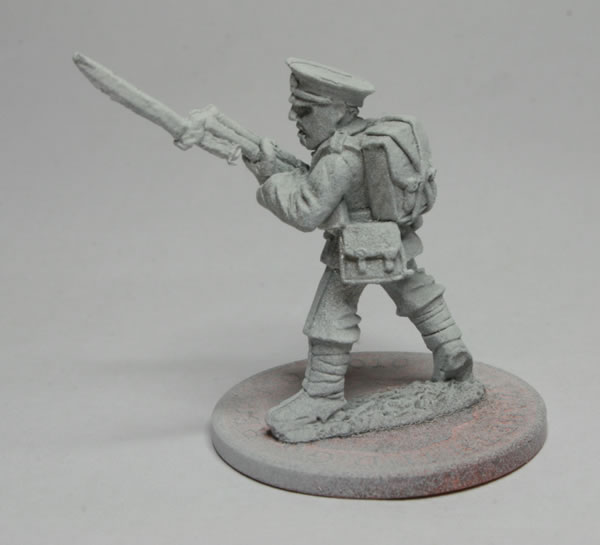
I have four metal models from this range that I bought some time ago, not sure if that was the only ones I bought or if I have merely mislaid and lost the others…. I thought I had ten, but there are only four.
I gave the models a white undercoat. Here is one of the models, an infantryman advancing.

I will give the models a base coat of khaki next.
I have been thinking about how I might use the models once I have finished painting them. I did think they would work well in a Victorian Science Fiction Scenario alongside my Steam Tank.
Another idea was to use them in a Doctor Who scenario fighting the Robot Mummies or the Cybermen. They are almost the right era for the Robot Mummies and would make for an interesting pre-UNIT or even Torchwood scenario.
I decided after basecoating the Ork Bommer that I might do an experiment with this model and apply some camouflage. I decided to add a second spray, after masking off some of the basecoat, of a different contrasting colour. Looking through the cupboard I realised that I only had a dark green, whereas I did think a darker brown would have worked well. Ah well, I had time to paint, not much time though to go out and buy some new paint!
In terms of masking I had three options, use some masking fluid, masking tape or blu-tac. I decided not to use the masking fluid, as I had not used it before, though I will probably have a go with it for the glass canopies. I did consider using masking tape, but I wanted curved lines not straight. So in the end went with the blu-tac.
This I stuck on the model and then gave the model a spray of British Armour Green.

As this was an Ork scheme, I didn’t use any kind of regular pattern with the camouflage.

After letting the paint fully dry, I removed the blu-tac.

I was very pleased with the end result.

Next stage will be the detailing, painting the engines and guns, as well as the crew and cockpit.
I gave my constructed Ork Bommer a white undercoat. The next stage was a spray basecoat of German Armour Yellow.

I used that colour, mainly as I had it in the house.
As is the case with most of the new kits from Games Workshop, this model comes with a range of choices on how you fit the kit together. You can build a fighter version, a ground attack variant or a dive-bomber.
The most popular configurations of the Ork Bommer are the Dakkajet, the Burna-Bommer and the Blitza-Bommer.
I decided that I would build mine as per the Burna-Bommer, as I liked the rear turret, but would arm mine with the weaponry from the Blitza-Bommer and a couple of extra forward firing big shootaz!

The model went together quite easily. Though I do feel that the CAD style of the instructions makes them more difficult to follow than the traditional line art that I remember from making Airfix kits in the 1970s and 1980s.

The main issue I had was with the rear horizontal fins. The way they are connected means it is not a strong joint and initially the fin drooped. I therefore had to prop it up whilst the glue cured.

With the way I am going to paint the model I kept the cockpit, pilot and turret assembly separate, and the bombs as well.

The next stage will be a white undercoat followed by a base coat of German Armour Yellow (well that’s what I had in the cupboard).