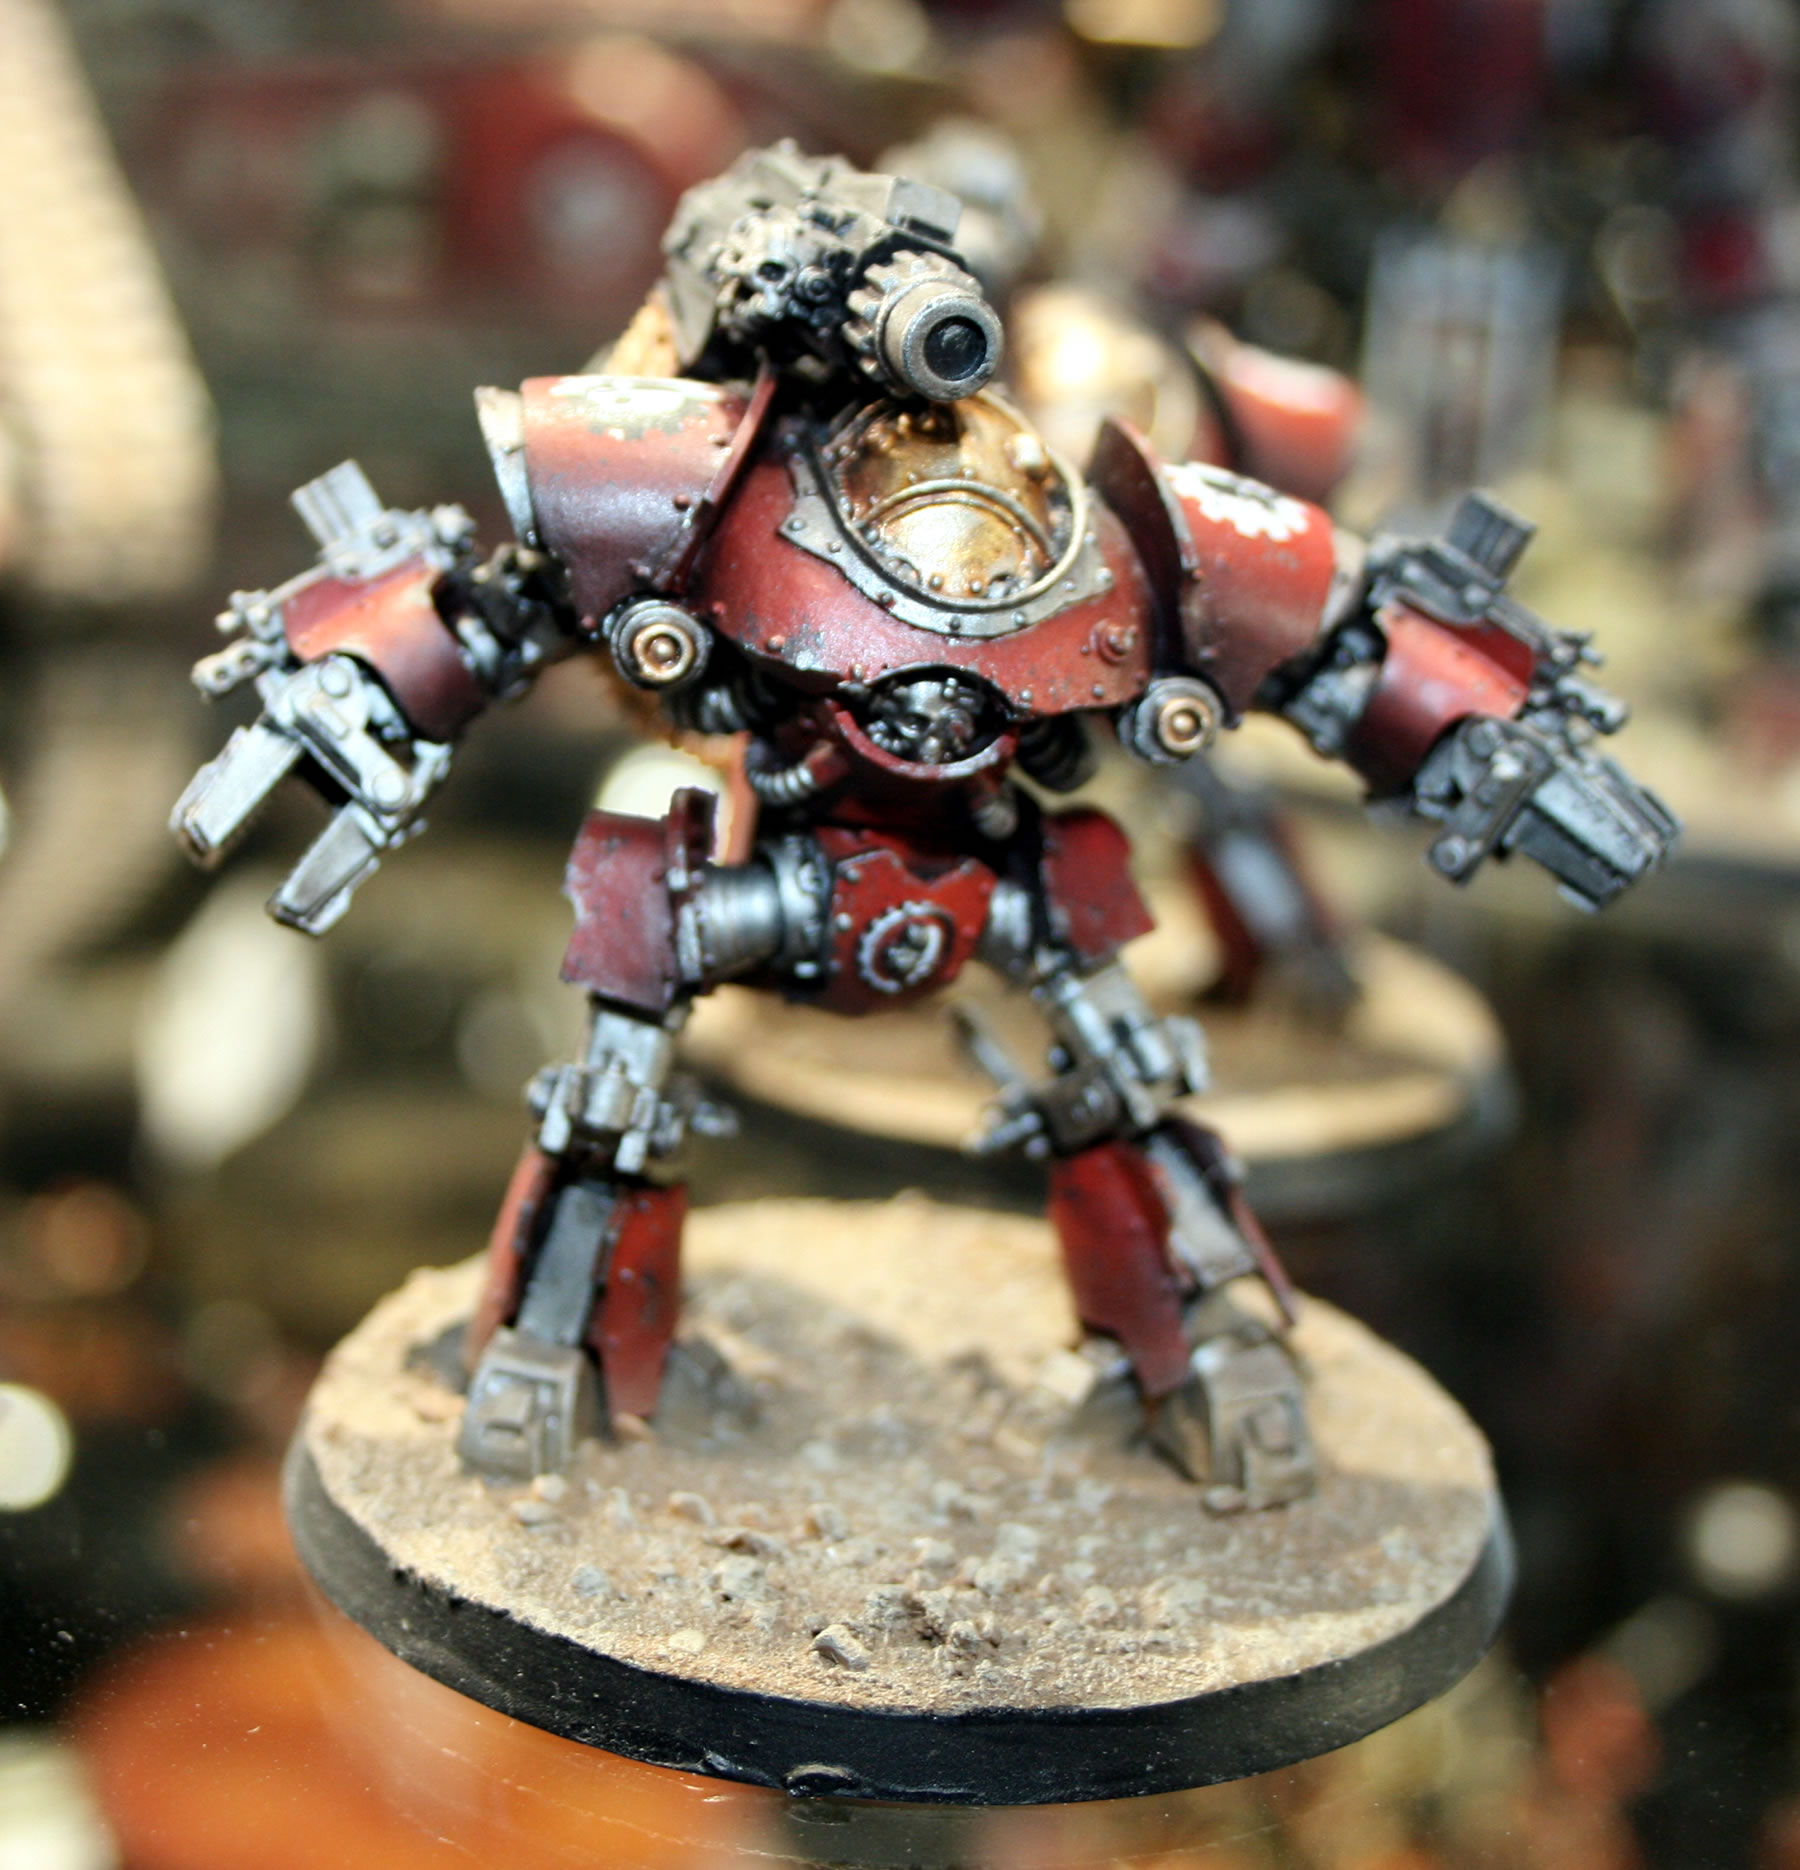
Much better…

I really didn’t like the new Taurox Prime from Citadel, however I do think the Astra Militarum Wyvern is a much better designed model.

Astra Militarum Wyvern

The Wyvern Suppression Tank exchanges the Hydra’s anti-aircraft autocannons for a pair of twin-linked stormshard mortars. The tank excels in the claustrophobic environment of urban warfare, raining curtains of shrapnel down upon enemy infantry with ever exposing itself to harm.

This plastic kit can be assembled as either a Hydra or a Wyvern with 2 crewmen: a gunner and a spotter and has the option to equip a heavy bolter or a heavy flamer.

In many ways better than the Hydra, which you can also construct from the same box. Possibly a little tall, but that’s probably the only thing I don’t like.

Really don’t like it…

Taurox Prime

The Taurox Prime is a robust infantry assault vehicle. It is heavily armoured with thick plates and is equipped with an array of heavy weapons to support the Scions on the battlefield.

Is it just me, or does the design of this model just look wrong?

The Taurox Prime is a new model from Games Workshop, and I really don’t like it. I think it’s too tall and the tracked “wheels” fail to work for me.

What are your thoughts?

Imperial Knight

Well, well, well, what do we have here then?

Imperial Knight

Yes Games Workshop after nearly twenty years have finally produced a 28mm version of the Imperial Knight that first saw the light of day with Epic back in the 1990s.

At 8 inches tall the Imperial Knight is a towering war engine. Crafted in the Dark Age of Technology and resplendent with gothic details it presents a unique silhouette both in a display cabinet and on the battlefield. Fighting alongside armies of the Imperium, most Imperial Knights are part of a Knightly House. They are affiliated with either the Imperium or the Adeptus Mechanicus. Some Imperial Knights choose to forsake all ties to a noble house. Known as Freeblades, they are masters of their own destiny.

Fully jointed at the head, arms and waist this kit allows you to create some wonderful poses. You can assemble the Imperial Knight as a Knight Paladin armed with a Rapid-fire battle cannon or a Knight Errant armed with a Thermal cannon. Both are equipped with a Reaper chainsword and protected by an Ion Shield. Each also has the option to add Heavy Stubbers. You have the choice of three unique face-plates: one for Mechanicus affiliated Knights and two for Imperial Knights.

This looks a very nice model and would certainly probably give my Stompa a bit of a kicking!

Mechanicus affiliated Knight

Now at £85 this is up there with the BaneBlade and Stompa as a somewhat pricey big model. However though I know that Games Workshop are going down the “let’s all have huge number of large models on the table” type game these days, I still there is room for these types of models in more narrative games. I can imagine an Ork Kommando raid on a single Imperial Knight that has been disabled. Will the Imperial Guard looking after the Knight be able to protect the Knight whilst it is repaired and powered up, or will the Ork Kommandos manage to lay their charges and make their escape.

So will I be buying one? Well you never know, but I do need to finish that Ork Bommer first.

Bommer Engine

I have both volumes of the Forge World Masterclass books and they are a real inspiration and full of ideas and techniques for painting and weathering models.

I wanted to try and emulate some of those techniques on the engine of the Ork Bommer.

I have been using a combination of inks and shades on a base coat of Bolt Gun Metal. I then want to highlight parts of the engine, as well as adding some more grunge.

I intend to use some Forge World weathering powders and Citadel Technical paints to further enhance and weather the engines. I might though in the first instance try them on another model to ensure it works out how I want them to, but also what happens when I varnish the model.

Washing the Bommer

The stage after painting the base coats and the details on the boomer I thought the next stage would be relatively much easier, however I was mistaken.

I was using a variety of Citadel shades initially, I left the boomer to dry. I found one of them I was using left a residue on the model. I was lucky that I was able to remove the residue with water and some kitchen towel. I am not sure what caused the problem, maybe one of age of my paints or not mixing it properly.

In the end I am quite pleased with the end result. What I was trying to achieve was a weathered aged look that is the result of a complete disregard to maintenance or care for the bommer. If this was a human Imperial Guard plane, it probably wouldn’t be able to fly, however as this is an Ork aircraft, it flies because of the sheer will of the pilot.

The next stage will be drybrushing, but in my next posting about the bommer I will look at the engine and engine details.

Detailing the Bommer

The next stage with the Ork Bommer was starting to add the details to the model. I have already given the model a two colour base coat, a base spray of German Armour Yellow, this was then followed by a second spray of British Armour Green. The base yellow was masked with blu-tac in an haphazard manner as would be befitting Orks.

In the past I would have painted the details Chaos Black and then dry brushed the details with Tin Bitz and Boltgun Metal. This process has fallen out of favour with me, and with this model I am going to use a technique that I originally tried on my Victorian Science Fiction Tunneller.

This underside view shows the engine in more detail.

The process is to first put down a base of Boltgun metal and then using shades and inks to add washes to bring out the detail.

I am also intending to use some of the Forge World weathering powders I purchased a few years ago, which I have never got around to using.

Here is the bommer with the turret and cockpit in place.

…and a close-up.

Ork Bommer Bitz

Here are two further components of my Ork Bommer, the cockpit and the rear turret assemblies. Initially they had a white sprayed undercoat.

The interiors were painted Chaos Black and drybrushed with Boltgun Metal. I then using Vallejo Middlestone for the exterior parts that will be showing. This (in theory) is the same colour as the original sprayed basecoat. The next stage

Camouflaging the Ork Bommer

I decided after basecoating the Ork Bommer that I might do an experiment with this model and apply some camouflage. I decided to add a second spray, after masking off some of the basecoat, of a different contrasting colour. Looking through the cupboard I realised that I only had a dark green, whereas I did think a darker brown would have worked well. Ah well, I had time to paint, not much time though to go out and buy some new paint!

In terms of masking I had three options, use some masking fluid, masking tape or blu-tac. I decided not to use the masking fluid, as I had not used it before, though I will probably have a go with it for the glass canopies. I did consider using masking tape, but I wanted curved lines not straight. So in the end went with the blu-tac.

This I stuck on the model and then gave the model a spray of British Armour Green.

As this was an Ork scheme, I didn’t use any kind of regular pattern with the camouflage.

After letting the paint fully dry, I removed the blu-tac.

I was very pleased with the end result.

Next stage will be the detailing, painting the engines and guns, as well as the crew and cockpit.

Constructing the Ork Bommer

As is the case with most of the new kits from Games Workshop, this model comes with a range of choices on how you fit the kit together. You can build a fighter version, a ground attack variant or a dive-bomber.

The most popular configurations of the Ork Bommer are the Dakkajet, the Burna-Bommer and the Blitza-Bommer.

I decided that I would build mine as per the Burna-Bommer, as I liked the rear turret, but would arm mine with the weaponry from the Blitza-Bommer and a couple of extra forward firing big shootaz!

The model went together quite easily. Though I do feel that the CAD style of the instructions makes them more difficult to follow than the traditional line art that I remember from making Airfix kits in the 1970s and 1980s.

The main issue I had was with the rear horizontal fins. The way they are connected means it is not a strong joint and initially the fin drooped. I therefore had to prop it up whilst the glue cured.

With the way I am going to paint the model I kept the cockpit, pilot and turret assembly separate, and the bombs as well.

The next stage will be a white undercoat followed by a base coat of German Armour Yellow (well that’s what I had in the cupboard).