This was the first in a two part battle in which the Orks forces of Warlord Grazzarg Furback invade Cygnus IV, an Imperial agriword in sector 467.
Pre-Game Setup
The first game consisted of a meeting engagement, each side was allowed 2000points and one detachment on the table, other detachments would use the reserves rules from the Battles Book.
The terrain consisted of a large village, lots of fields with hedges, some trees and an industrial complex.
The battlefield from the Ork position, with a small village in the background and industrial units in the forground.

The Ork deployment Zone.

This is the map of the battlefield, the grey building on the bottom left is a bunker which in the end played no part in the battle.

Starting Morale
Ork Morale: 43
Imperial Morale: 45
Turn One
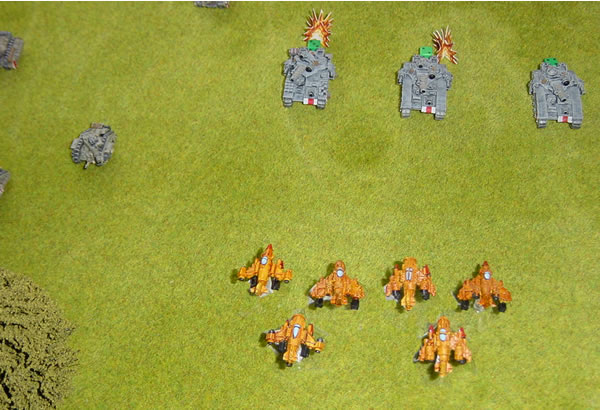
On turn one, the Orks placed the Great Gargant on the table and the Imperials, an infiltrator Imperial reconnaissance patrol detachment of Salamanders and Sentinels.
We were playing the reserves rule, so only one detachment was allowed on the table at the beginning of the game, the Orks chose the Great Gargant, Bigguz, as it was slow and therefore as a reserve would take ages to get on the battlefield.

The Great Gargant using the Industrial Complex as a form of cover.

The Imperial reconnaissance patrol was able to add 30cm to its first move and quickly moved into the village. Consisting of Salamanders and Sentinels it was designed for speed and not hitting power.

The Salamander models utilise the Griffon Mortar hull and gunners from Ork Buggies!

The Imperial Sentinels quietly stroll though the village.

The Great Gargant faces down the Imperial reconnaissance patrol.

At the end of turn one, not too much had happened… but all that was to change in the next turn. The Orks gained one morale point as they had held onto their cleanse objective.
End of Turn One
Ork Morale: 44
Imperial Morale: 45
Turn Two
The other detachments started to appear on the table including an Imperial Flyer detachment of Maurauder Bombers who took an instant dislike to the Great Gargant.
The other detachments started to appear on the table including an Imperial Flyer detachment of Maurauder Bombers who took an instant dislike to the Great Gargant and launched a Ground Attack against it.

An Imperial BaneBlade starts to move into position.

Ork Heavy Bommerz close in on the Imperial BaneBlade detachment hoping to take them out, they caused quite a bit of damage.

An Imperial BaneBlade, these are the Forgeworld models and we give them six damage points to differentiate them from the regular metal BaneBlades.

The main Ork detachment (a Kult of Speed) which contained a real mixture of stuff including some Trukks full of Nobz and two Krooz Missilz Trukks (grins).

The Ork Dread Mob with dreadnoughts, Killa Kans and led by a Stompa, slow, but very nasty in assaults (and we use the walkers are infantry rules).

The Imperial reconnaissance patrol was really burning at this stage of the battle, so the Great Gargant leaves them to find some new blood and moves on, leaving the Dread Mob to finish them off.

The Ork Kult of Speed starts its engines…

At the end of turn two, quite a substantial amount of units were now on the table. The majority of the Ork forces were on the table and the two flights of six Heavy Bommerz were in place on their airfields. The Imperial reconnaissance patrol was now pretty much out of action.
End of Turn Two
Ork Morale: 45
Imperial Morale: 41
Turn Three
More detachments started to appear on the table.
Imperial BaneBlades moving up, overrunning an Ork objective counter.

Some more of the remains of the Imperial reconnaissance patrol hides in the village.

A flight of six Ork Heavy Bommerz flies in to bomb the Imperial BaneBlades (metal models) in not so effective attack.
The main Imperial Tank detachment makes its move on the table.

You can see some Imperial Crocodiles (Hellhounds) in the middle of this picture.

The Ork Kult of Speed speeds over the hedges, led by Wartraks and Buggies, the heavier units skulk behind the hedges.
The Ork Dread Mob starts to move into a better position to assault the Imperial Guard.

The Imperial BaneBlades prepare to defend the village.

At the end of turn two, quite a substantial amount of units were now on the table.
End of Turn Three
Ork Morale: 46
Imperial Morale: 16
Turn Four
The final detachments appeared on the table, though in the end some were to play no part in the battle.
Just prior to the assault phase the Great Gargant had been shot at by both the BaneBlades and the Imperial Tank force.

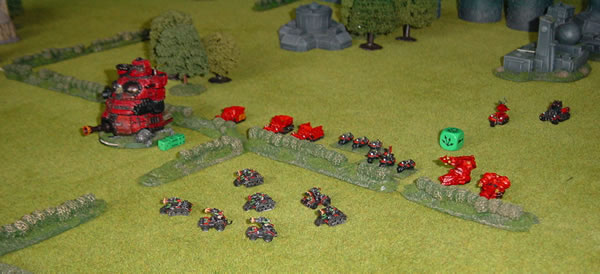
You can see here how the Orks, supported by the Great Gargant launch their assault against the Imperial BaneBlades.

The Ork Dread Mob starts to move forward to attack the remains of the Imperial Recce Patrol. They had been attacked by a flight of Imperial Maurauder Bombers though they were intercepted by the Ork Bommerz and two of the Maurauders were shot down.

Imperial Sentinels under attack.

The Orks rush in and assault the BaneBlades, Ork Nobz mounted in Trukks lead the way.

A large tank formation of the Imperial Guard was just too far away to support the BaneBlades and had very little opportunity to swing the battle one way or the other.

The Ork Battlefortresses start to rumble out from underneath the trees…

…but in the end they didn’t fire a single shot.

We see here how the battle ends, with the three Imperial BaneBlades ablaze surrounded by the victorious Ork forces.

At the end of turn four, the loss of the BaneBlades in the assault and large number of blast markers made the Imperial morale crumble away.
End of Game
Ork Morale: 43
Imperial Morale: 0
A resounding victory for the Orks who by the end of the game had lost very little, but had gained everything.
For the next game, the Imperials will regroup and defend (2000 points) whilst the Orks will reinforce their troops (3000 points) and launch an attack against the entrenched Imperial forces.