The Char B1 was a French heavy tank manufactured before the Second World War. It was a specialised heavy break-through vehicle, originally conceived as a self-propelled gun with a 75 mm howitzer in the hull; later a 47 mm gun in a turret was added, to allow it to function also as a Char de Bataille, a “battle tank” fighting enemy armour, equipping the armoured divisions of the Infantry Arm.

Among the most powerfully armed and armoured tanks of its day, the type was very effective in direct confrontations with German armour in 1940 during the Battle of France, but a slow speed and high fuel consumption made it ill-adapted to the war of movement then fought. After the defeat of France captured Char B1 (bis) would be used by Germany, some rebuilt as flamethrowers or mechanised artillery.
It’s as the German flamethrower variant that is sold for Flames of War. At the time of writing (Jan 2011) they don’t sell an early war French version. I got two blisters of the Char B1.

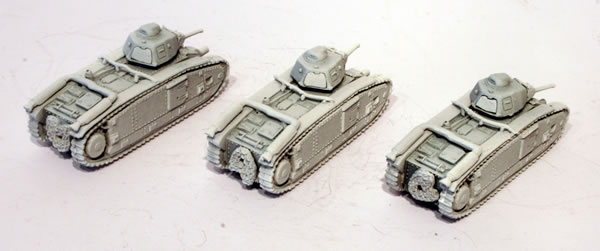
Though having looked at the army lists in the Blitzkrieg book it looks like I should really have three, however there were only two in the shop when I bought them. So I ordered a third when I made a recent order for Flames of War. I then re-read the army lists to realise that I probably need a fourth model for an HQ tank.
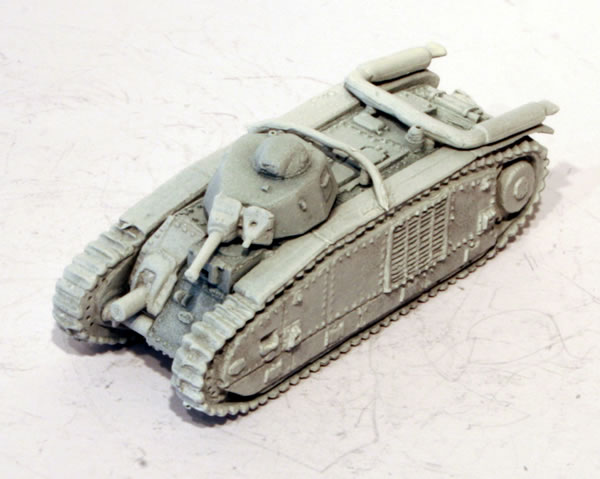
Within the blister you get the resin hull and turret whilst the rest of the model is whitemetal.

You have the option to make it into a German late-war Flammwagen B-2(f) however as I bought these for Blitzkreig I will be making them as Early War French.

Here are the three resin hulls lined up.

They are smaller than I expected. For some reason I had this impression that the Char B1 was a really large tank. Well compared to other Early War tanks it is, however compared to Late War tanks it’s quite small.
When assembling the models the instructions were a bit unclear. However unlike many Flames of War models it isn’t a straightforward assembly. The main gun needs to be glued to the hull. The front axel needs to be glued to the right track. The axel is on the sprue with the turret weapons and there is a depression in the right track for the axel to fit.

I then glued the tracks to the hull. It was apparent that the key is not to place glue in the depressions in the track that fit into the hull, as the fit is not perfect and there is a gap. So what I did was place superglue around the tab on the side of the hull.


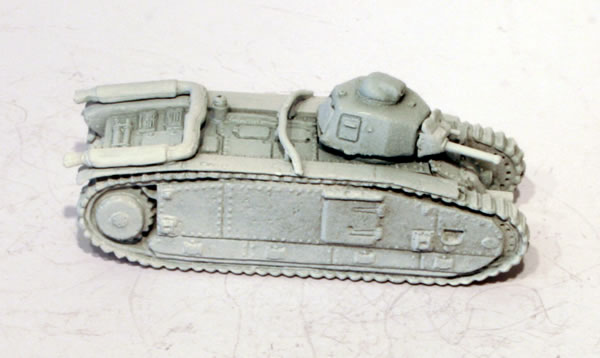
There isn’t a commander figure for the turret and not having any in the spares box I modelled the turret with the command hatch closed. If I make a command Char B1 bis then I will try and model it with a commander.
The turret weapon fits on with the 47mm cannon on the right and the MG on the left.

The next stage was placing the exhausts and the rear grab rail.
Here are the three models lined up.

Here are the three models lined up from the other side. You can see where I added the towing chains to the rear of the model.

I had a few problems with the rear grab rail on the model.


Still they do look the part.

The next stage was a white undercoat.

I gave the model a basecoat of Tan Yellow (912).


The turrets were stuck to a wooden stick to make them easier to paint.
